LP Burners Overview
|
Some useful sites for Burner Design: http://ronreil.abana.org/design1.shtml#TheMongo http://kcrucible.wordpress.com/2010/07/28/the-propane-burner/ http://www.backyardmetalcasting.com/ Another Charcoal smelting forge video: http://www.instructables.com/id/Blow-Dryer-and-Red-Brick-Aluminum-Forge/?ALLSTEPS |
| Some Burner Designs | ||
| Ron Reil's original 'Mongo'
burner. Click for Large image!) |
 |
|
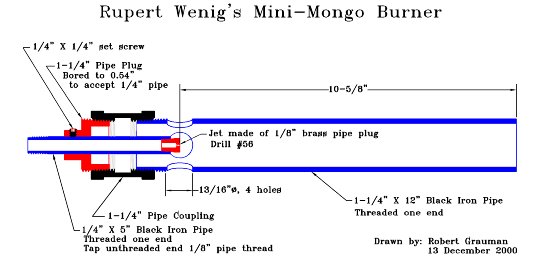
| Mini-Mongo. Click for Large image!) |
 |
|
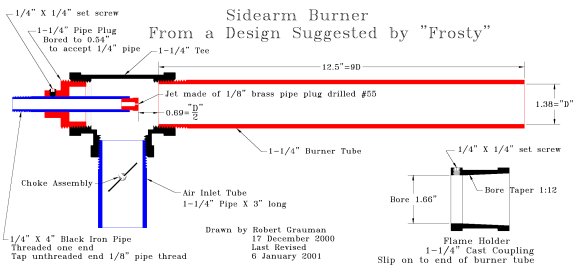
| 'Sidearm' Click for Large image!) |
 |
|
| 'Sidearm' burner. Click for Large image!) |
 |
|
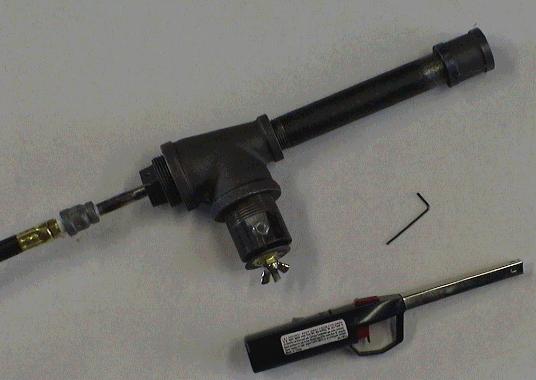
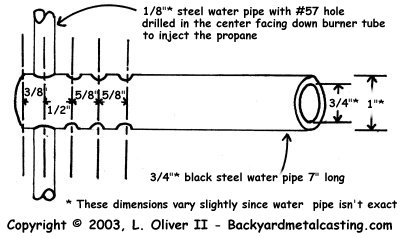
| Oliver Burner details. |
 |
|
 |
||
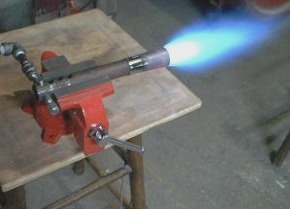
| Oliver burner with flare installed. |
 |
|
| Oliver burner. |
 |
|
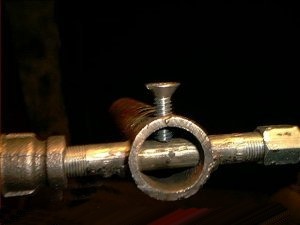
| Set screw detail. |
 |
|
|
These are the instructions I received from 'Frosty' aka Jerry Frost who is located up in Alaska a few years ago... The last "T" jet burner I built was summer before last and I spent a whopping $9.00 for parts and almost 20 mins. making it. The following description has been altered to reflect how I made my last burner.So, the attached drawing is of the Jet ejector type burner I've been using for the last 10 years or so. I call it the "T" Jet burner and with small refinements I haven't changed the design in 10 years. You'll quickly notice there're no labels, dimensions or other helpful tips. This is why I call it a "concept drawing" if you need more, let me know and I'll do what I can to help. Same for my description, I've tried to do an adequate job of it but some folk need more info. Just let me know.You will have to spend a little time wandering around a halfway decent plumbing supply for the brass fitting to make up the mig tip and the lamp rod. You'll also have to find lamp rod. Hope you're not overwhelmed yet! <grin> The tube is 1" x 8" black iron pipe. The "T" is a 1" x 1" x 1" black iron "T". The "jet" is a 0.045" Miller mig tip. Shortened to 9/16" long and deburred.The jet attaches to the 1/8" SPT (Straight Pipe Thread) lamp rod via a 1/8"FPT brass fitting or cap, drilled and tapped 1/4"-28.Get lamp rod at FredMeyer's, etc. in the lamp repair section, get one or two lock nuts too. If you go to an electrical supply or hardware store it'll cost twice or more as a dept store. On the other hand it's only a buck or two per foot at most, anyway. You can eyeball center when drilling the top of the "T" for the lamp rod but the better the alignment of the jet down the center of the tube the better it will work.This alignment is the single most important factor to making a good tuneable burner. Screw the tube and "T" together make match marks and chuck it up in the lathe to drill and tap for best alignment. After drilling the hole, chuck the 1/8" TPT tap in the tailstock or drill press chuck and hand crank to tap the threads. This will keep them as perfectly aligned as possible. If you don't have access to a lathe you can use a drill press but will need to make a vertical "V" block to align the tube and all the rest. Use a piece of large 1/4" x 2"+ angle iron as the base plate and weld two smaller pieces, say 1" angle parallel and square to the base. The idea is to clamp the vertical "V" block to the edge of the drill table with the parallel "V" hanging over the edge. The "V" needs to be as perfectly aligned to the drill press chuck as possible. Chuck up a long straight piece of round stock, say 1/4" and with the burner tube clamped in the "V" block align the 1/4" straight down the tube. Clamp it solid and you're ready to go.I don't have a 1/8" SPT tap so I use 1/8" TPT (Tapered Pipe Thread) and thread the hole a little at a time till the lamp rod just threads through it. If you run the tapered pipe tap too far you get a lot of slop, you get a little anyway but it's controllable if you're careful. A little slop is actually helpful for fine tuning the jet's alignment.Now thread the lamp rod into the "T" without removing the assembly from the lathe or "V" block and lock it in position with one of the nuts.Install the brass 1/8" FPT x ? fitting on the tube and snug it up. Drill and tap the brass fitting for 1/4"-28. Now screw in the shortened mig tip, insert a 0.045 drill bit shank in as an indicator and spin the lathe to see if it's straight, gently tap the mig tip as needed till the tip is straight.If you're using a drill press, remove the lamp rod and gently chuck it in the drill press. Insert the 0.045" drill bit shank into the mig tip and hand crank the drill press. Watch for any wobble and correct it with gentle taps of a hammer.Be careful or you'll damage the lamp rod threads. Once you have the lamp rod and Mig tip aligned thread it into the hole in the top of the "T" from inside. Bring the brass fitting all the way to the "T" and lock it down with a nut from the outside. Using pipe tape or teflon paste, attach your hose fitting and you're ready to test fire it.I wouldn't really call these a "project" they take me maybe 15 minutes to make with my lathe, 20 if I don't turn it on and hand crank it.I also don't put tapered flares on them, I only run them in the forge and they work just fine.To be fair, they will not burn open air. If you have use for an open air torch then adding the flare and doing the trial and error work to tune it will be worth the effort. A proper flare is a 1:12 ratio or a 2.5 degree taper.
|
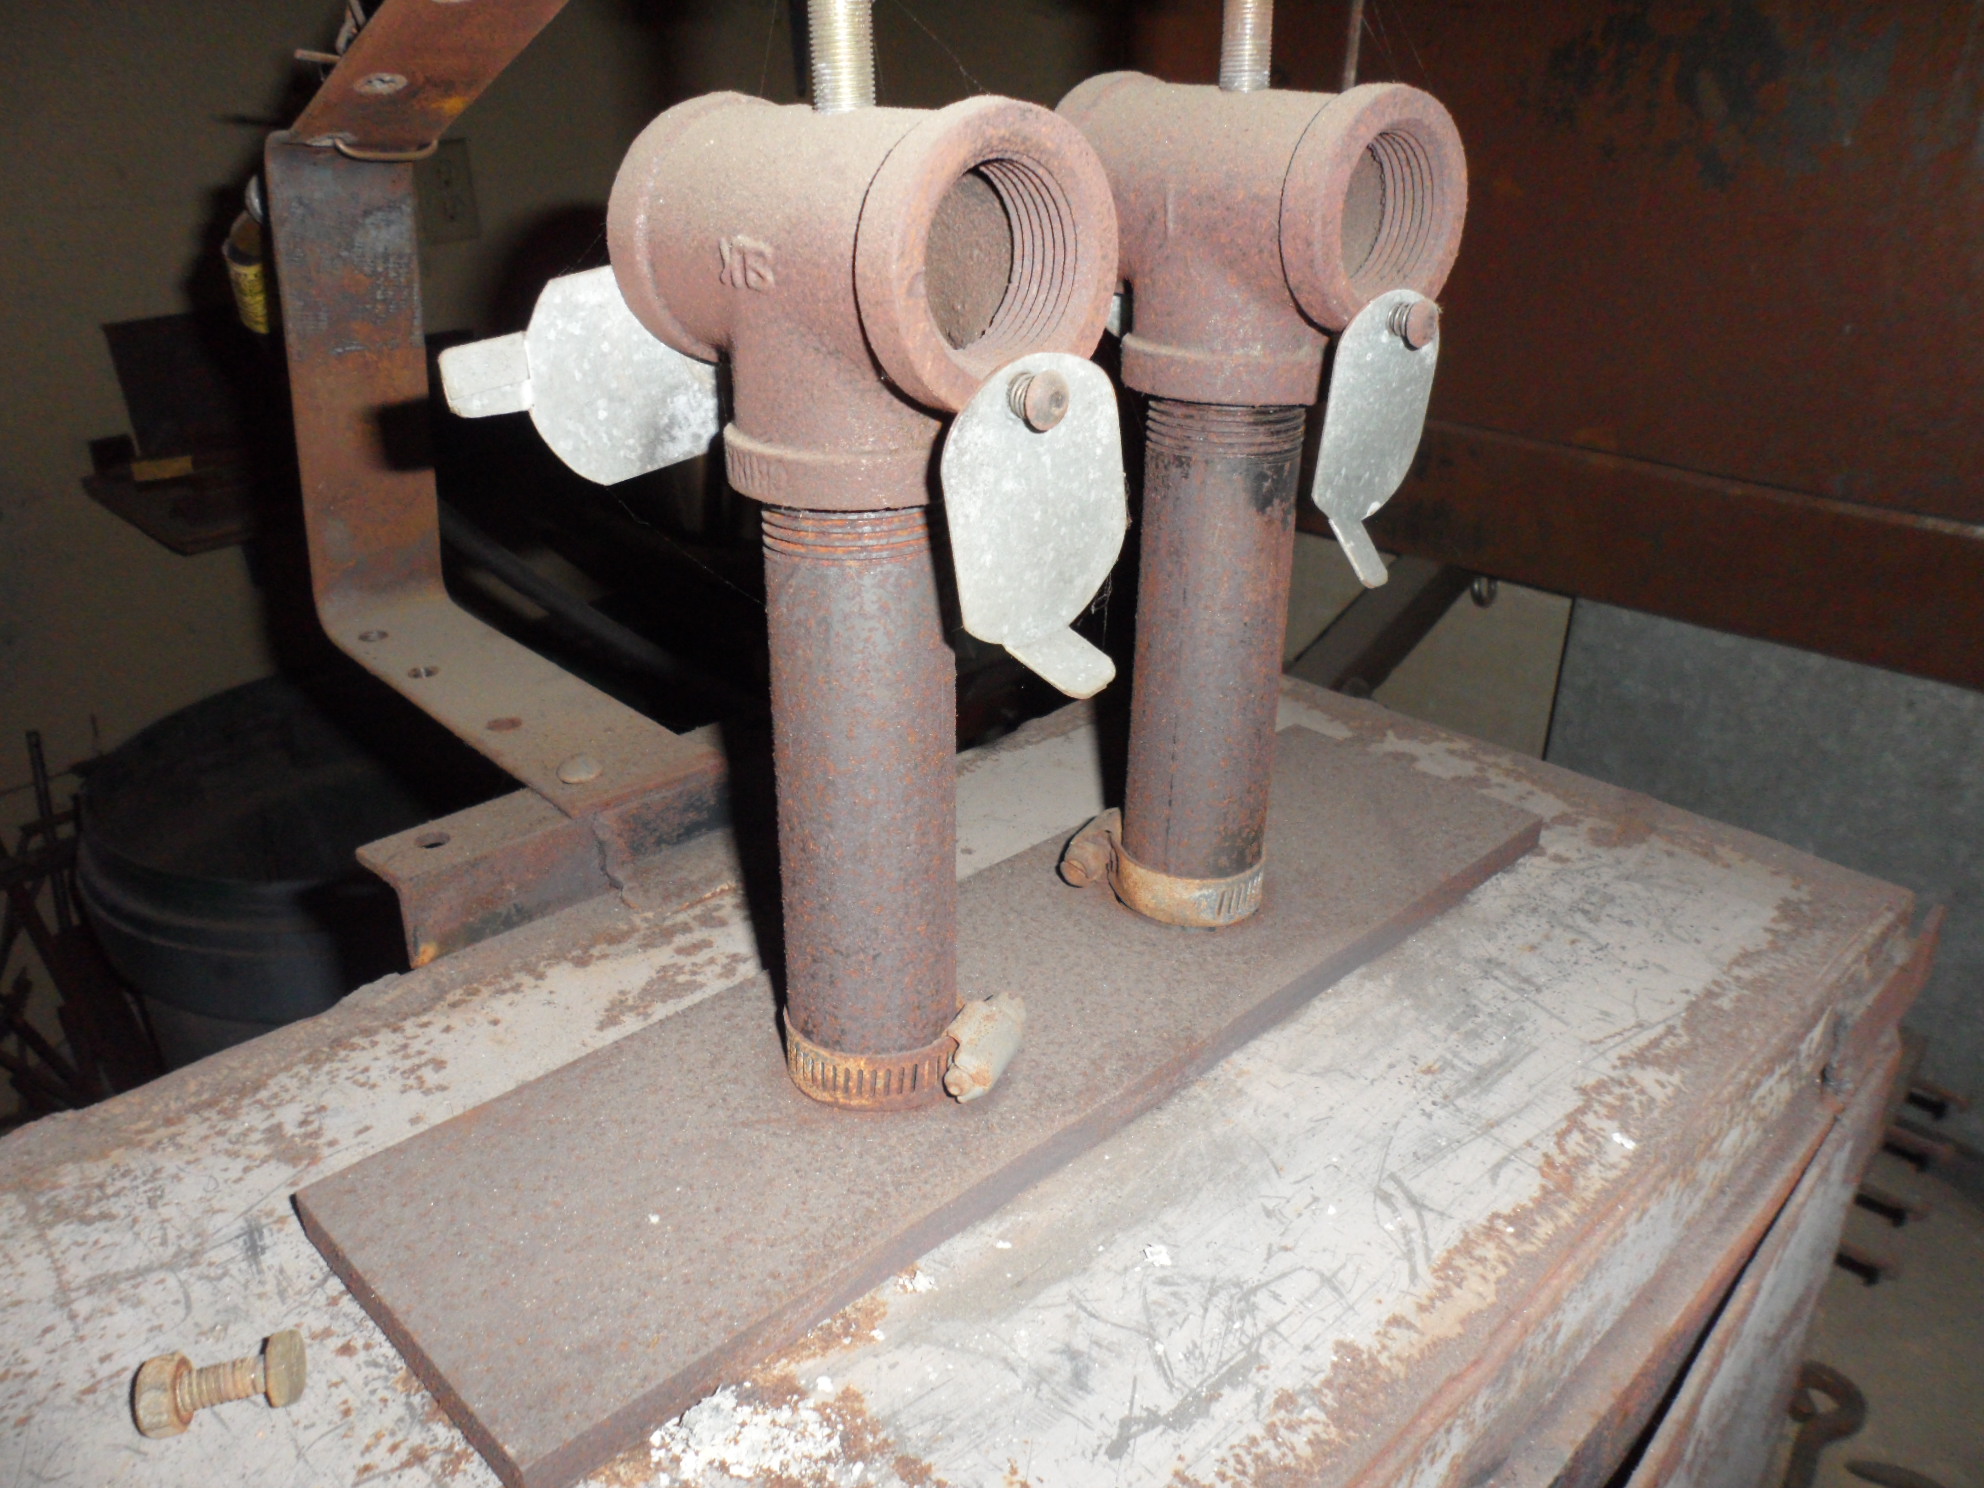
| MY Two 'Frosty-Burner' Forge | |
| Dual Burners with 'banjo' paddles. 1" 'Tee' coupling and 9" long 1" Black iron pipe. |
 |
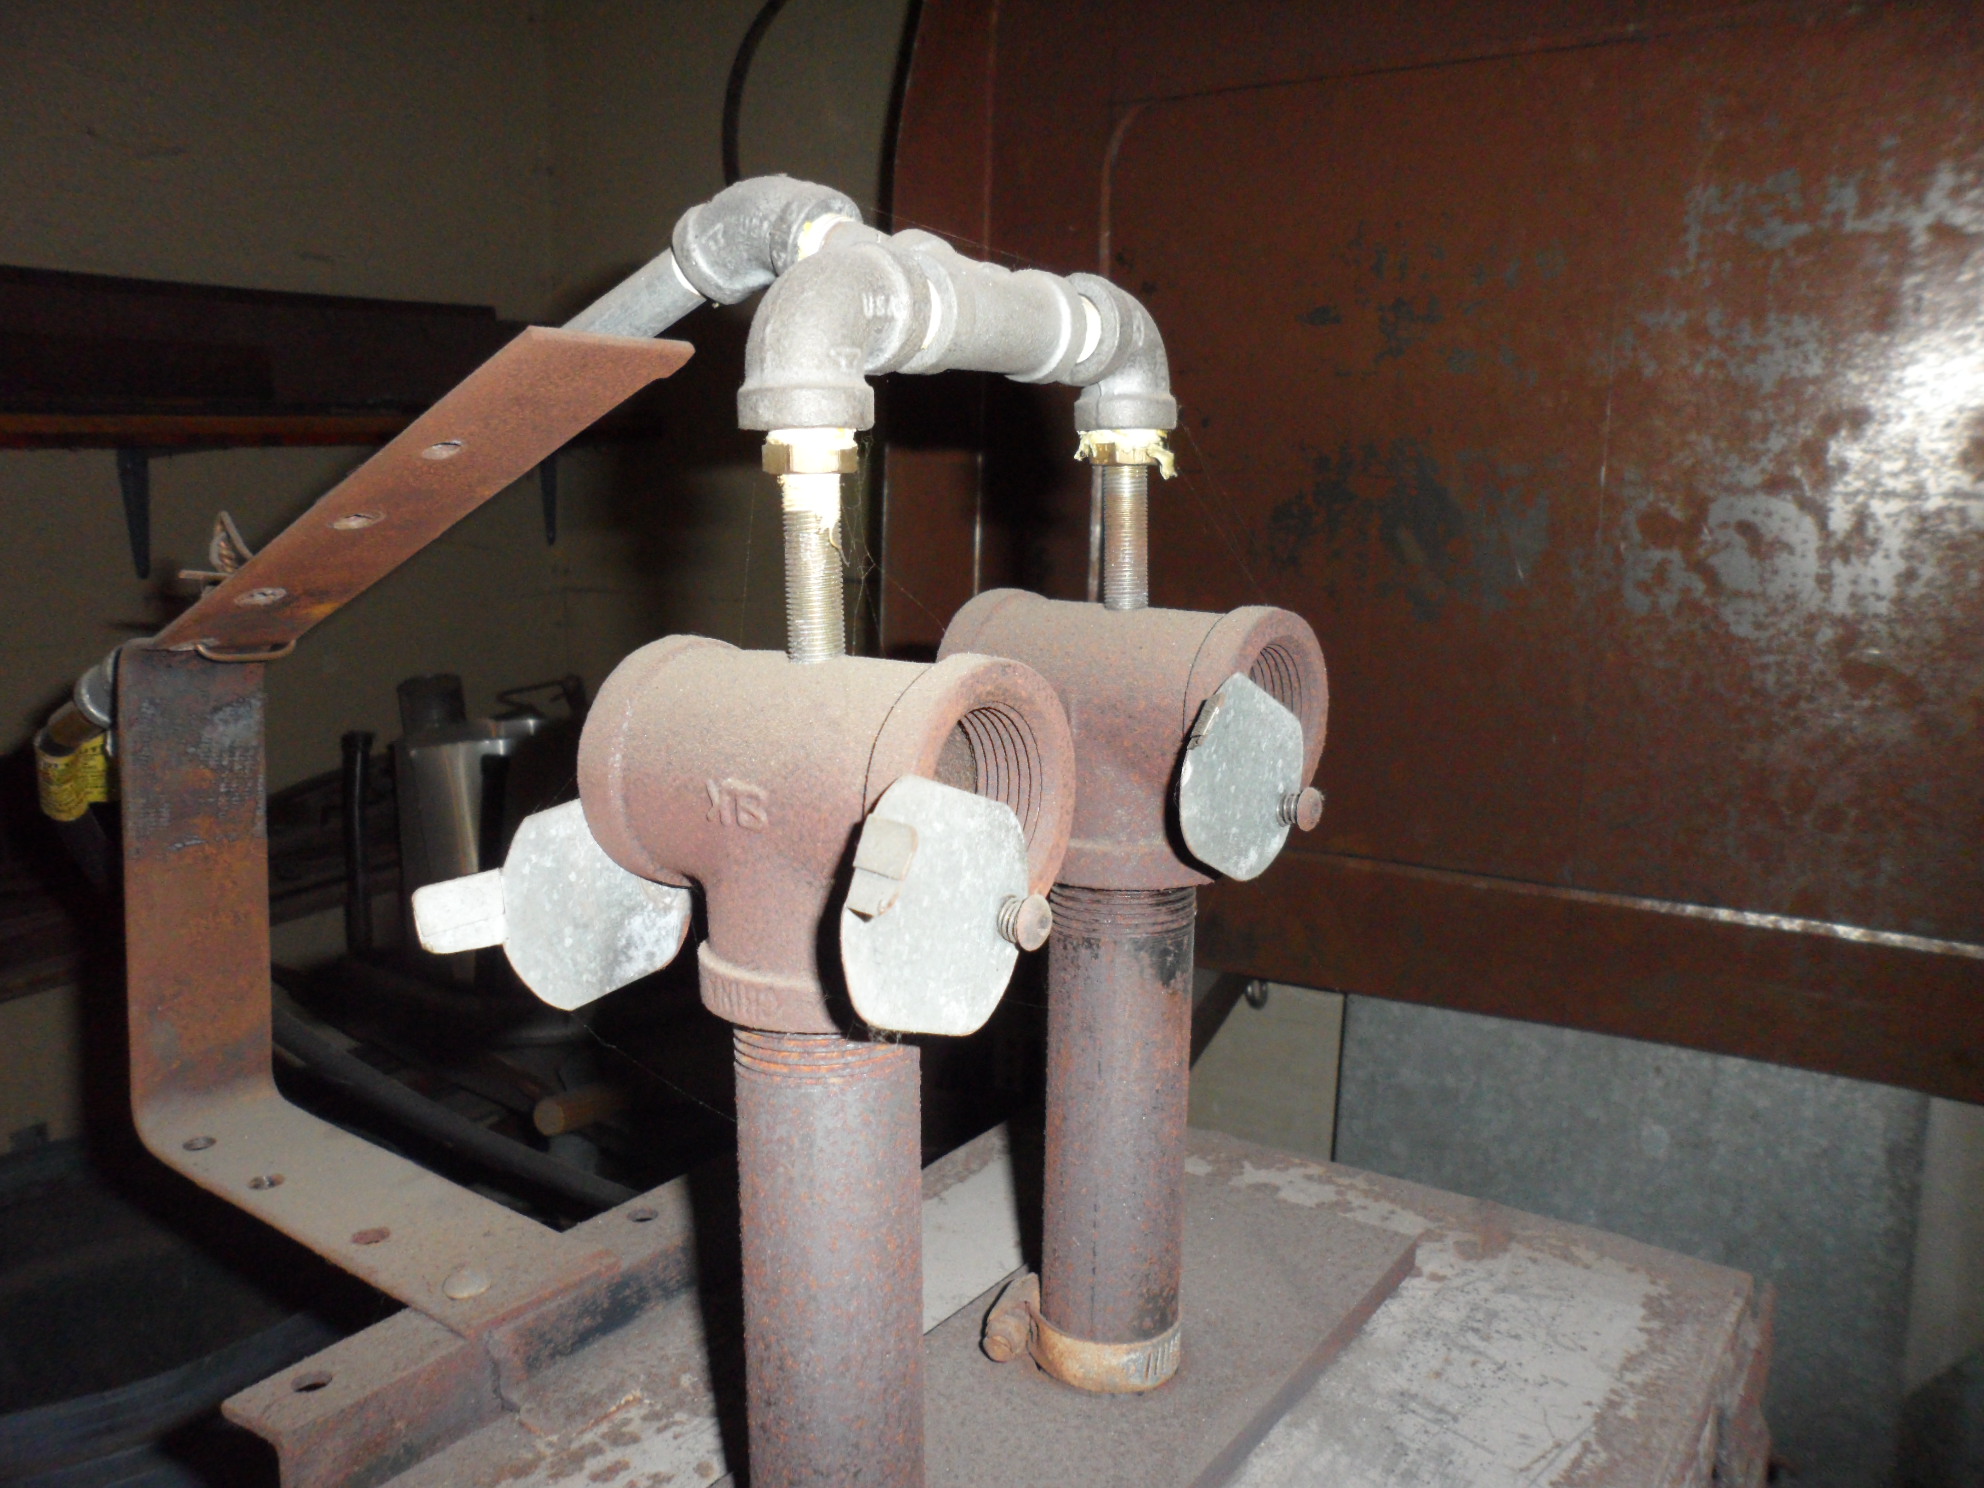
| Manifold connection of the burners. |
 |
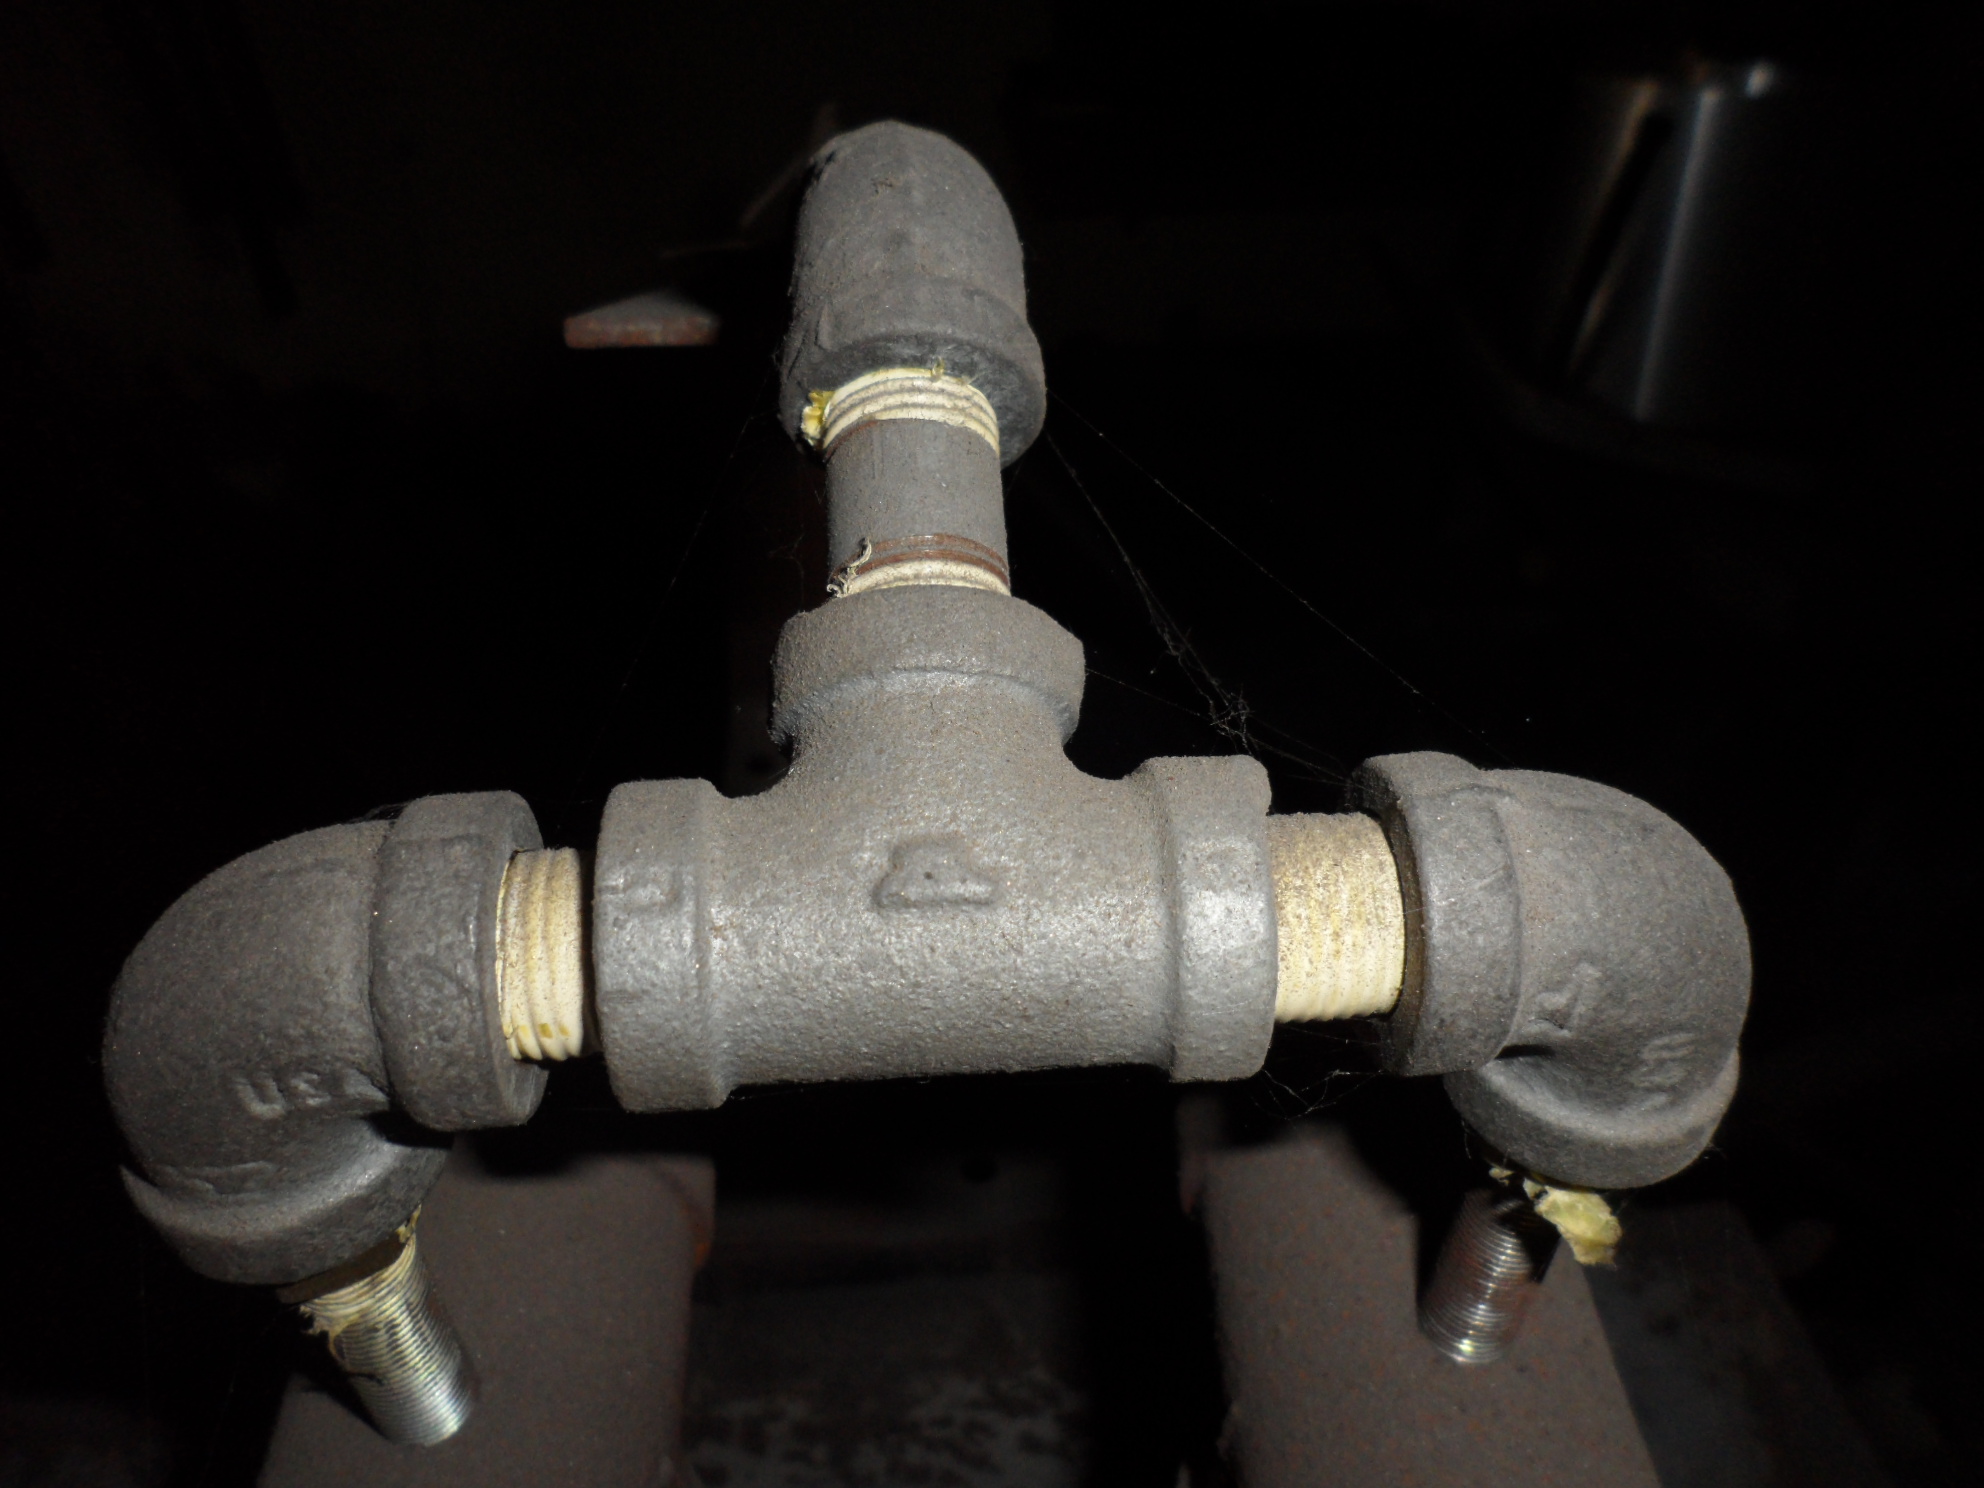
| Close-up of manifold. |
 |
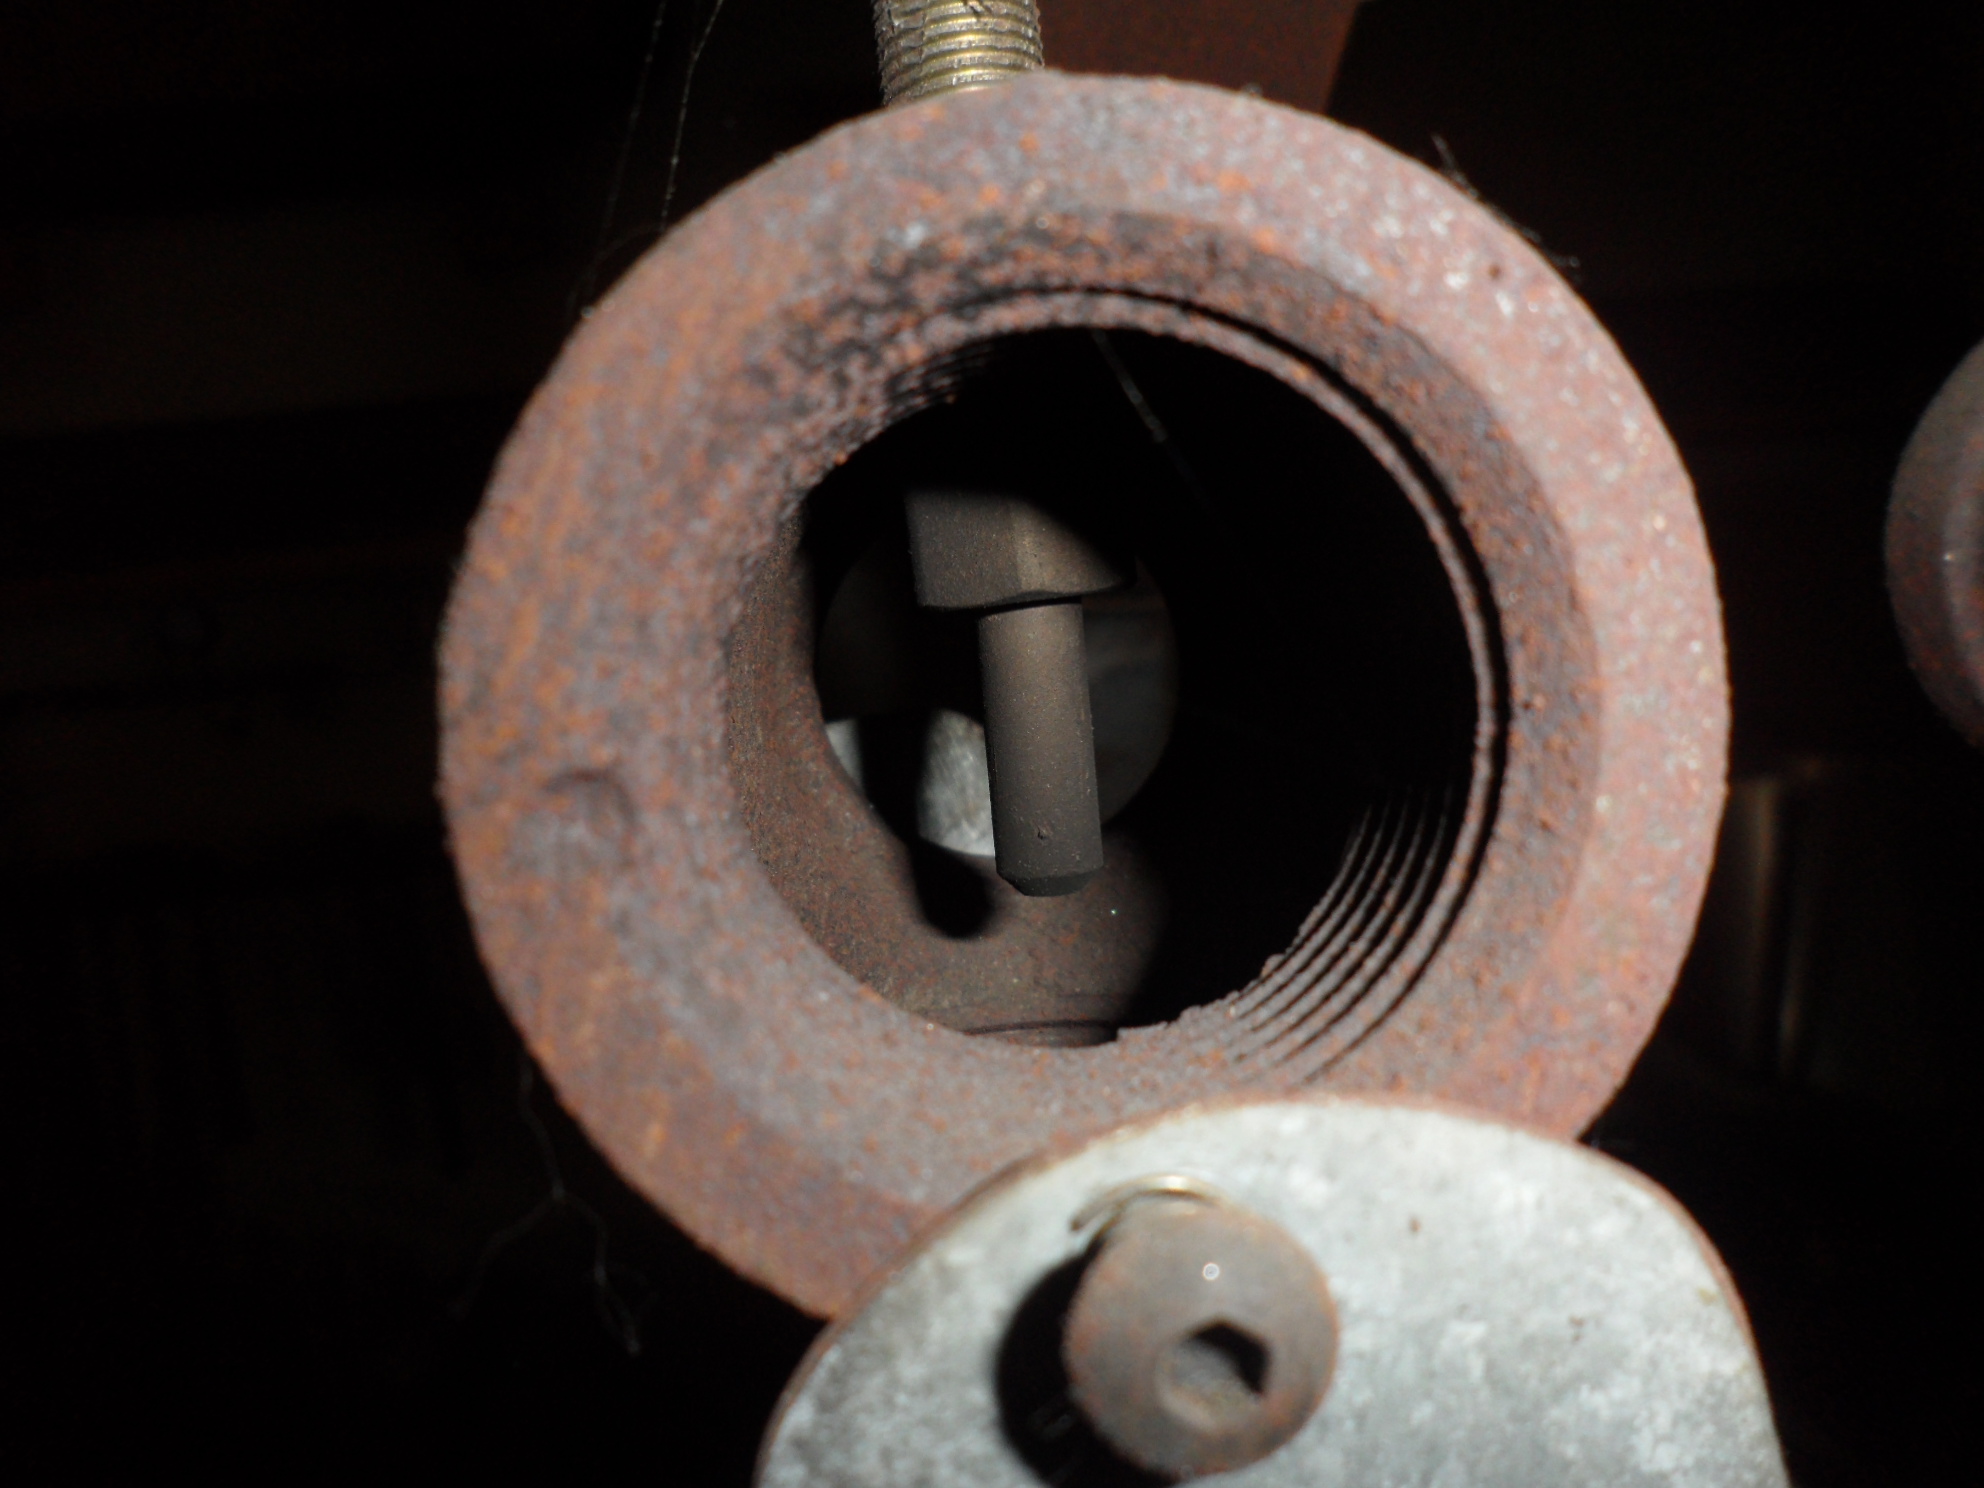
| Lamp Tube |
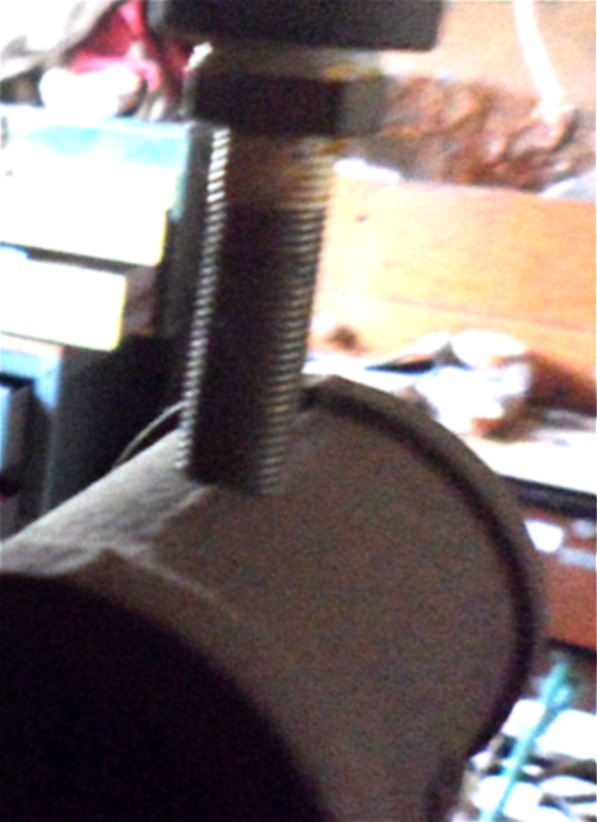 |
| Mig tip insyalled on brass cap on Lamp tube. |
 |
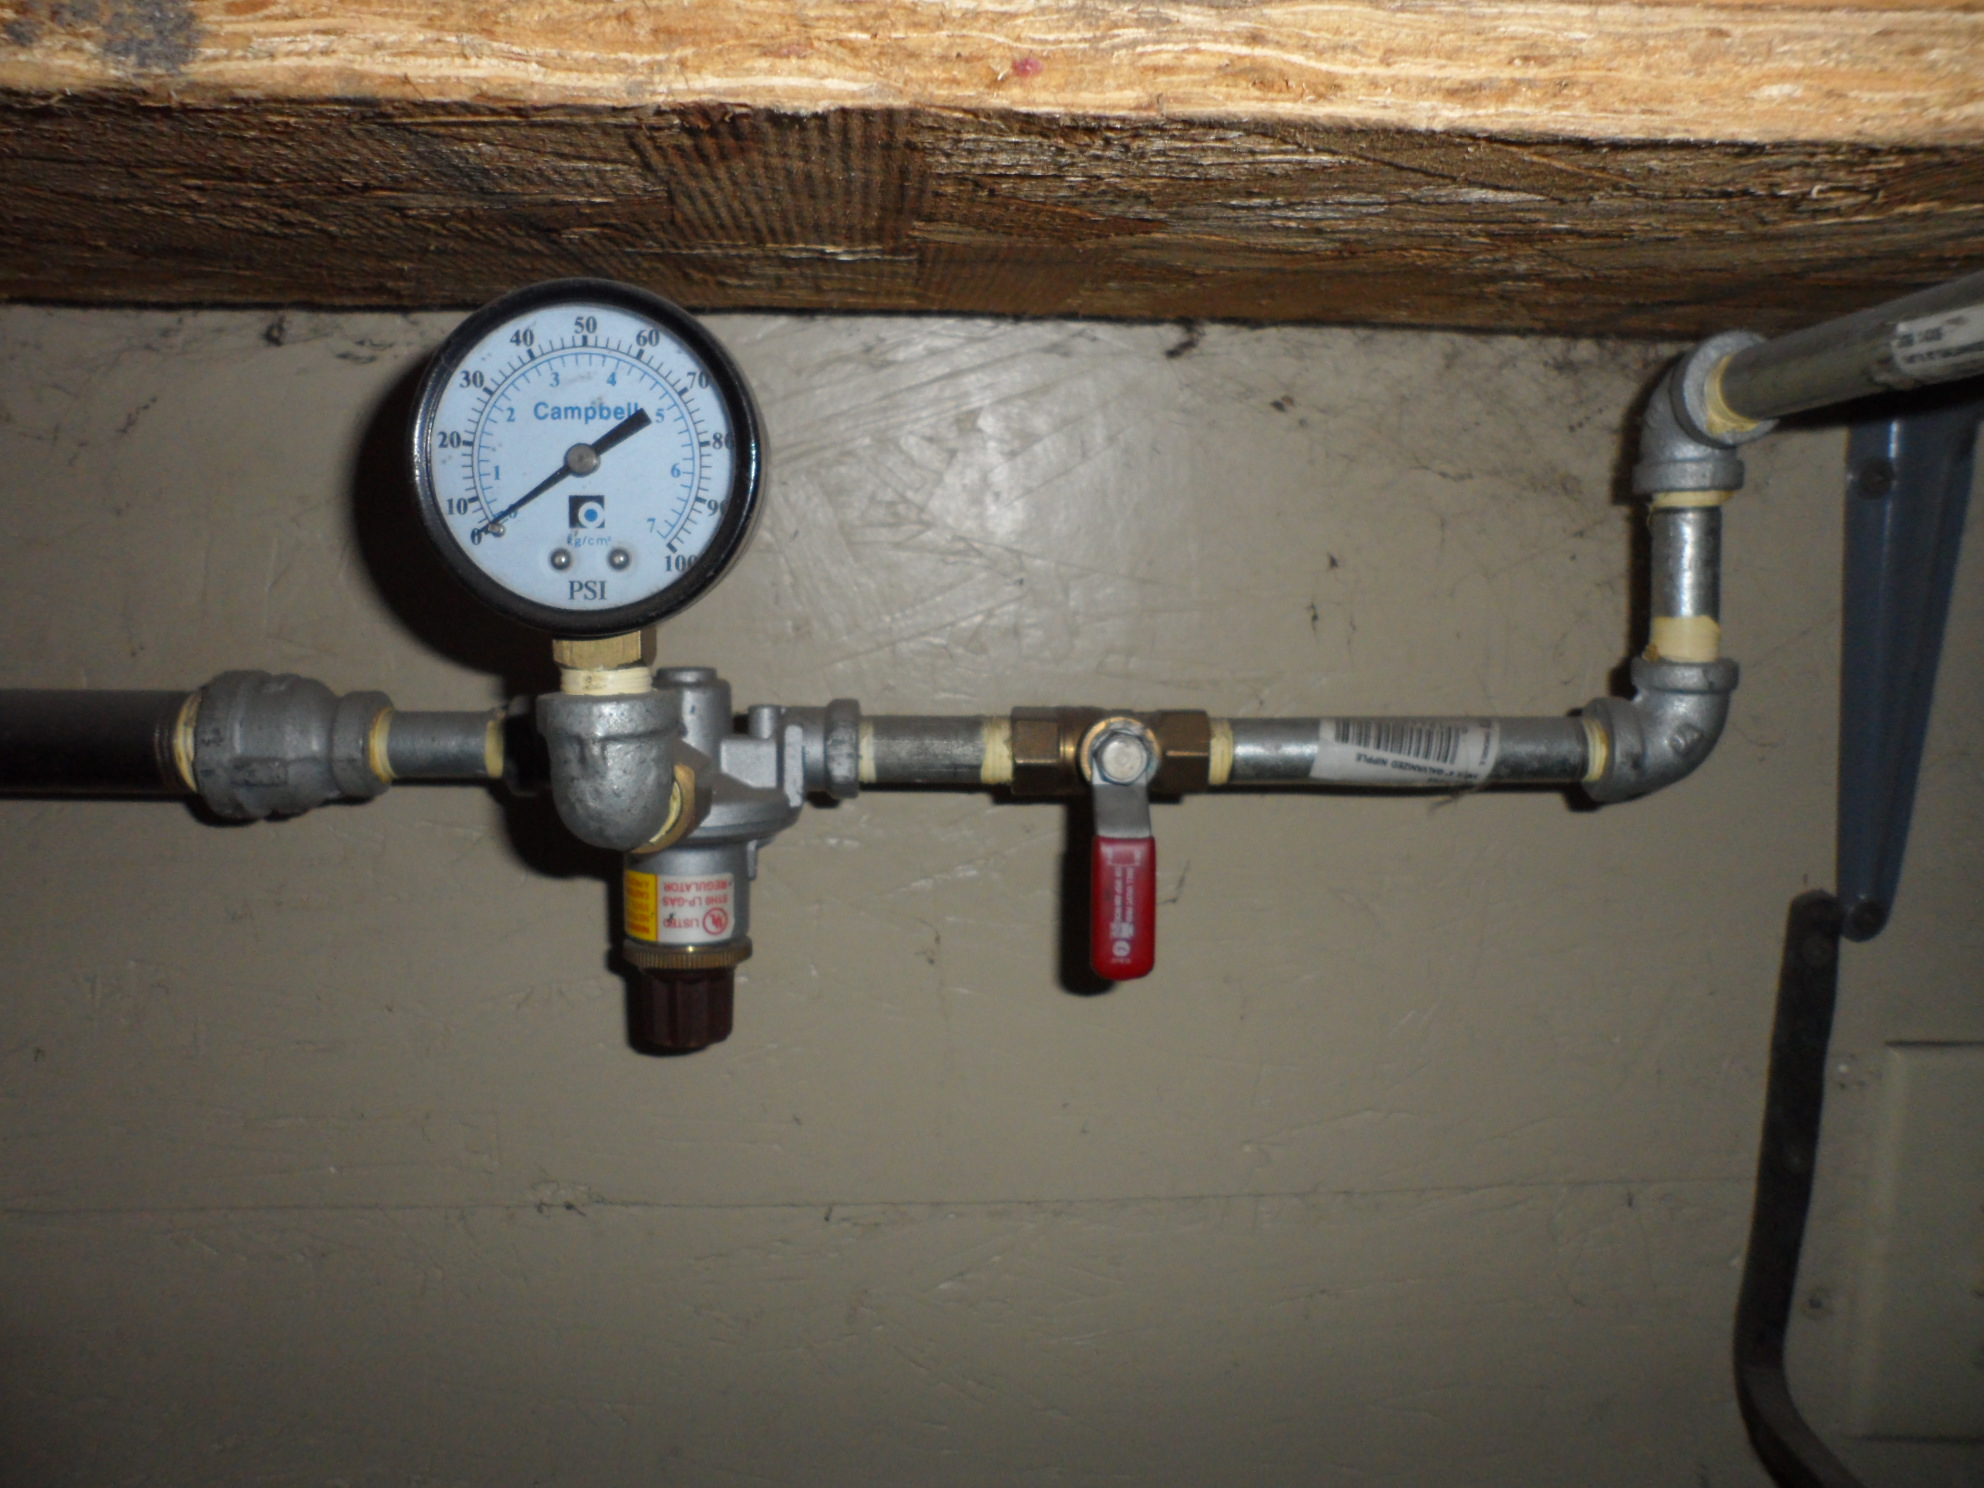
| Pressure regulator and Ball valve. |
 |
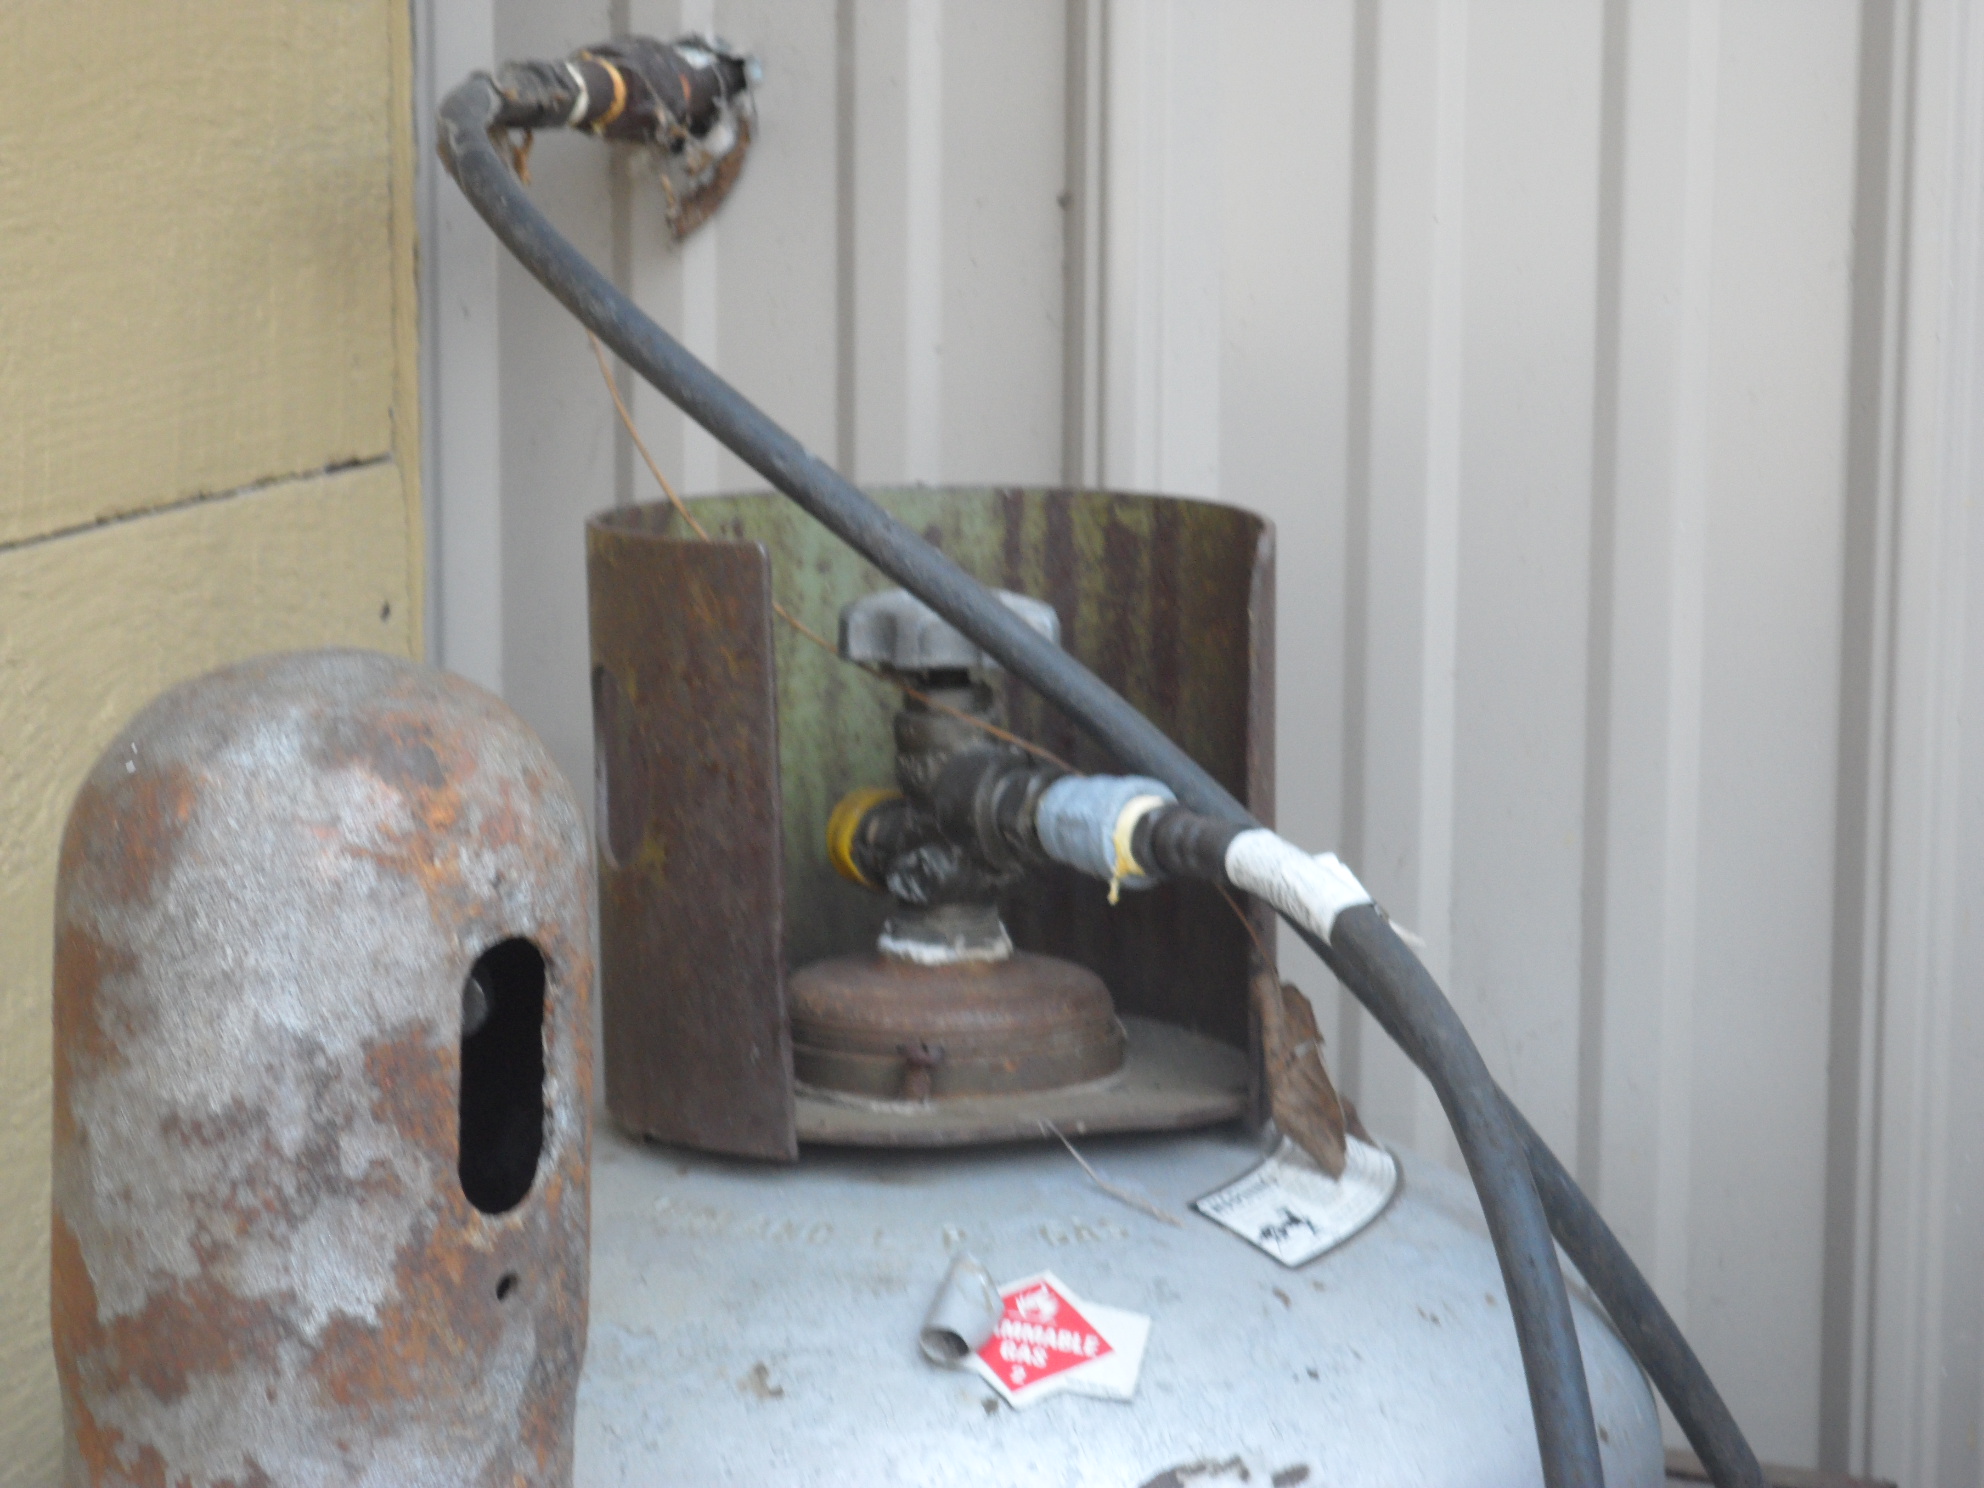
| Outside connection to 100# LP tank. |
 |
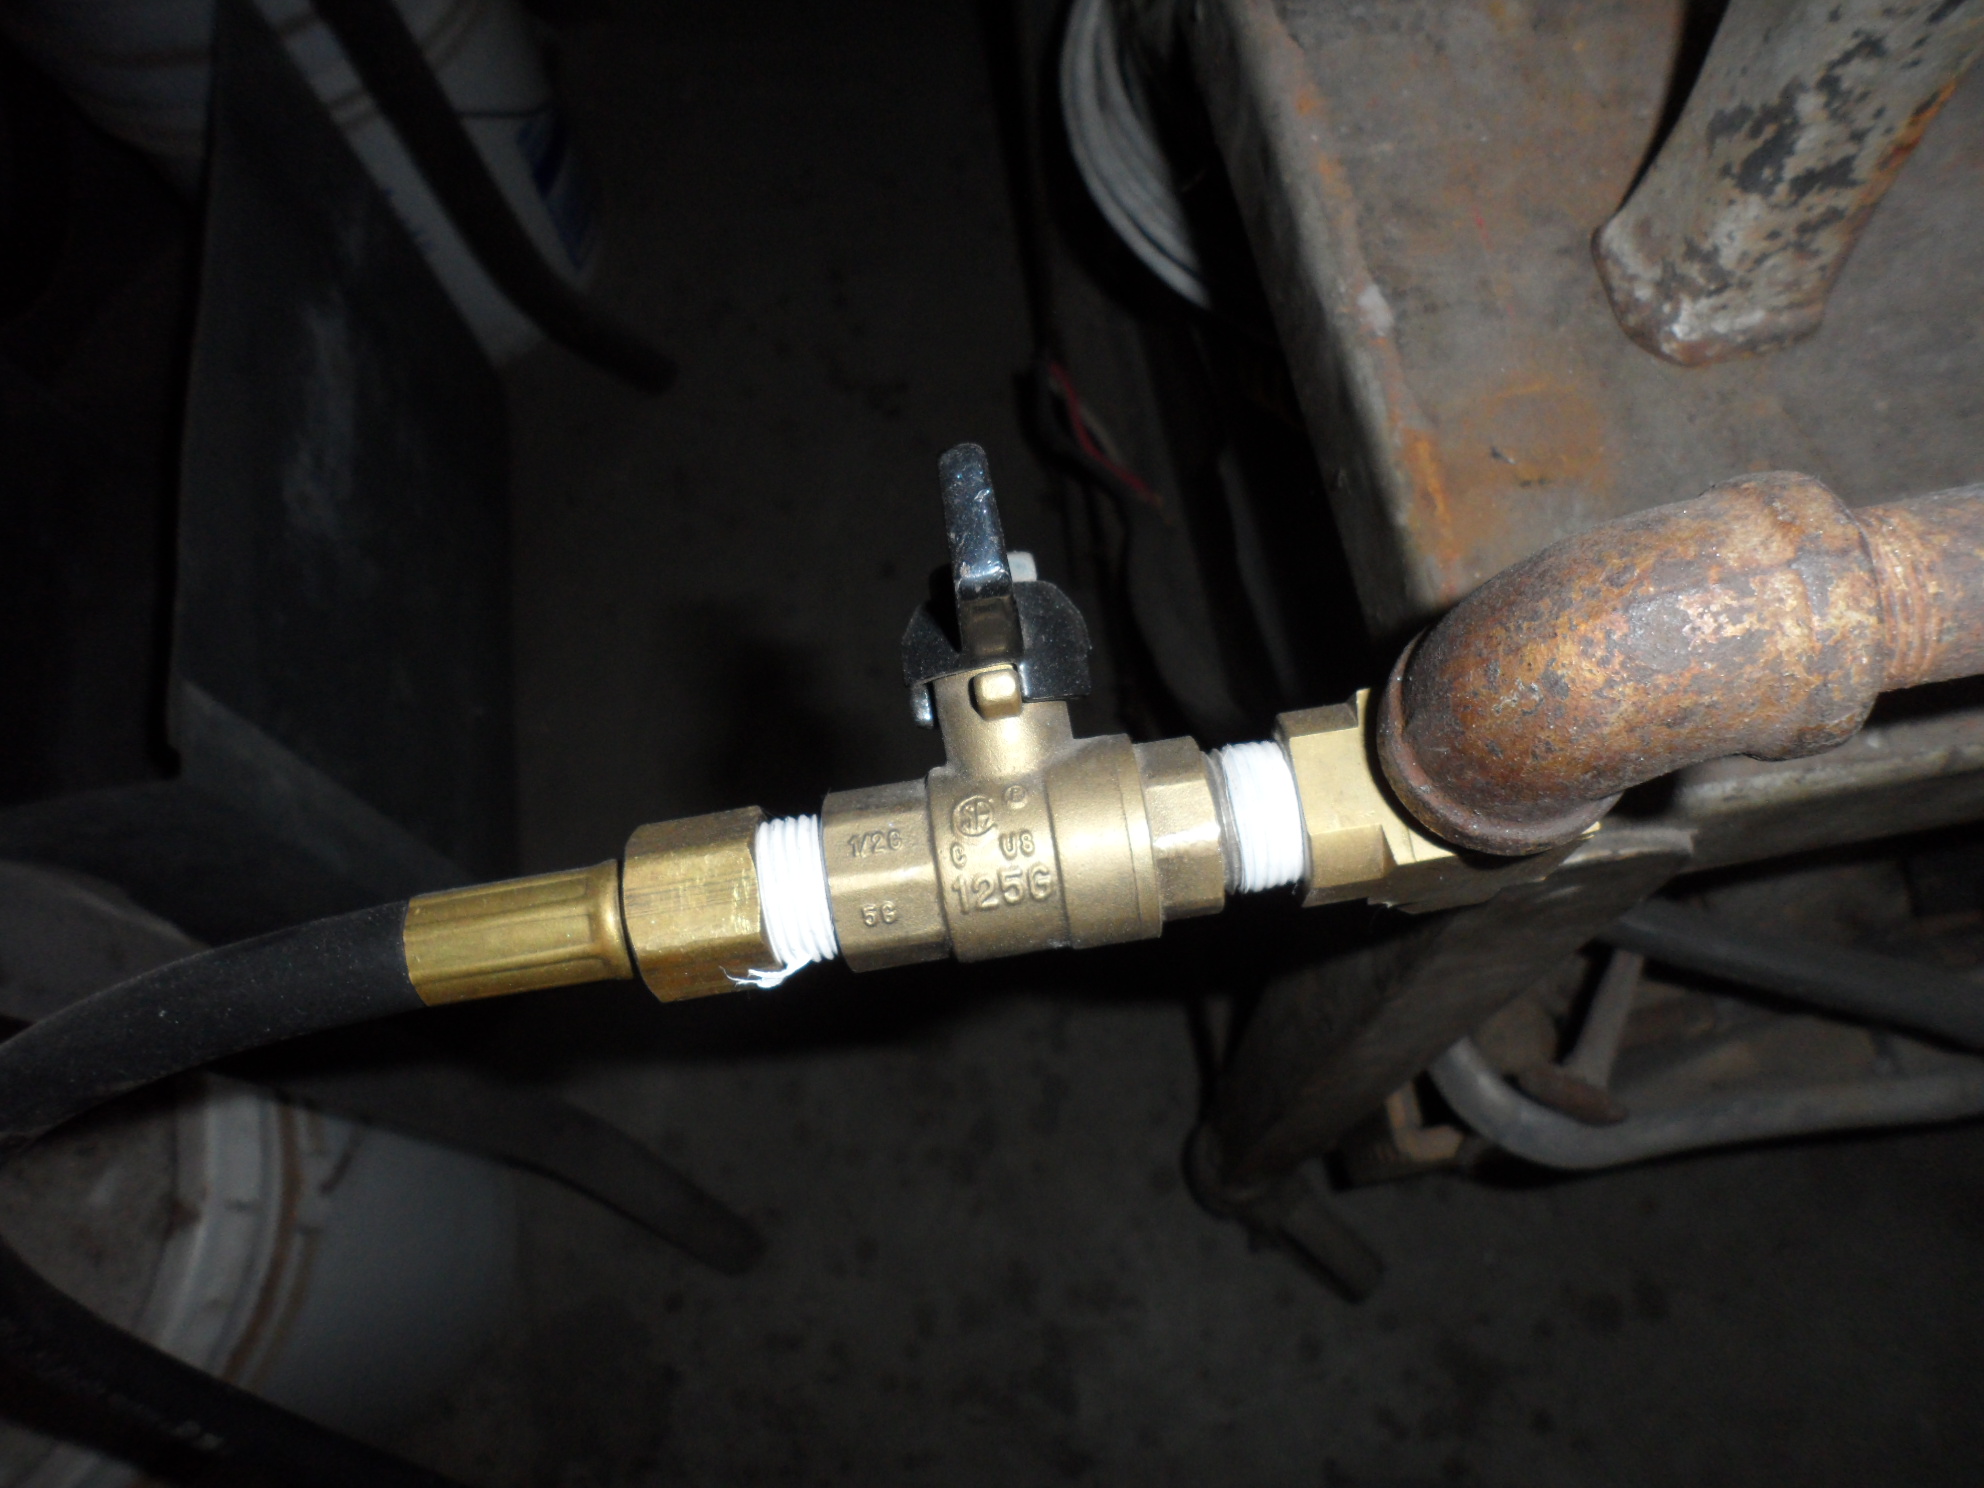
| Ball valve. |
 |
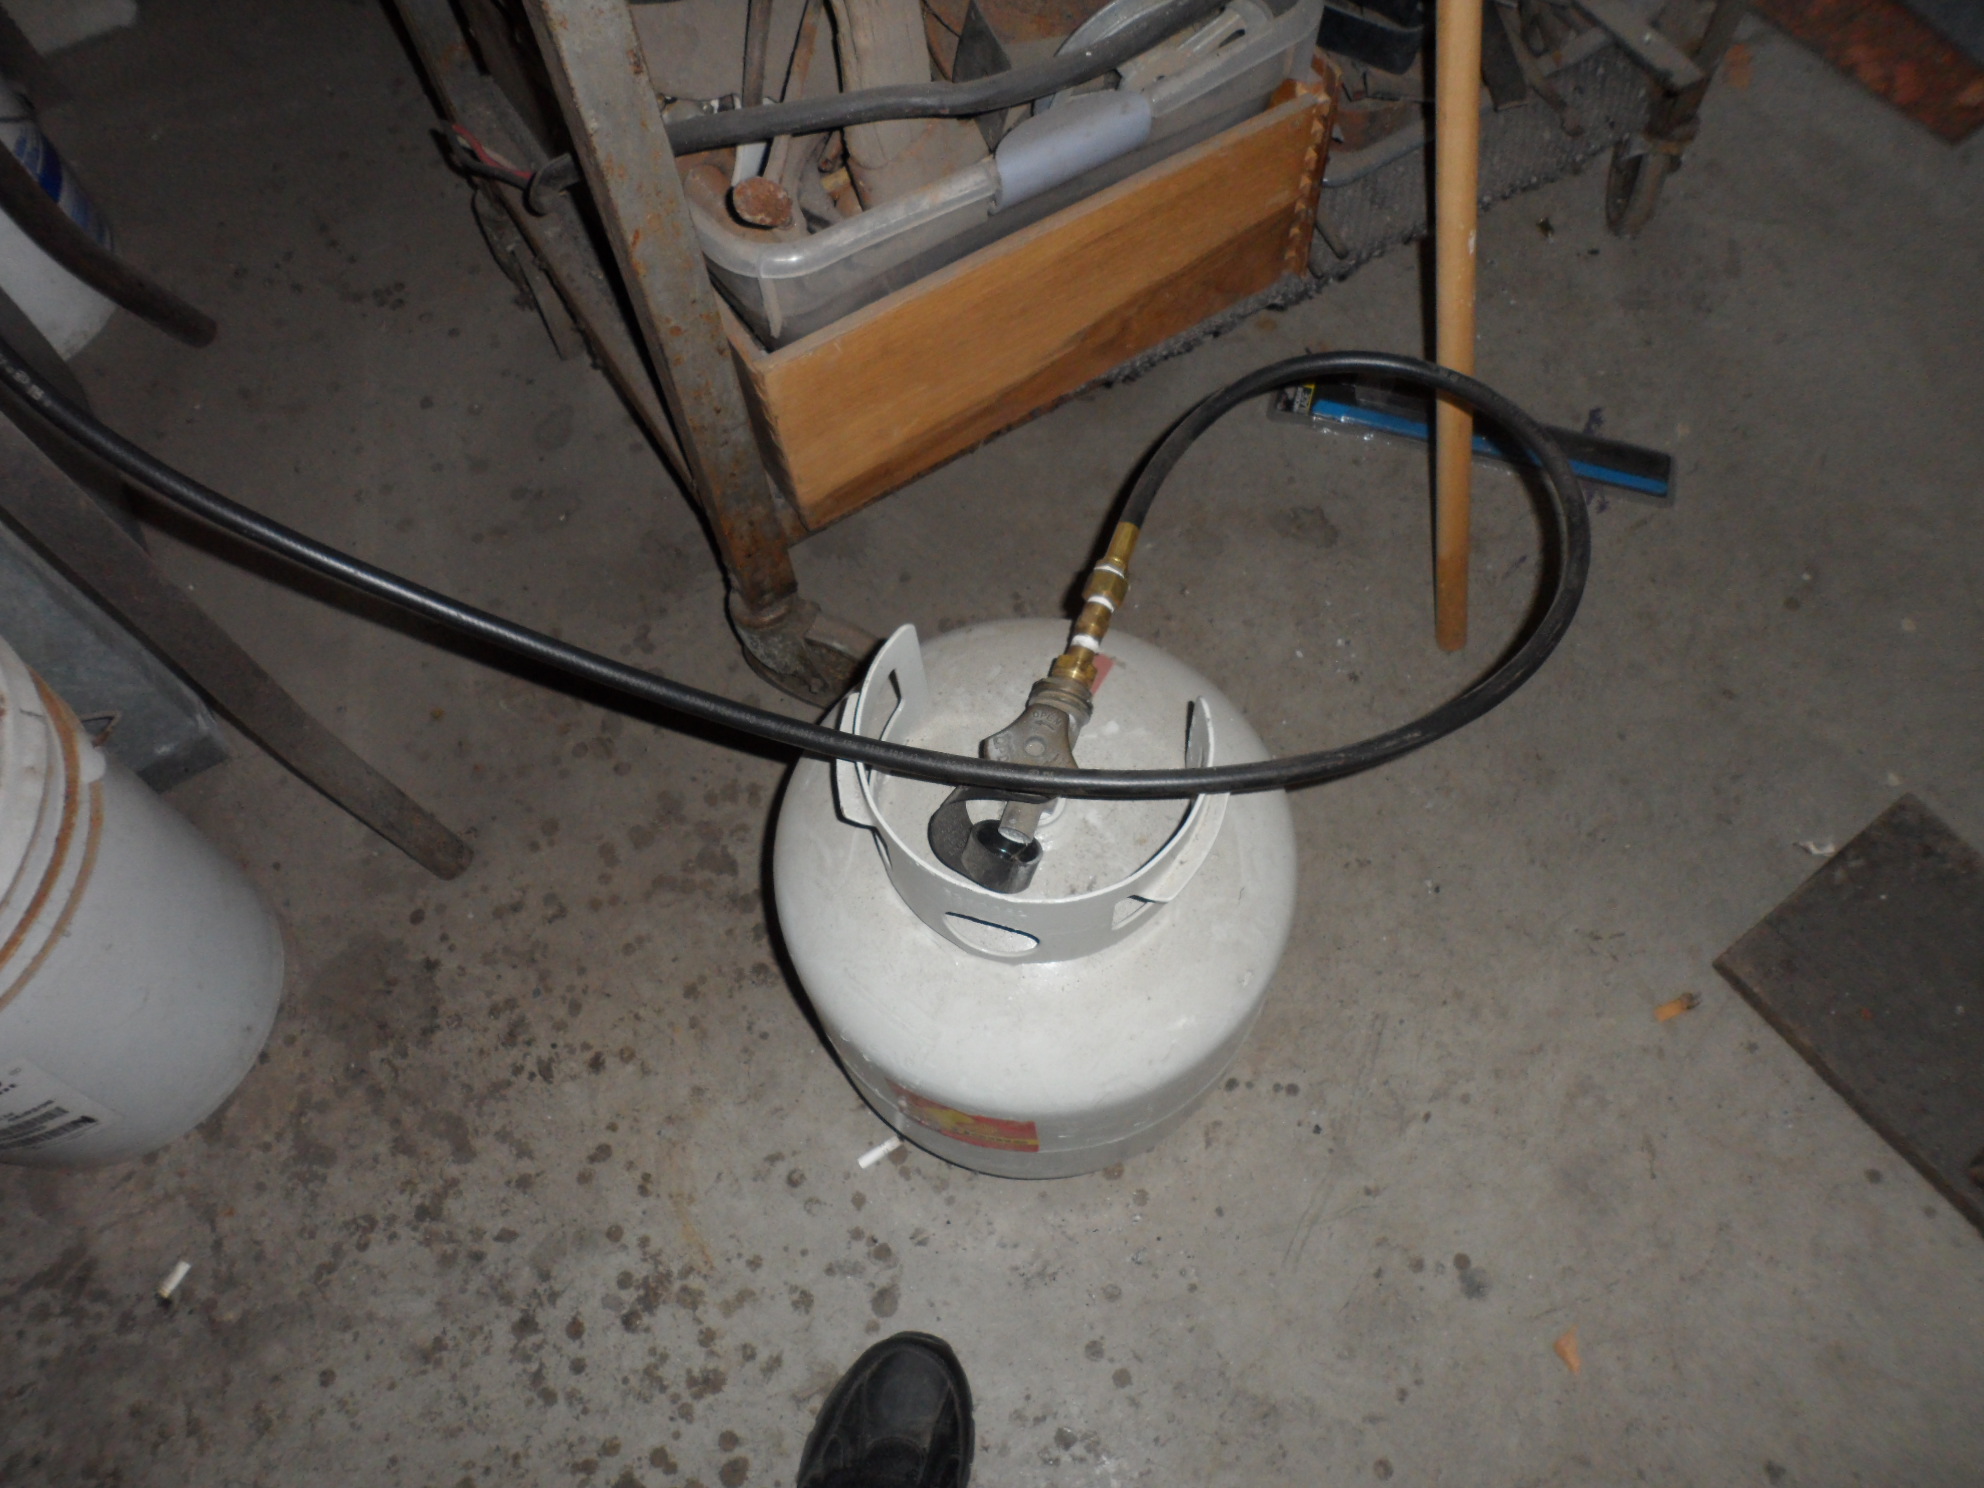
| 20# LP tank can also be used. |
 |