Potato Planters
Audio Archive for The Tinkers Shop 01-18-14 (Right-Click to Download.)
| An Old and A New | ||
|
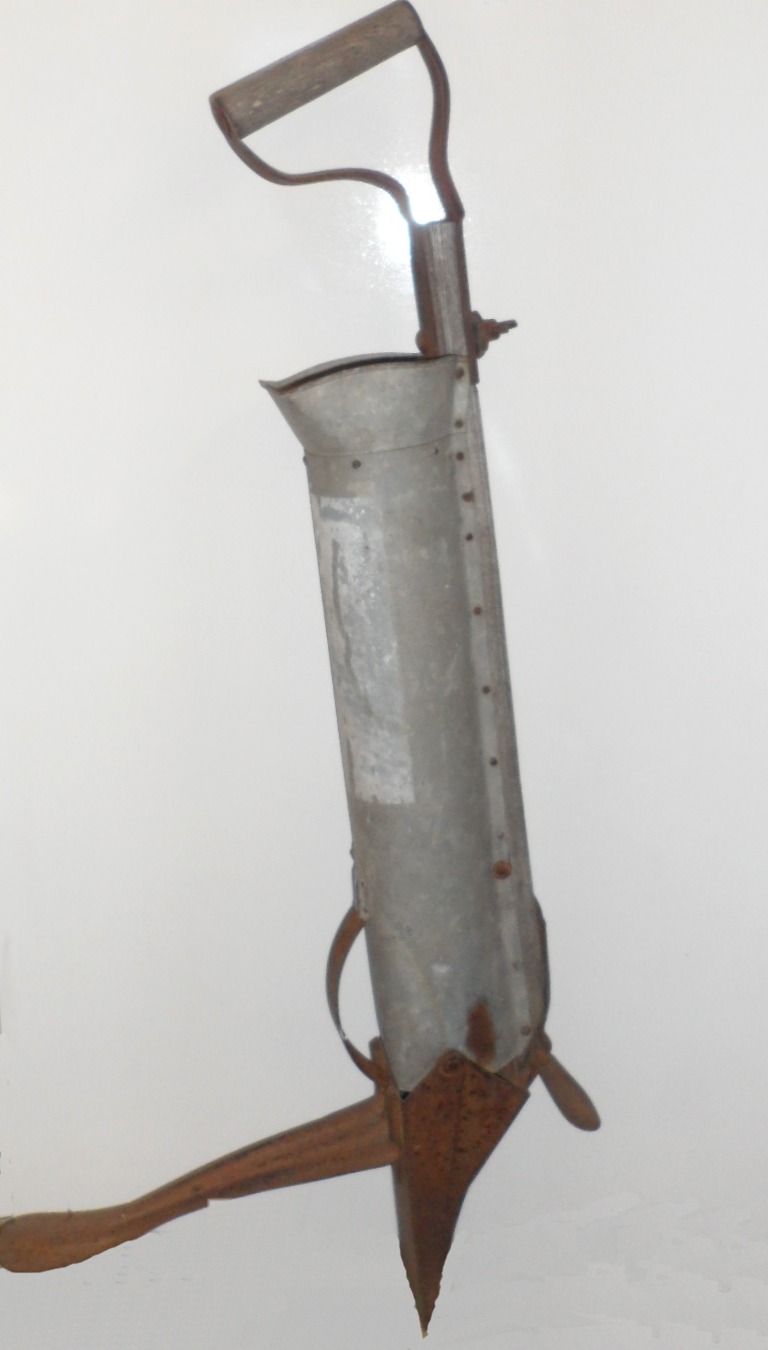
This is an old style planter which I inherited from my Grandfather, and I believe he had gotten it from his father when he left the farm The overall height is 32" and the body/barrell is about 2 3/4" diameter. I still use this one - I've planted many a hill of potatoes with this fine old tool. |
 |
|
|
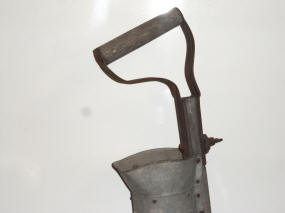
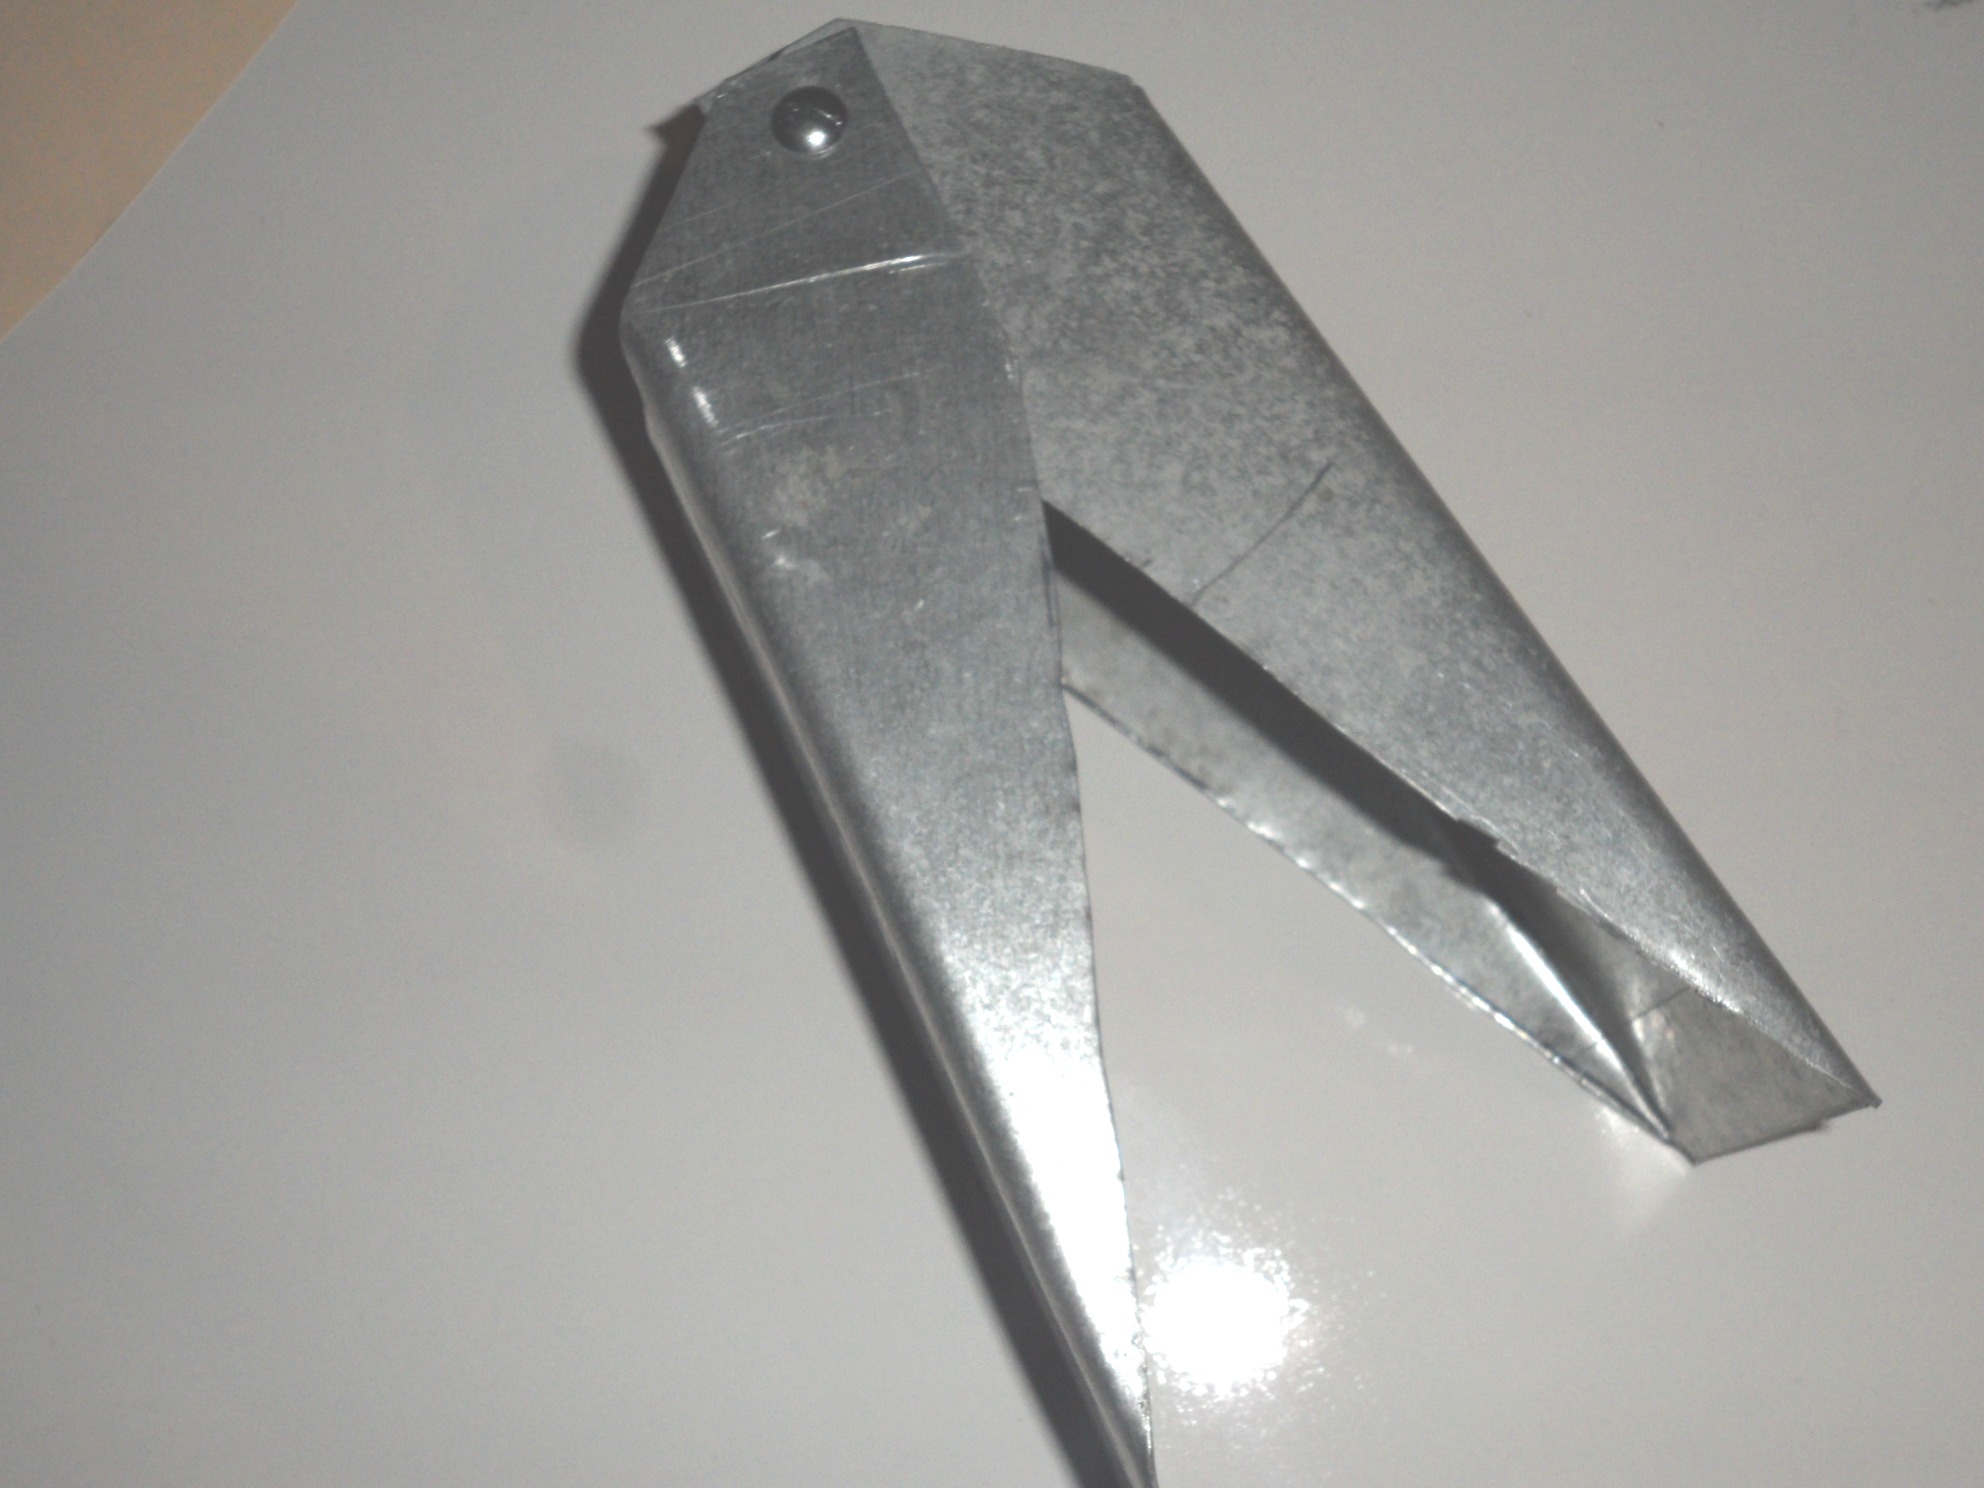
This is what the handle was like. Note that the handle is over the barrell. |
 |
|
|
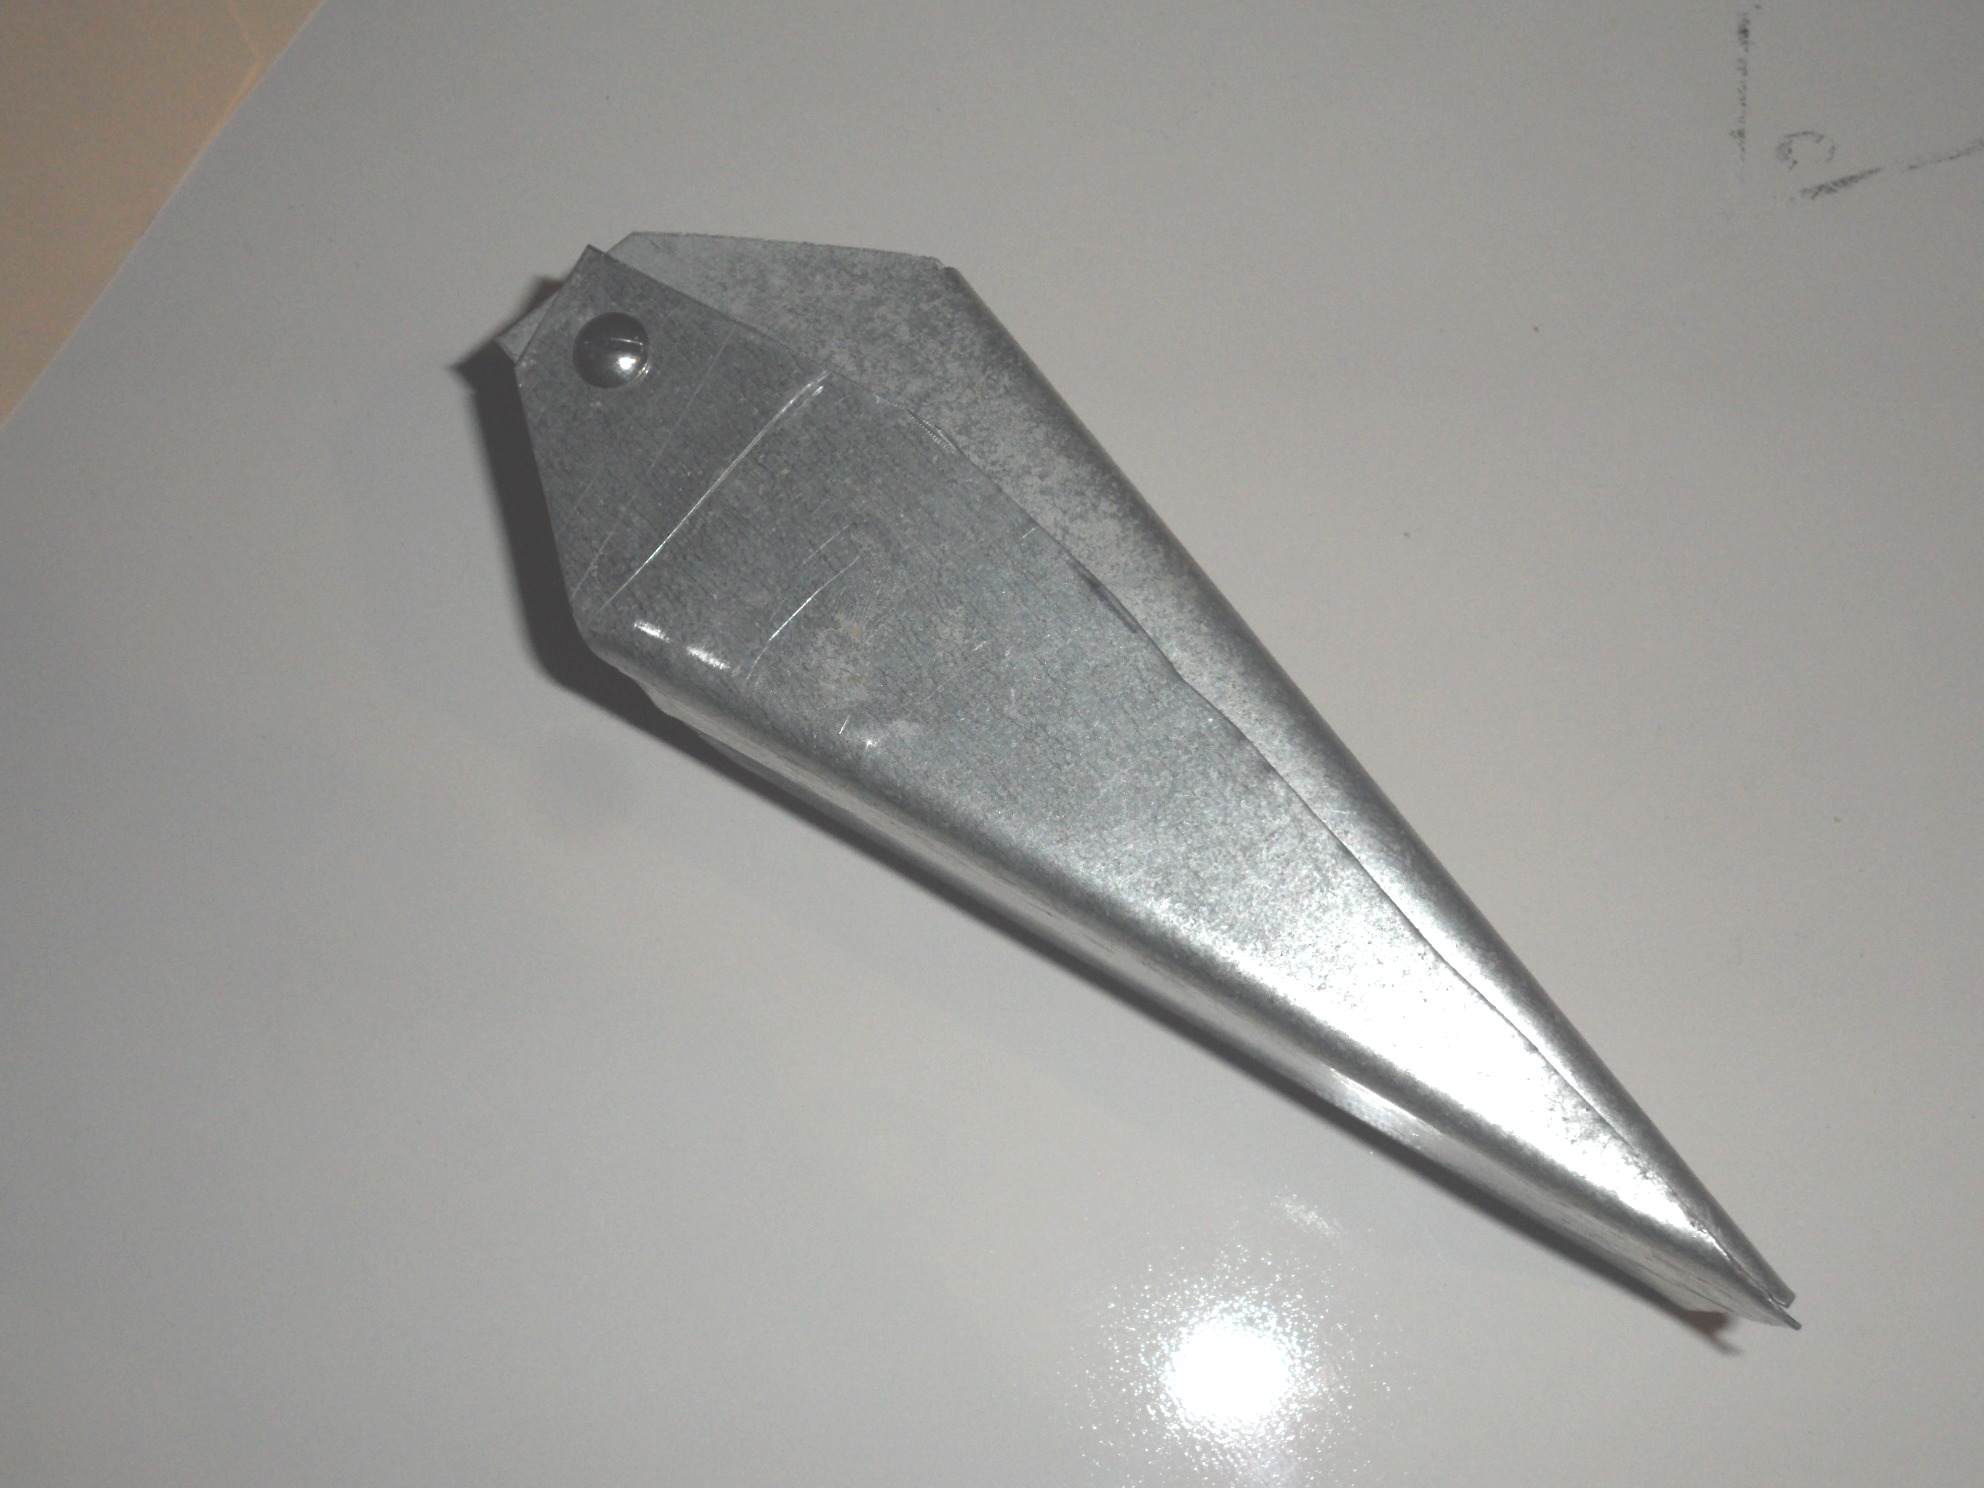
This is the lower end with the 'clam-shell assembly. This is pushed into the ground, a potato set dropped into the top and then the entire body is rotated to open the clam-shell.
The process is repeated for each hill. |
 |
|
|
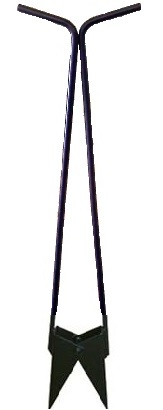
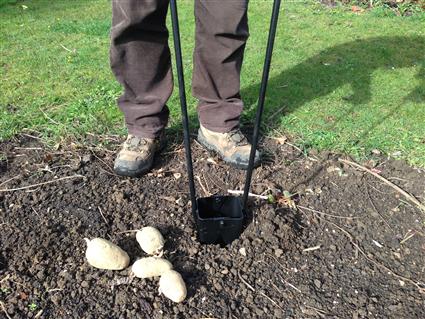
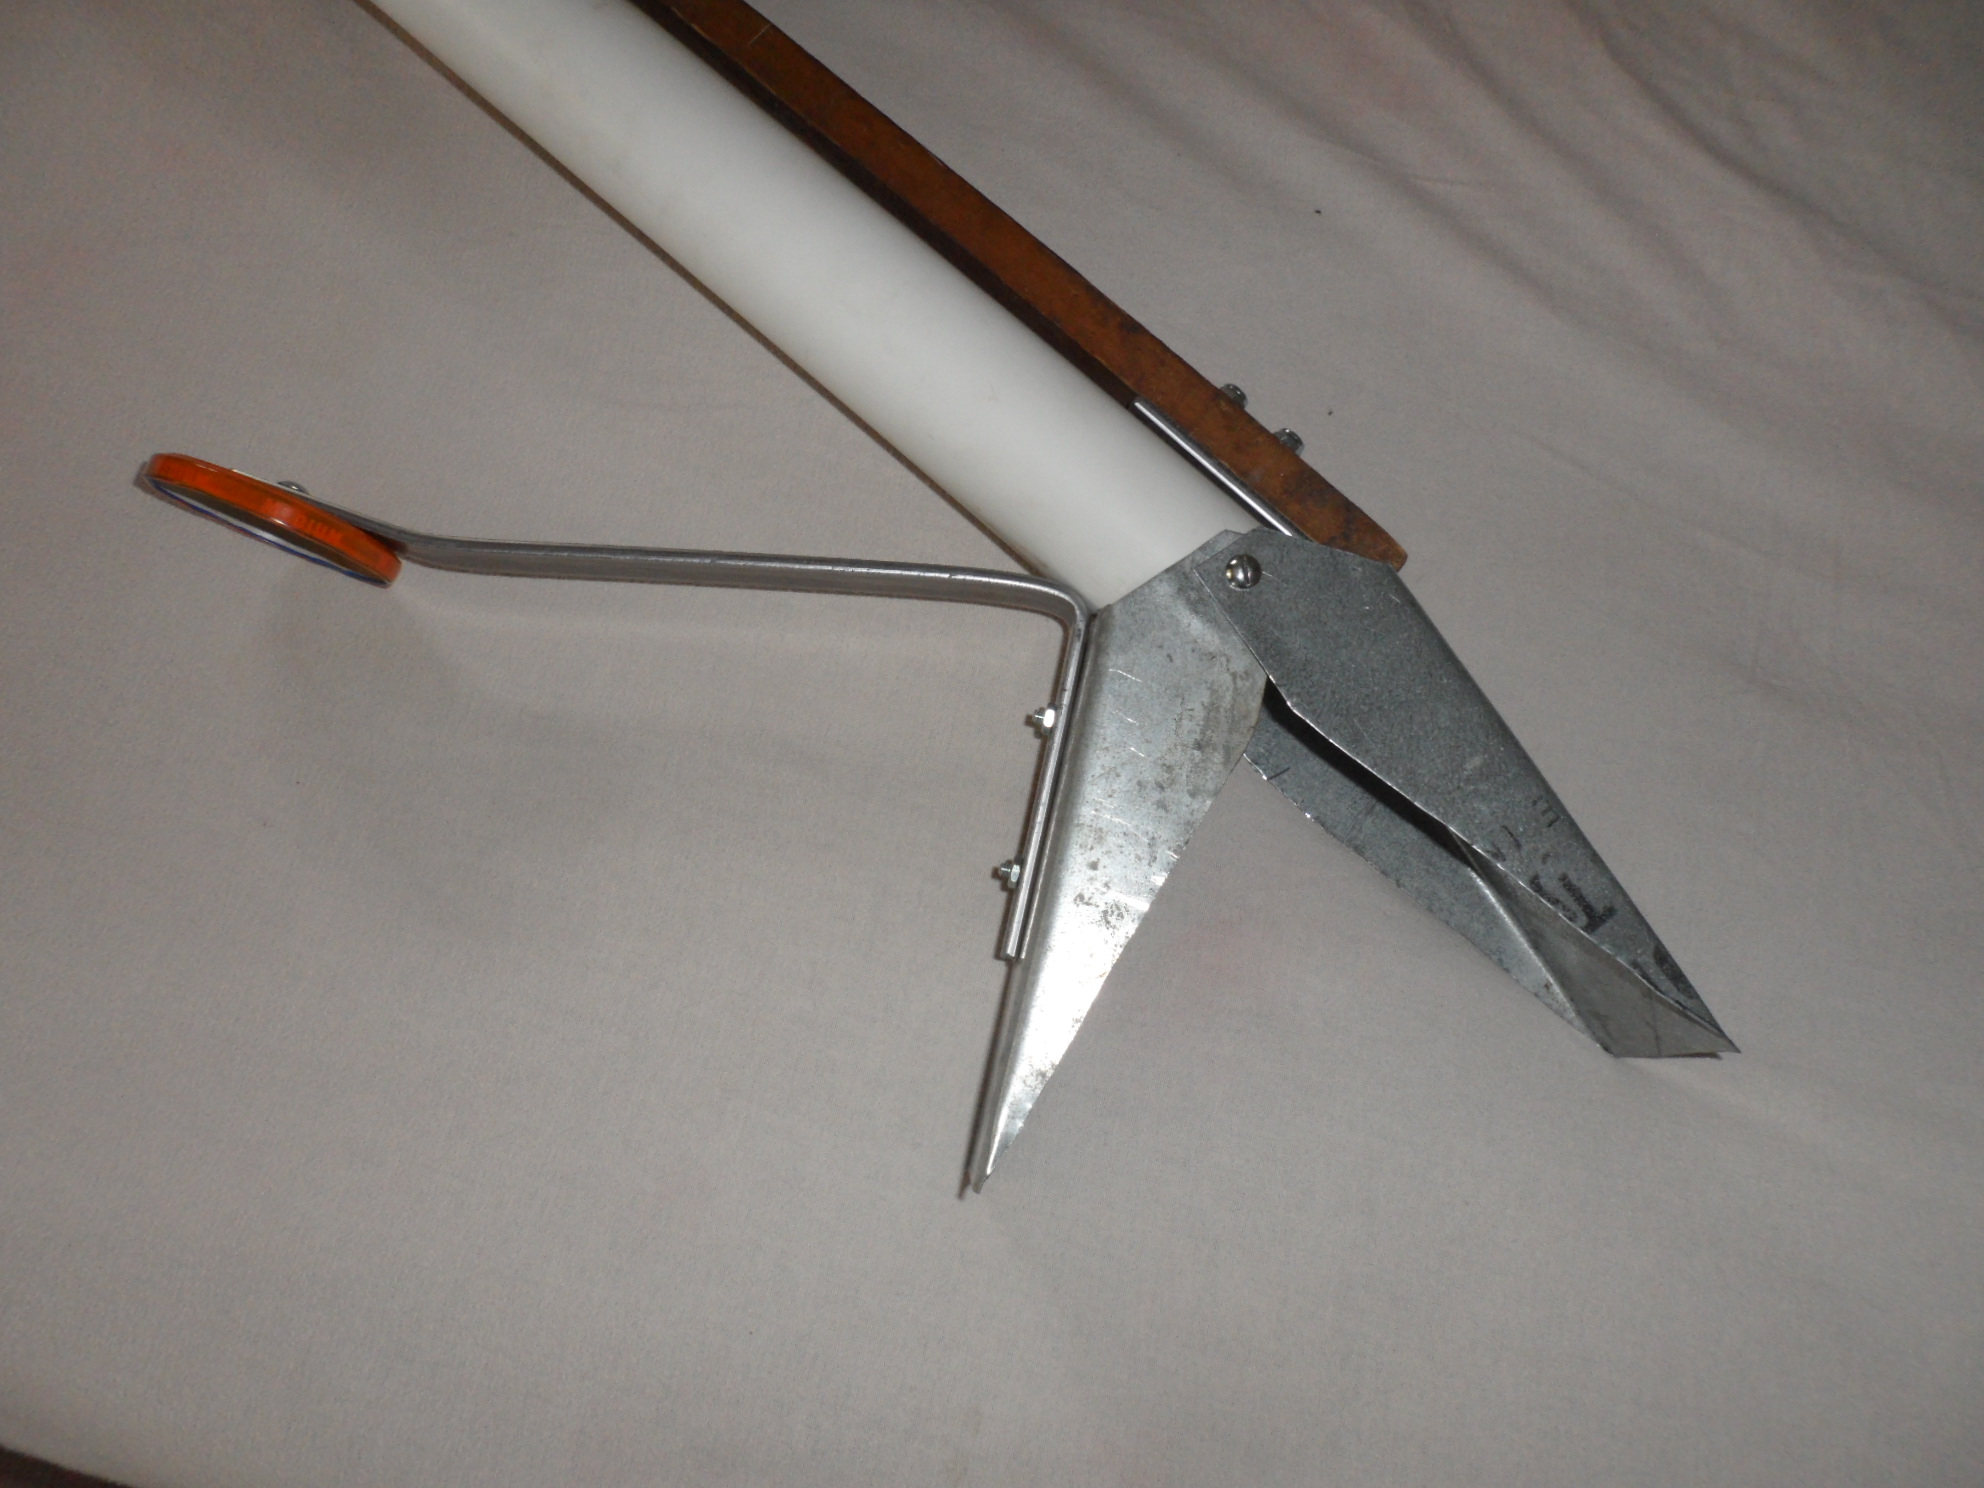
Next here is a newer British style of Planter
|
 |
|
|
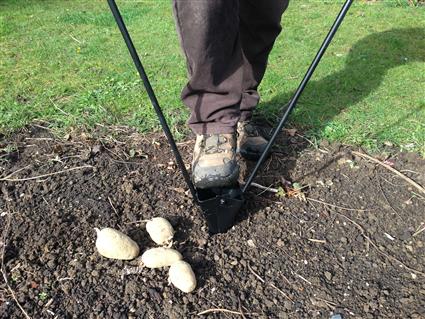
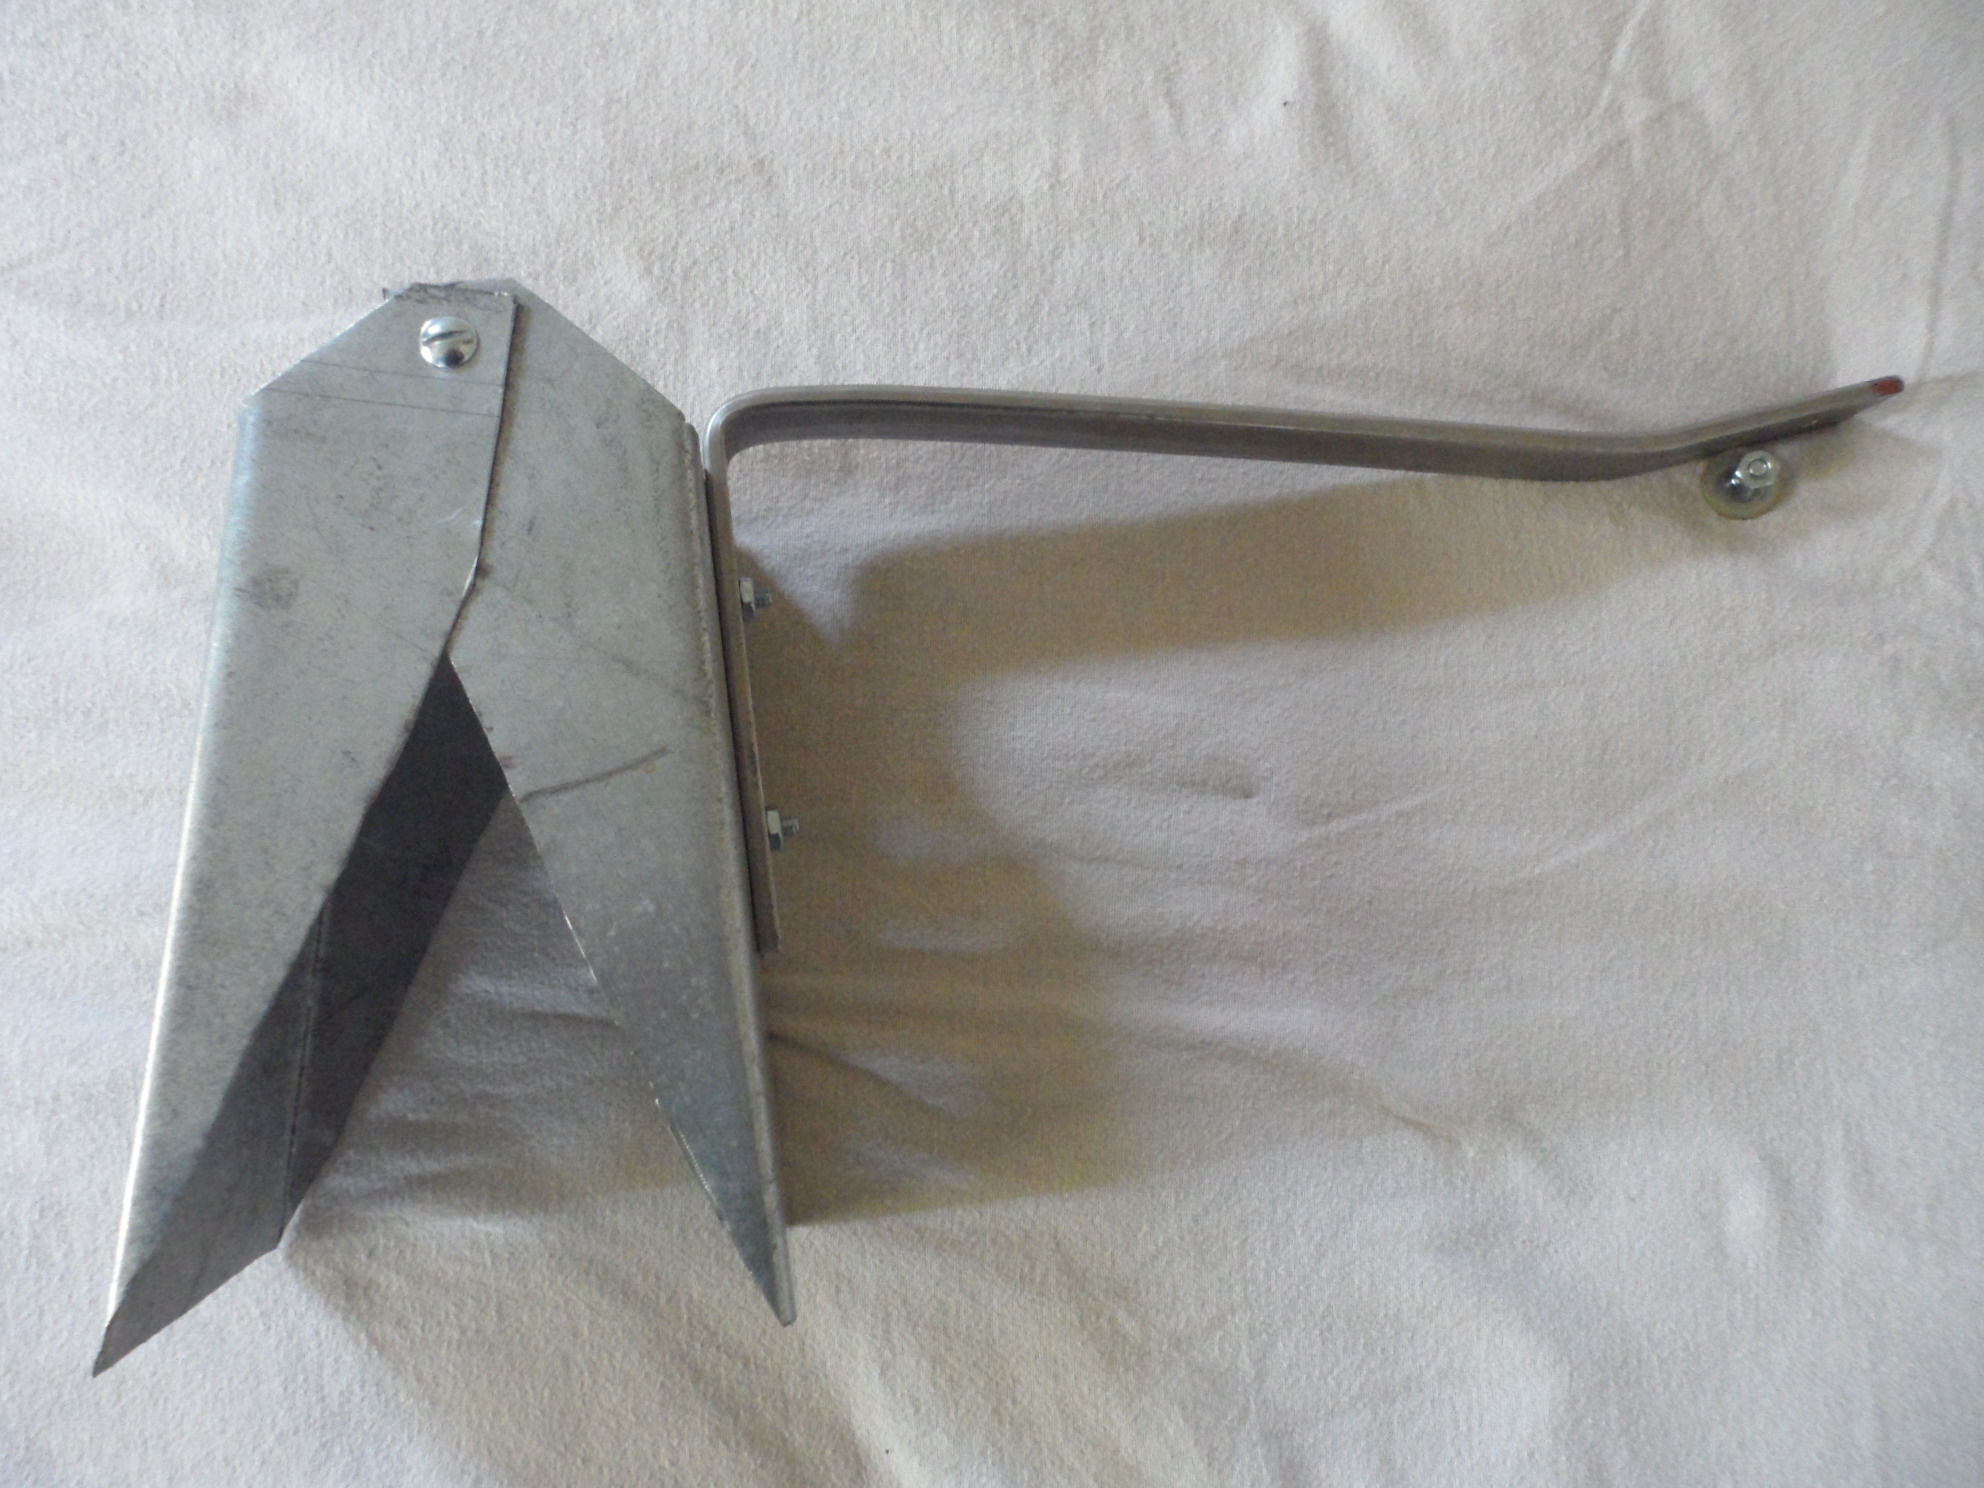
The handles are opened and one
steps on the clam-shell to push it in. |
 |
|
|
The handles are opened and one steps on the clam-shell to push it in.
|
 |
|
|
If you want to see other types of Planters you can always do a 'Google' search. For wxample you could try the link below: http://www.ebay.com/bhp/vintage-potato-planter
|
||
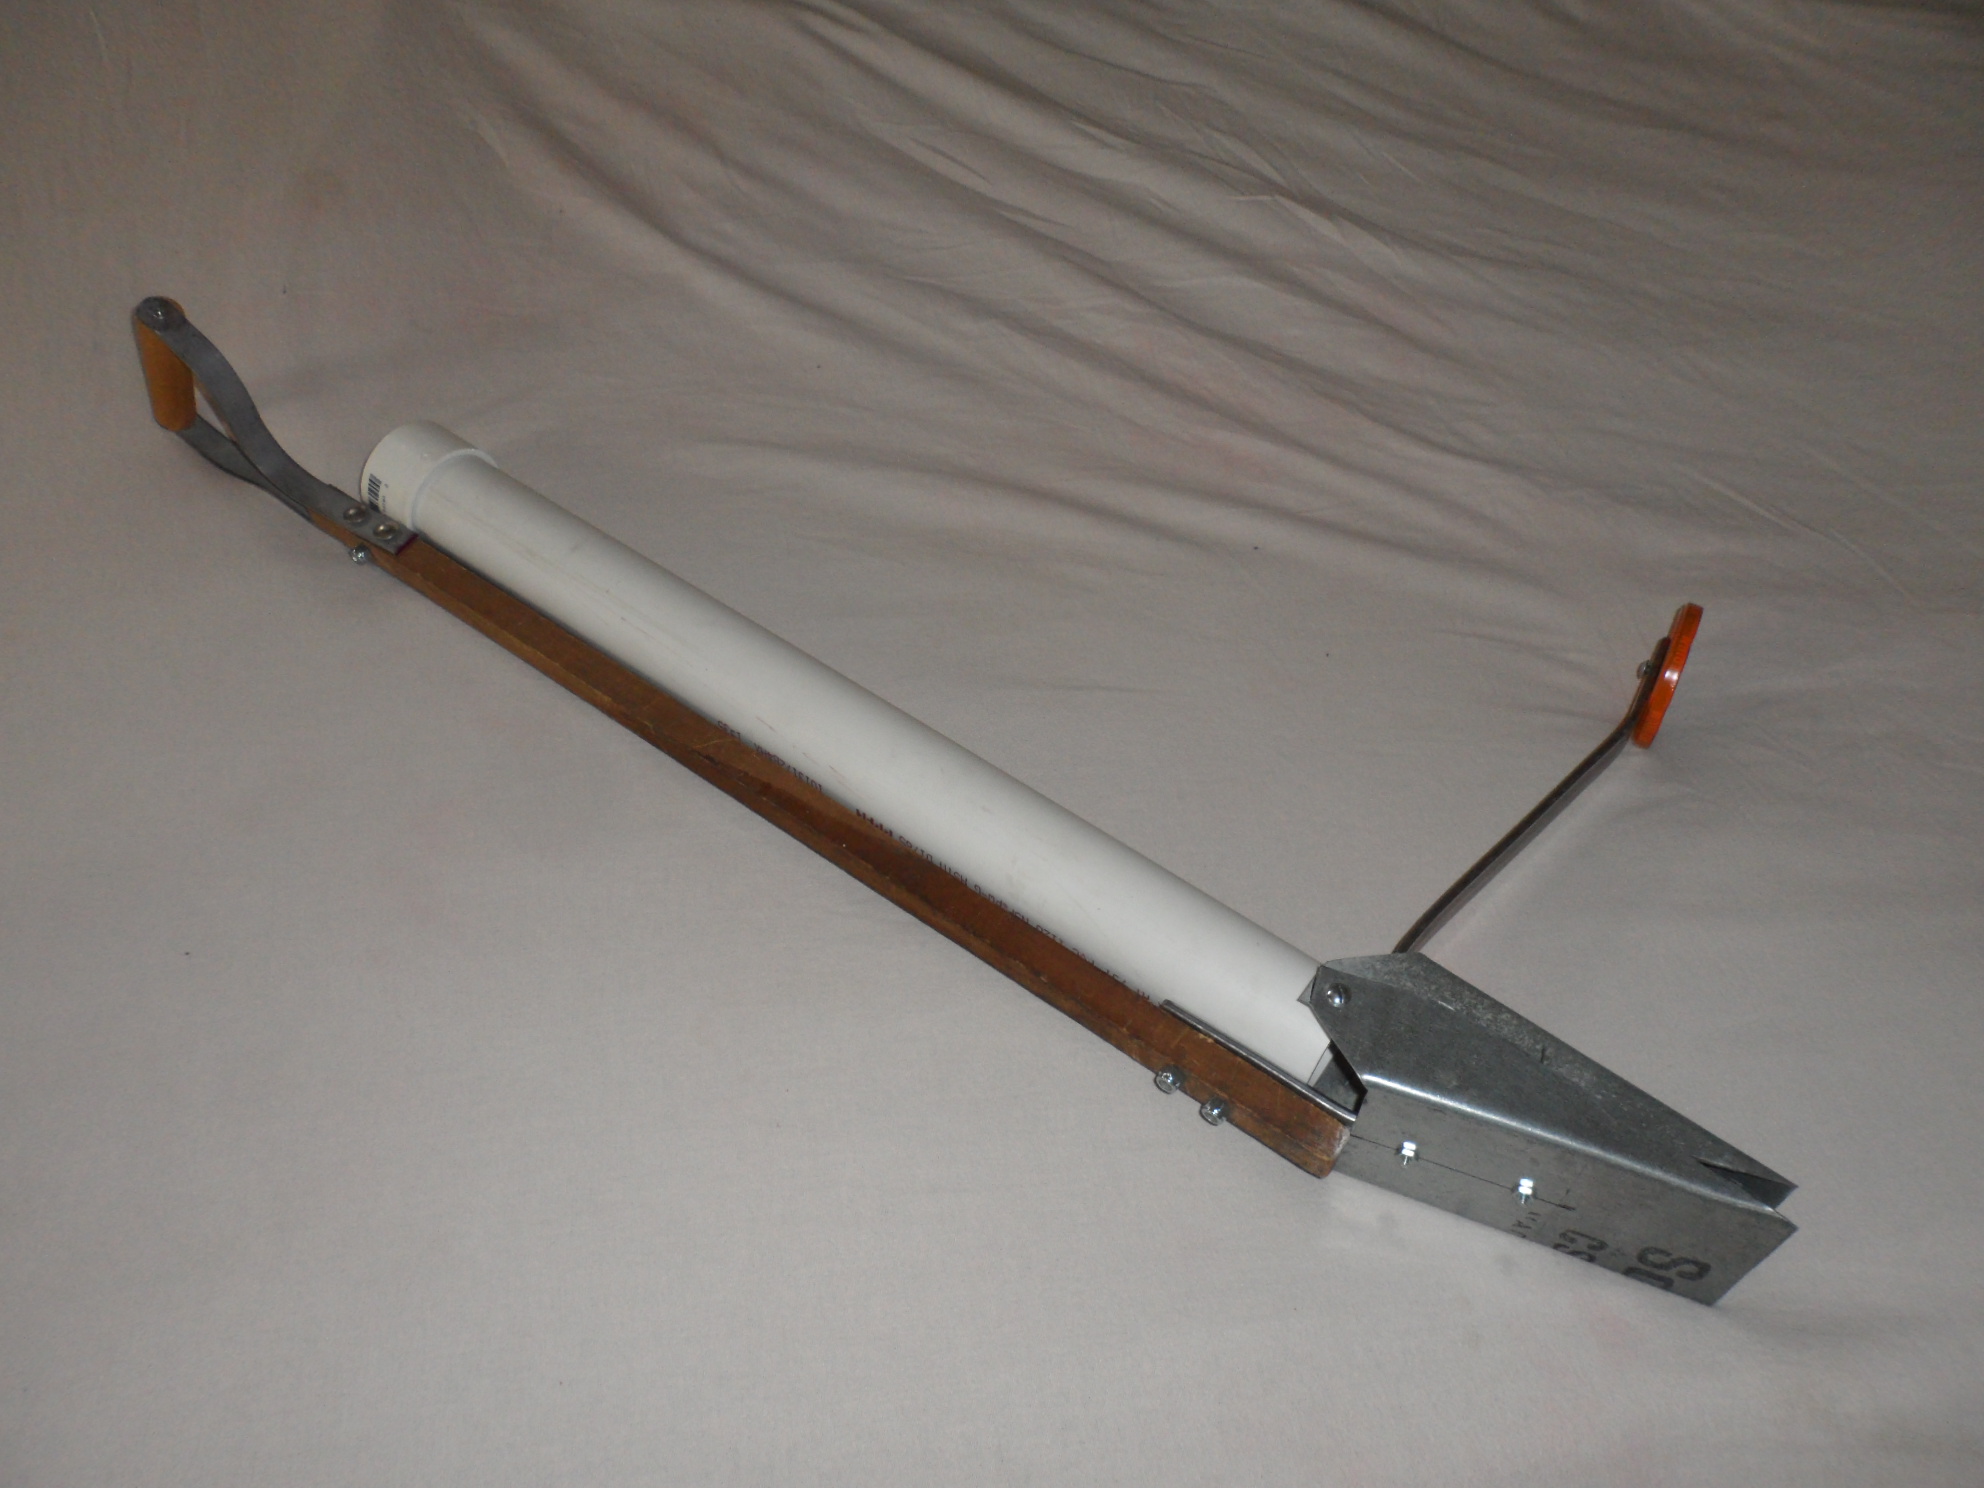
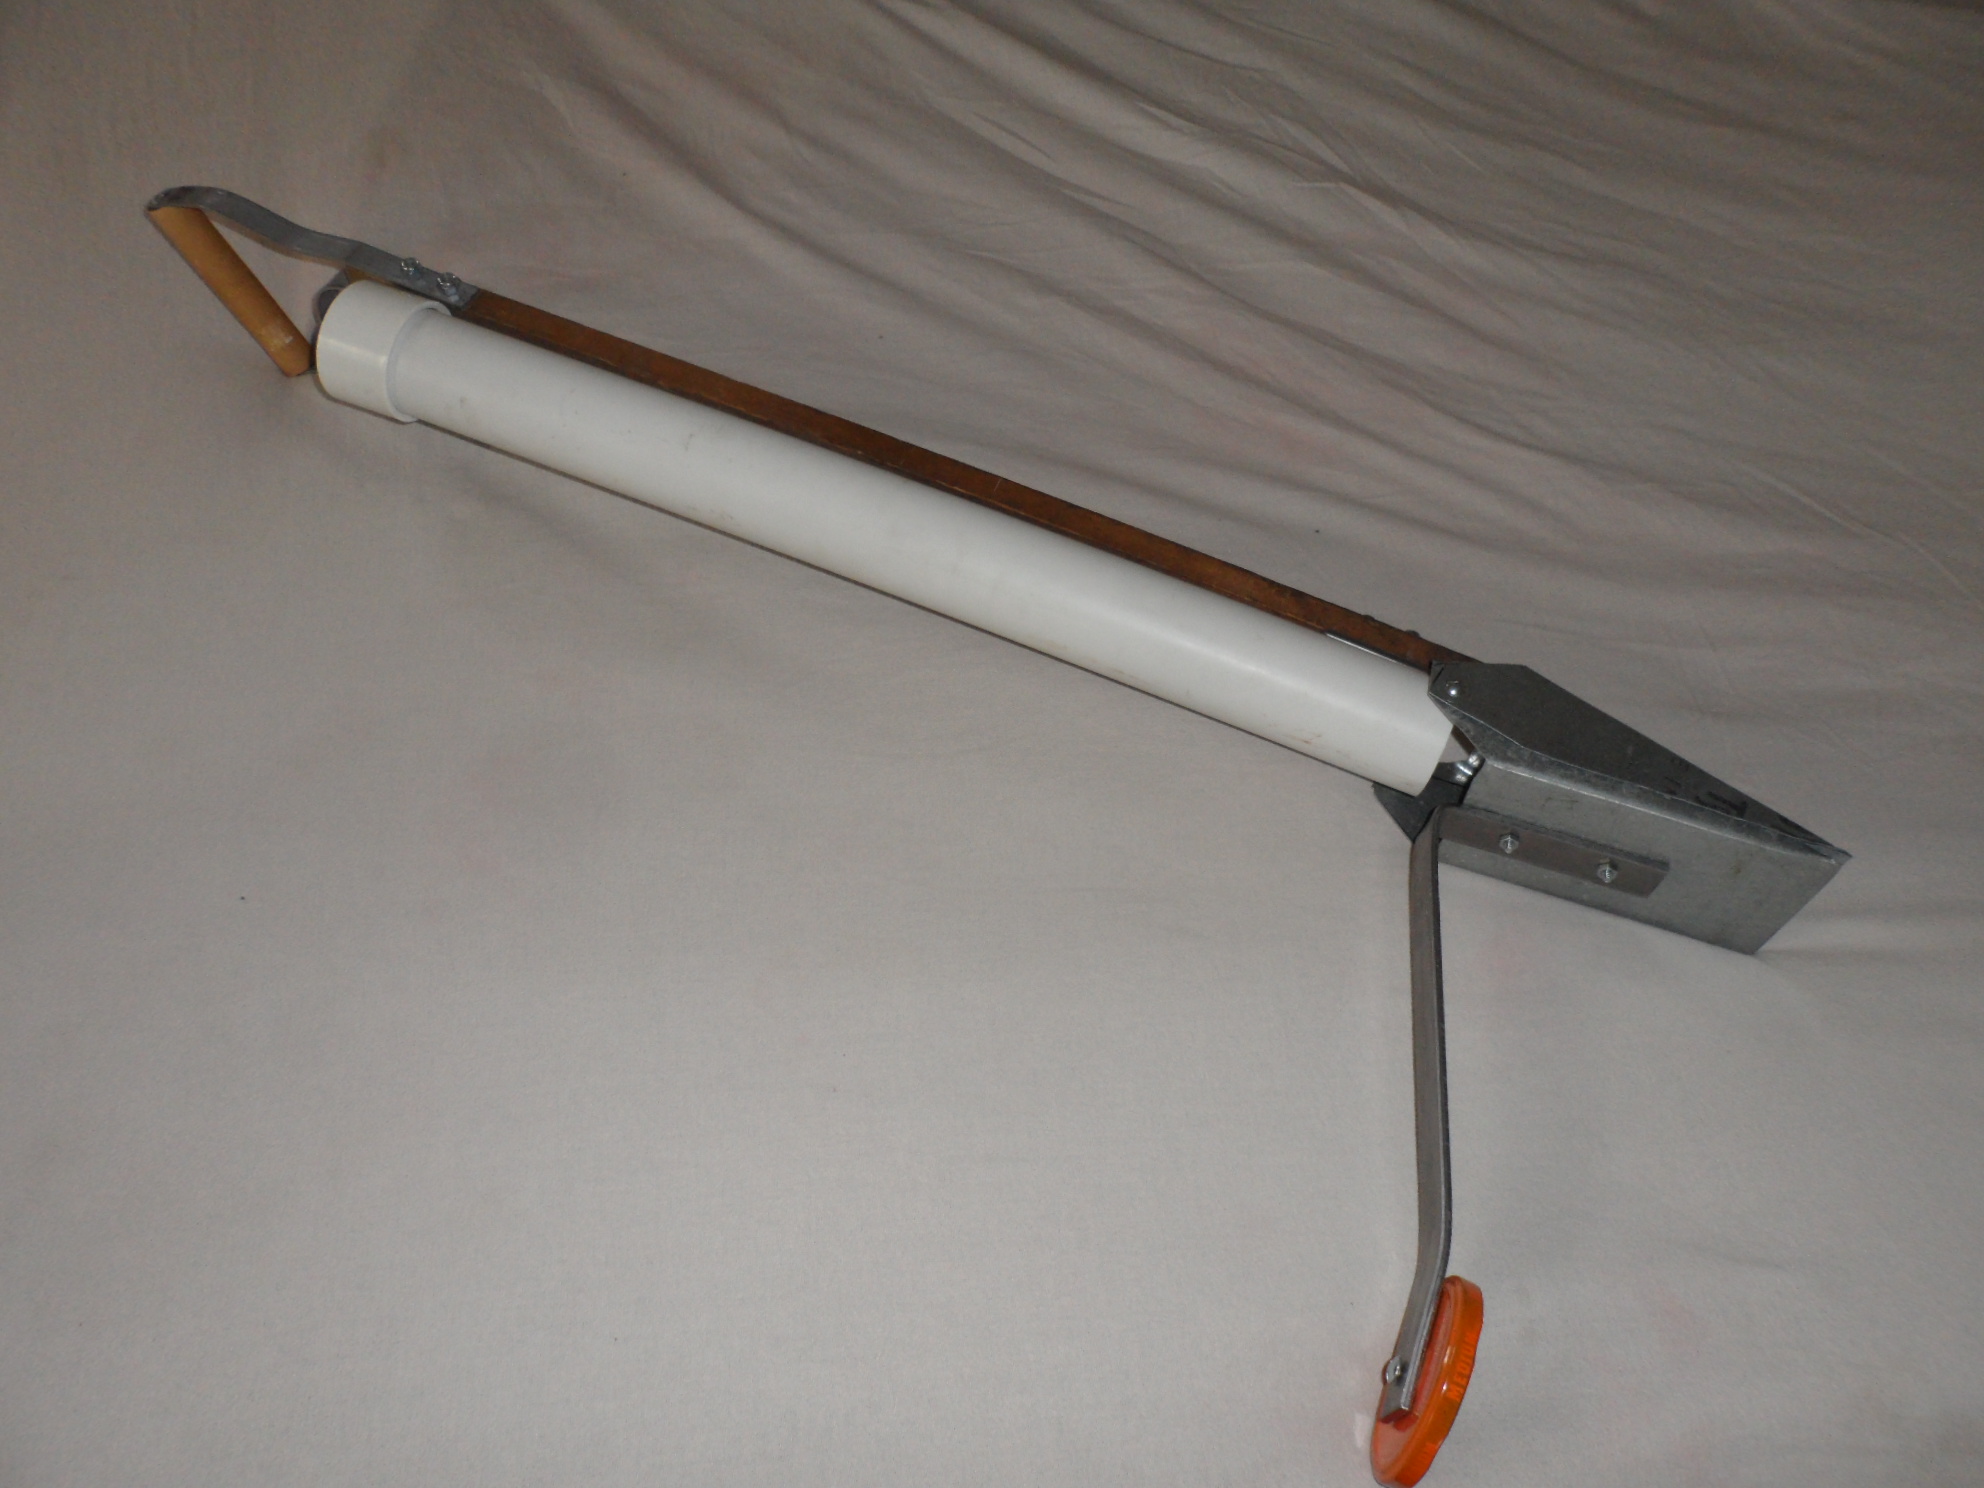
| My Home built Spud Planter | ||
|
It is composed of 3 main sections: 1- A Handle 2- A Body 3- The Clamshell assembly. |
 |
|
|
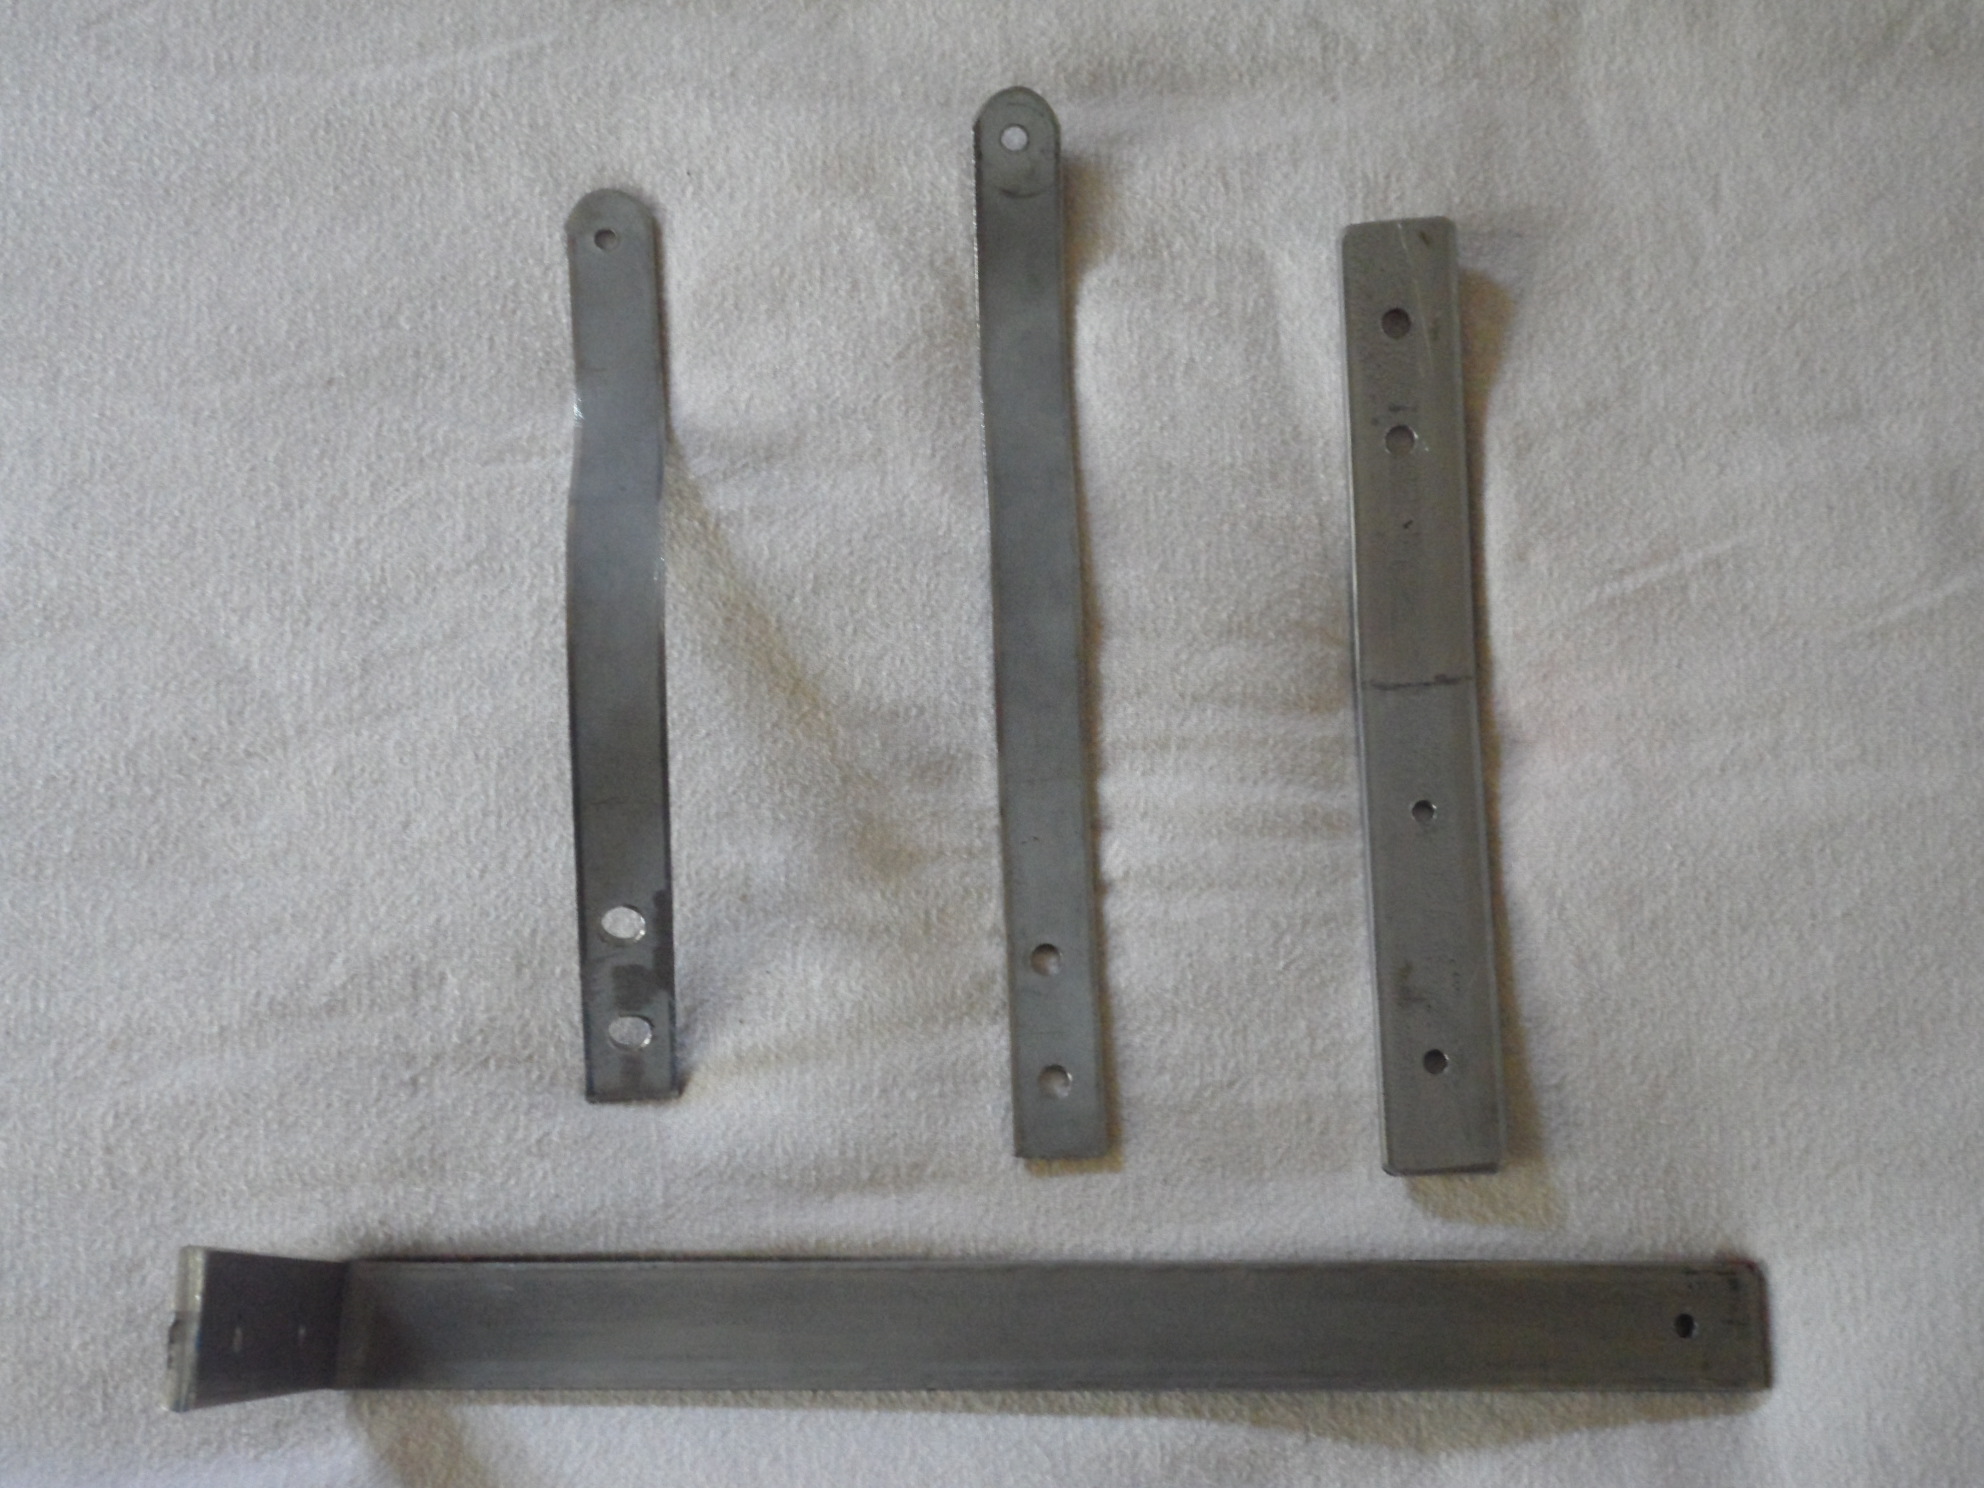
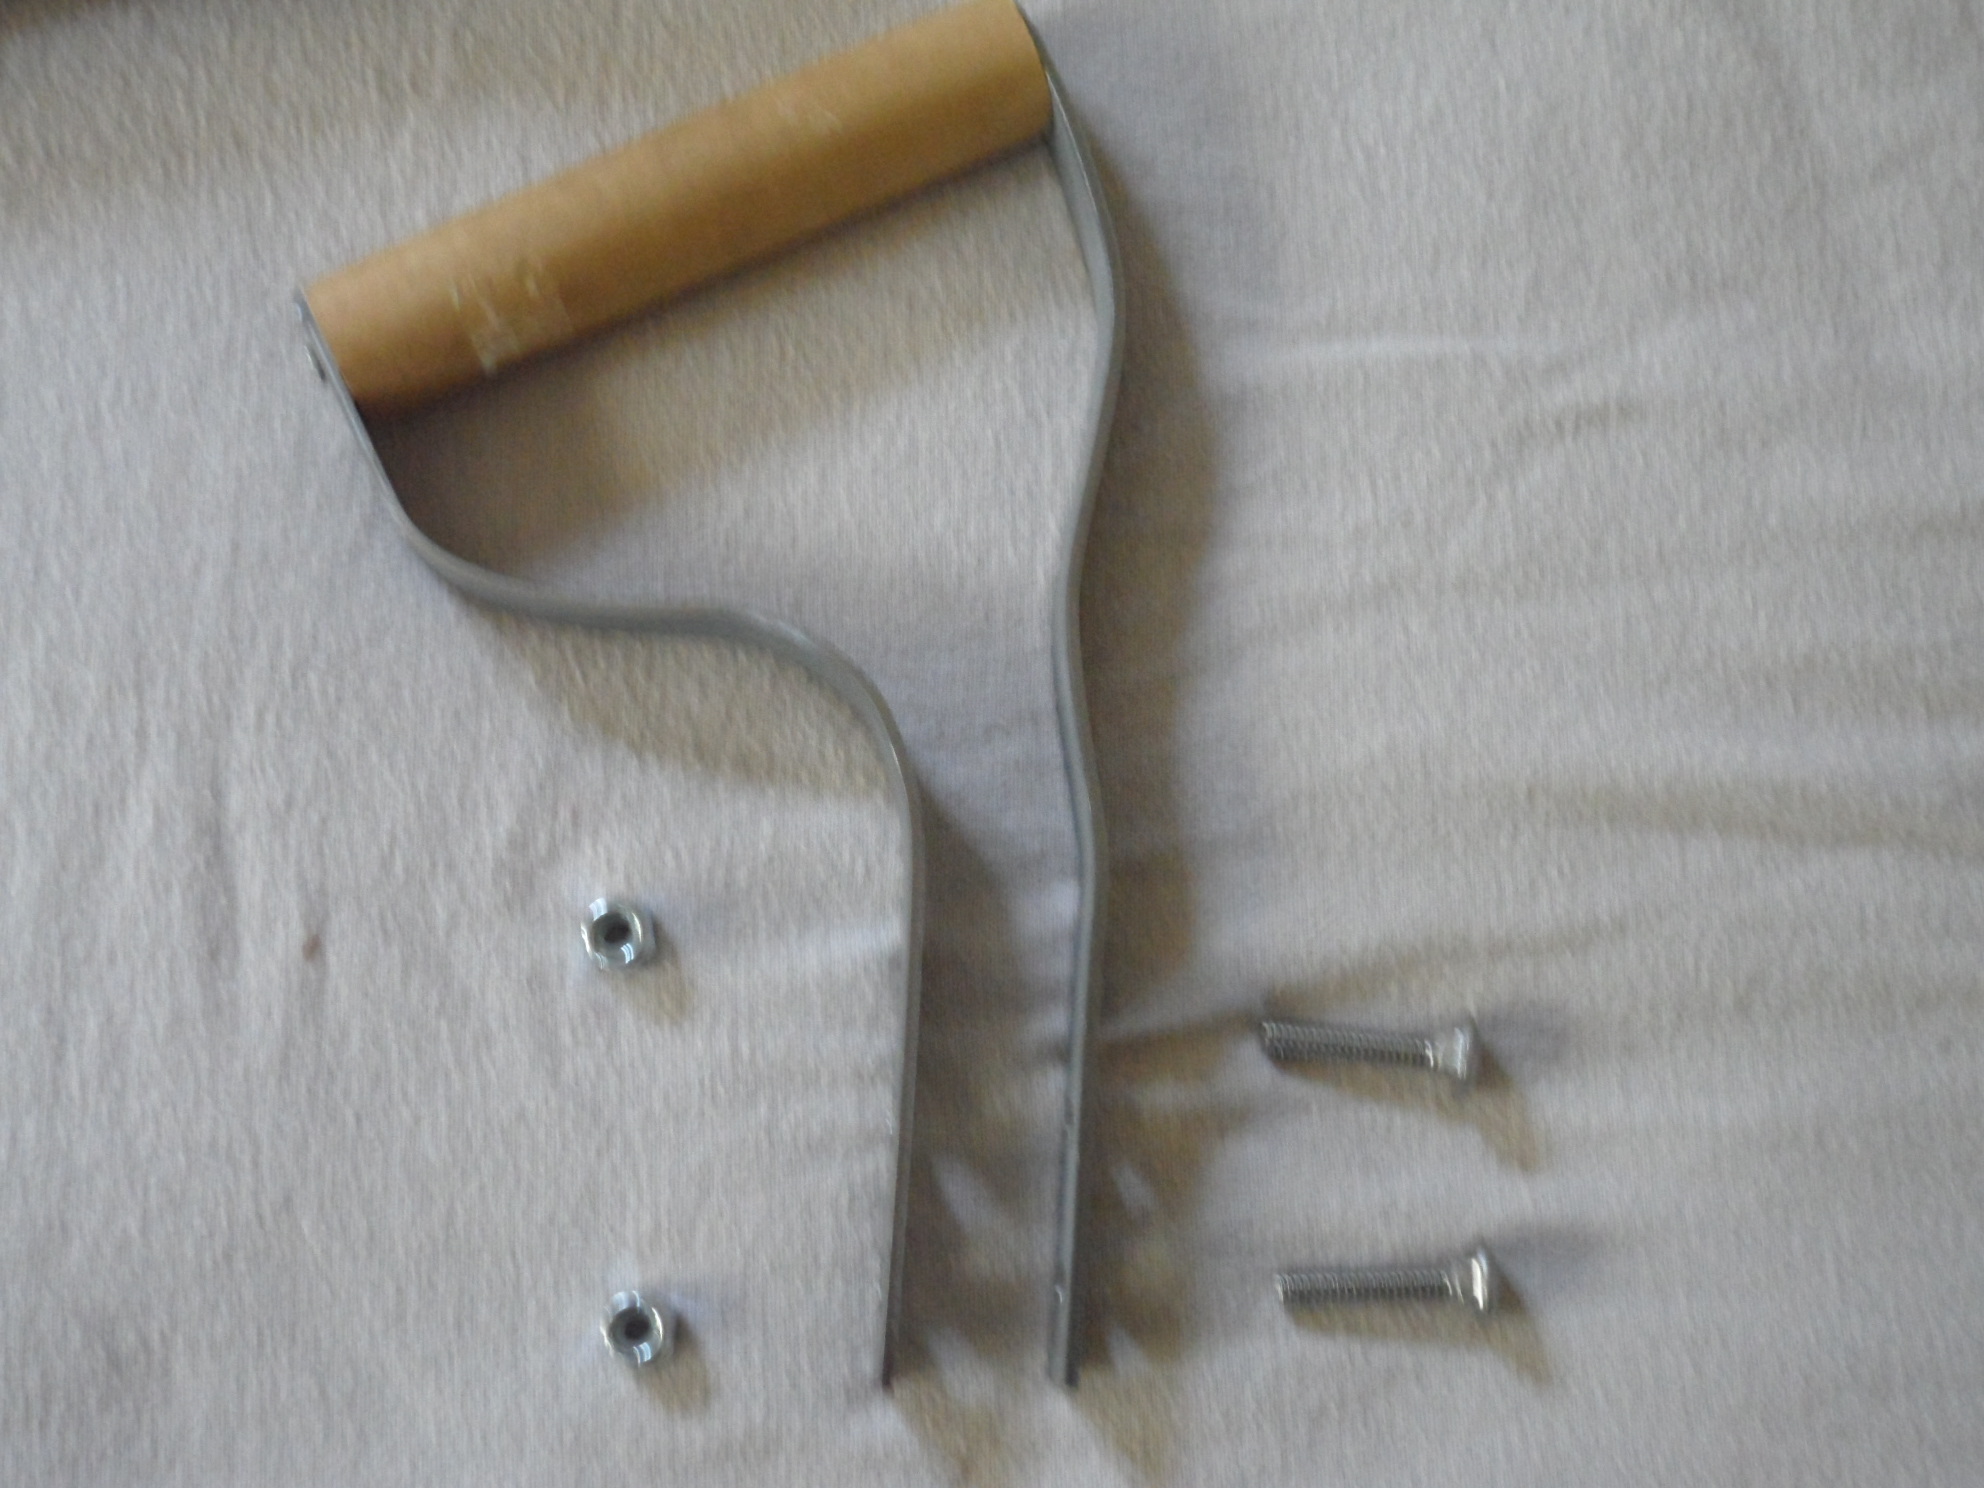
Here are a couple views of the metal parts that will need to be made to build this planter. The two left ones are the parts for the handle. (1/8" x 3/4" flat stock) The right one and the bottom one are parts for the clam-shell. ( 1/4" x 1" flat stock -- One (8" long, the other is 16") |
 |
 |
|
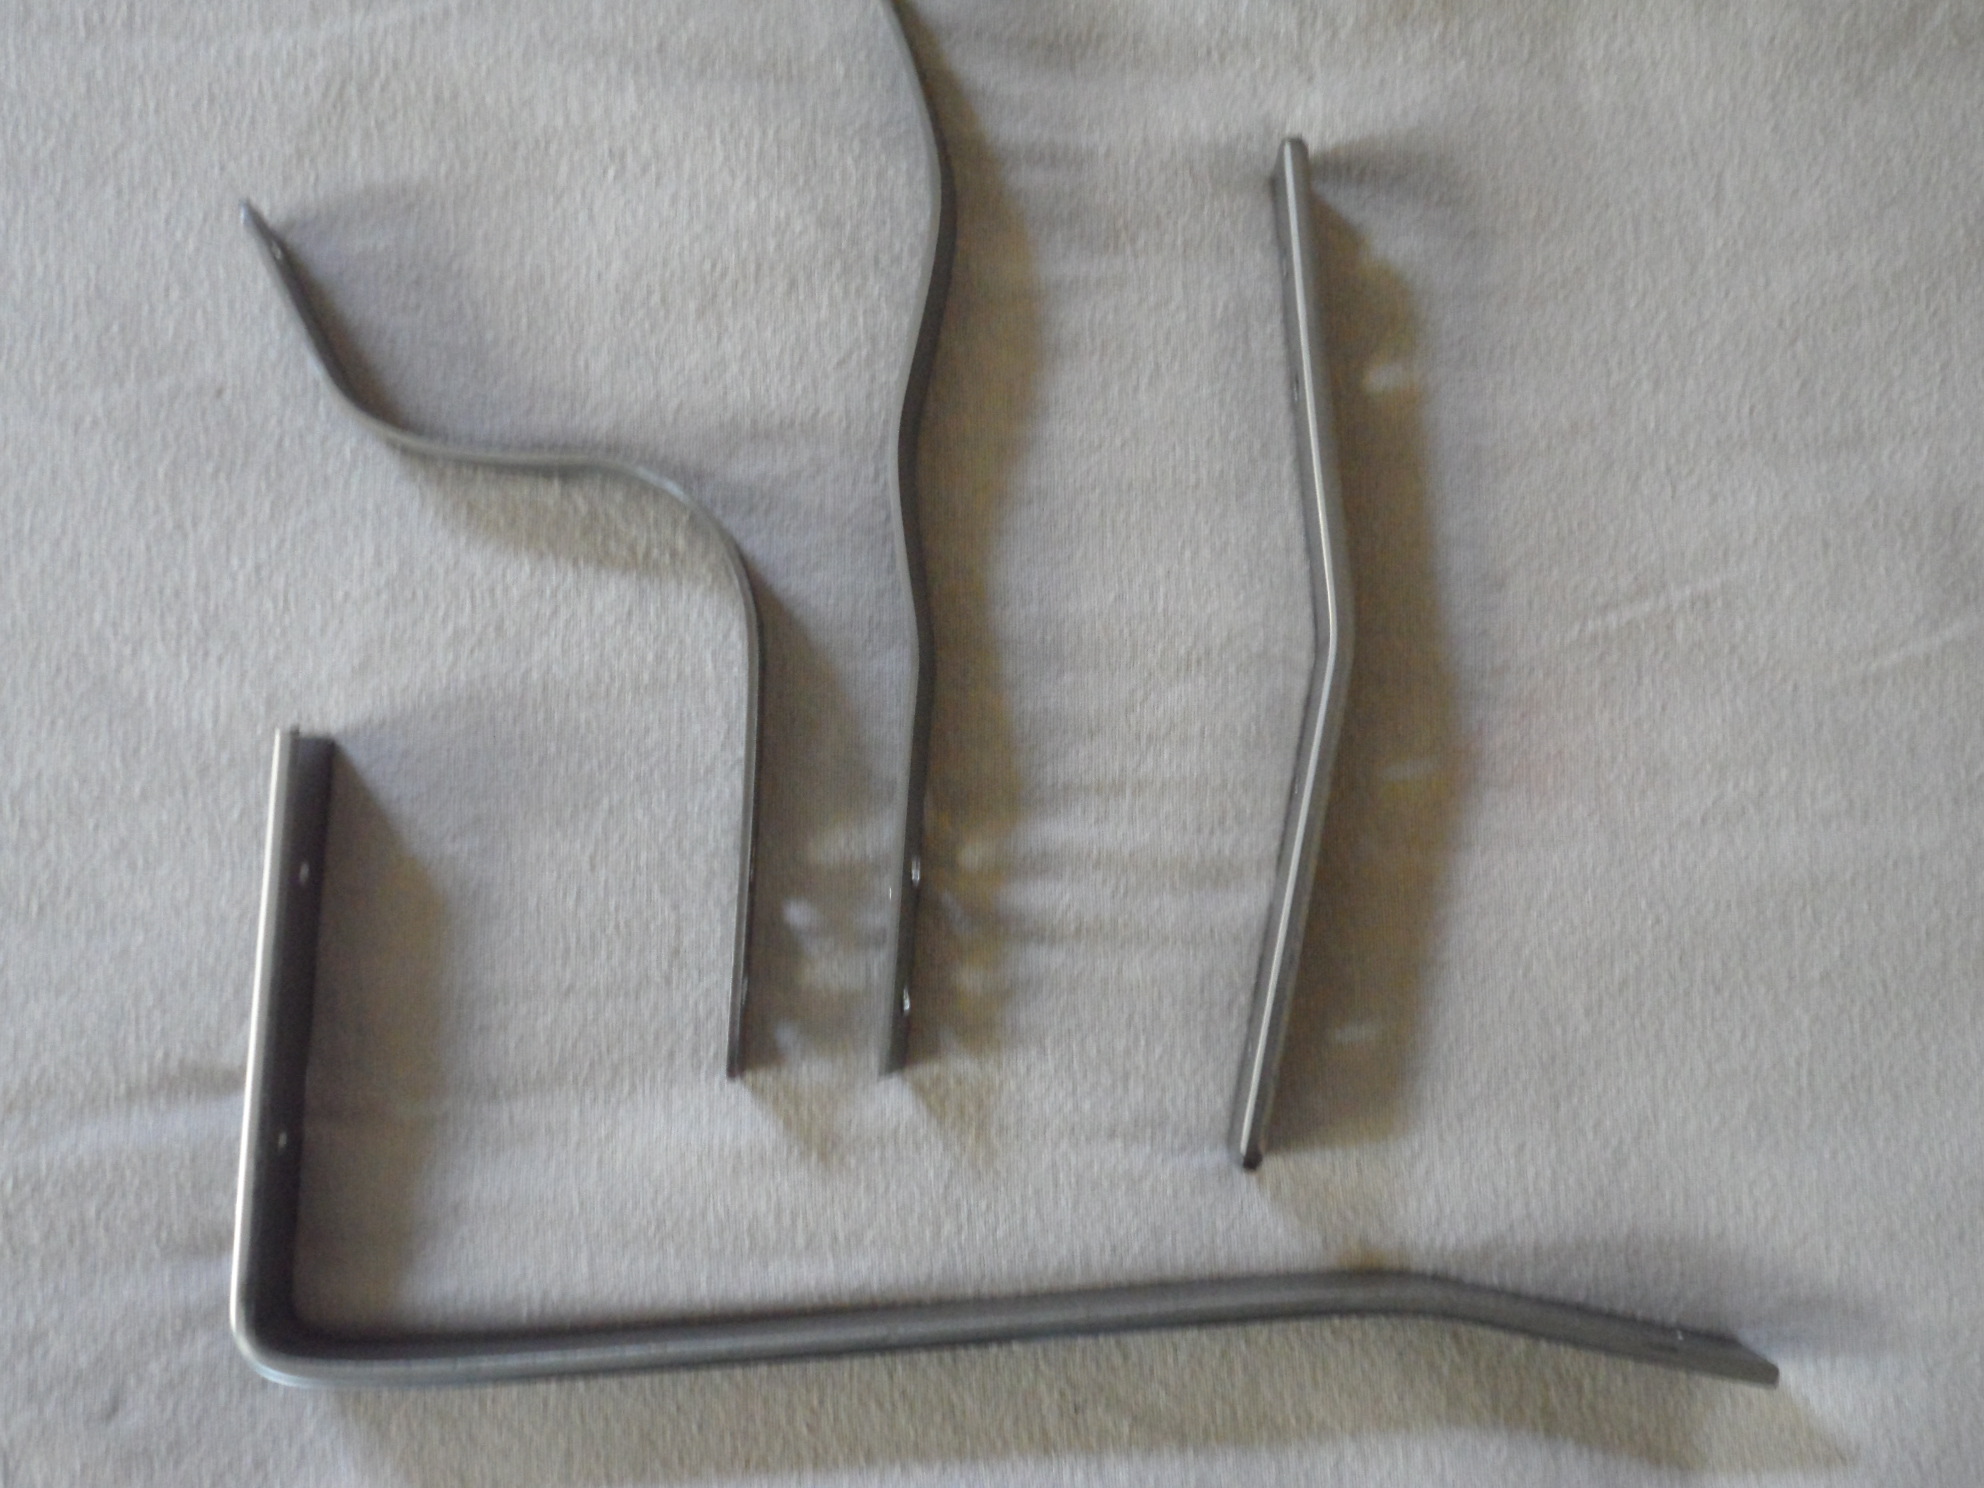
Exploded view of the handle. The bent met parts started out a 9" long sections if metal 3/4"w by 1/8" thick. They were then bent to shape. There are 3 holes in each: One 3/16" hole for the wood part and two 1/4" mounting holes spaced 1" apart. The wood part is a 4 3/4" piece of 1" dowell rod.
|
 |
|
|
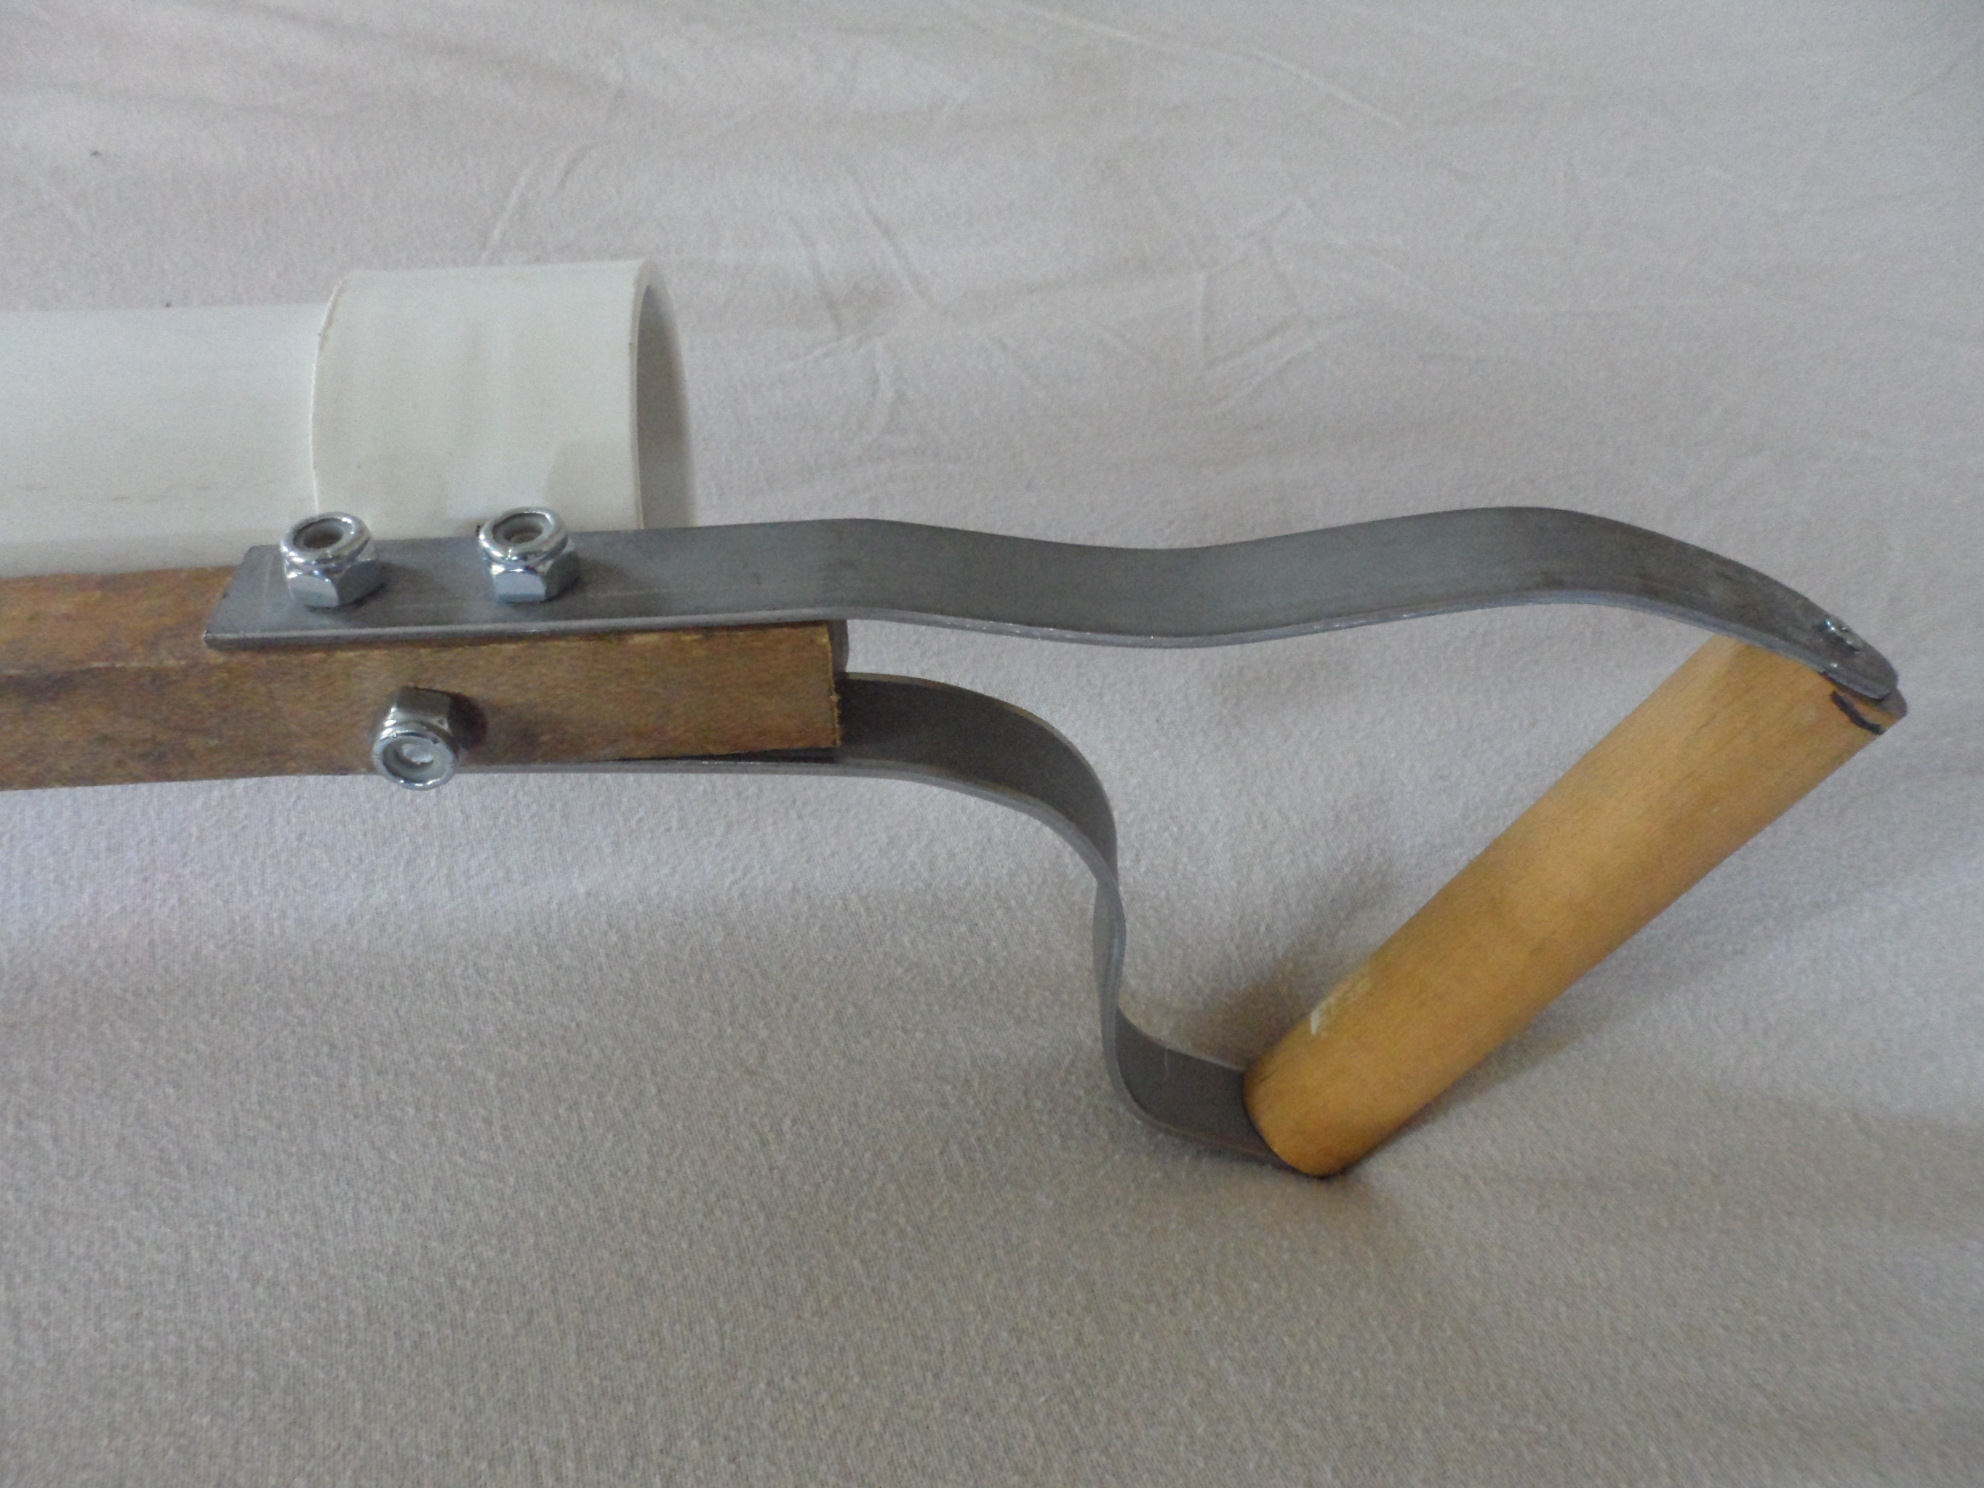
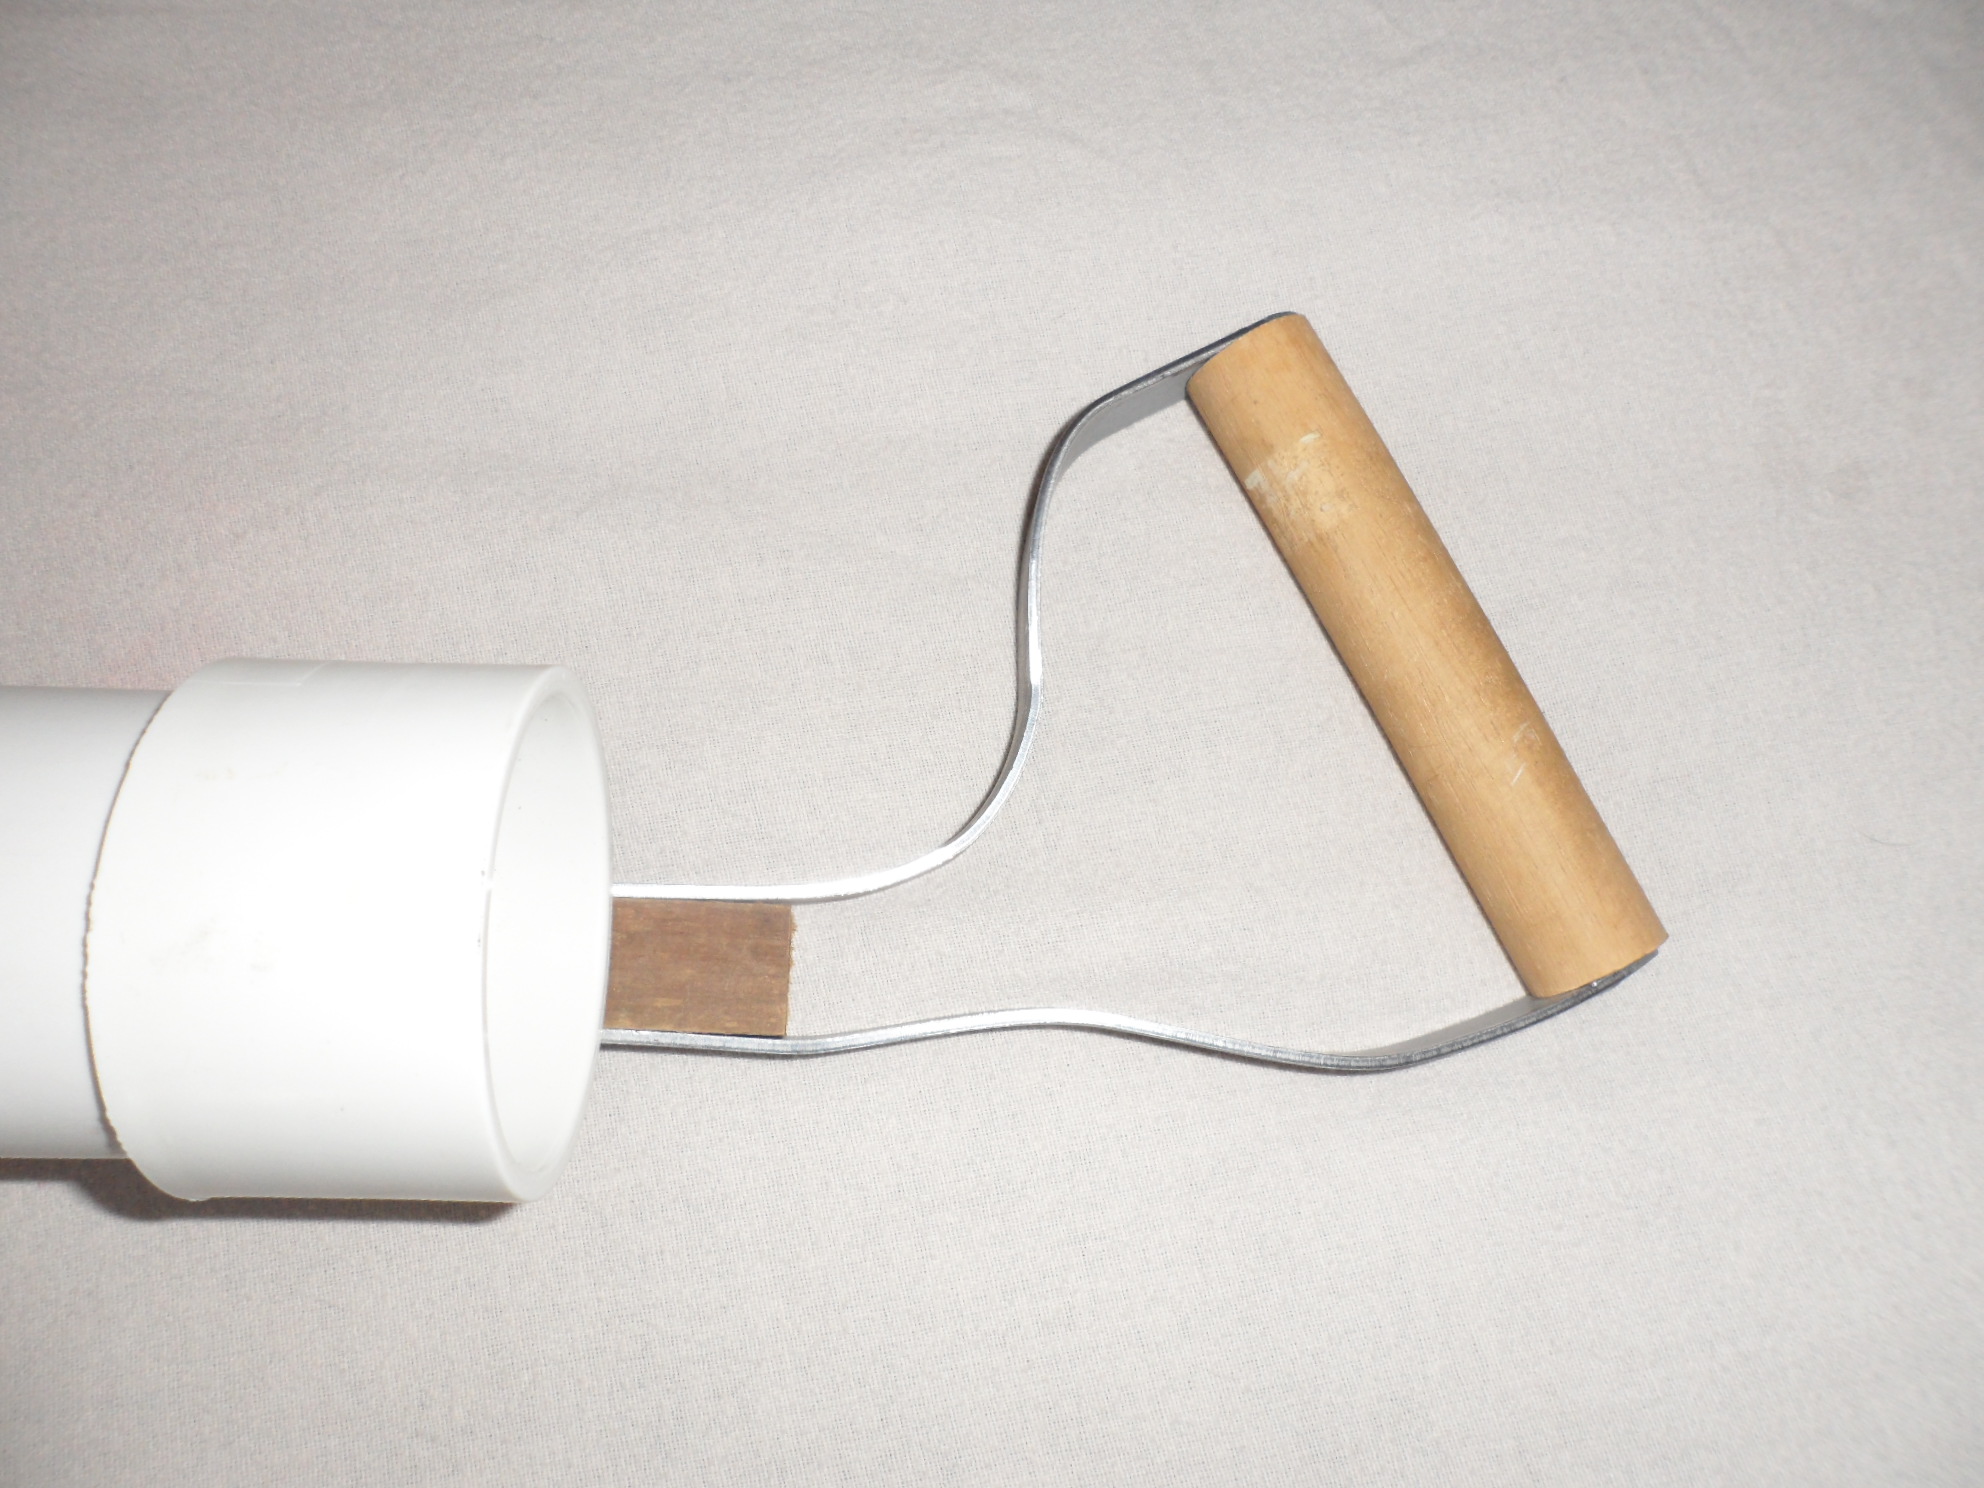
Two views of the handle when assembled to the body:
|
 |
 |
|
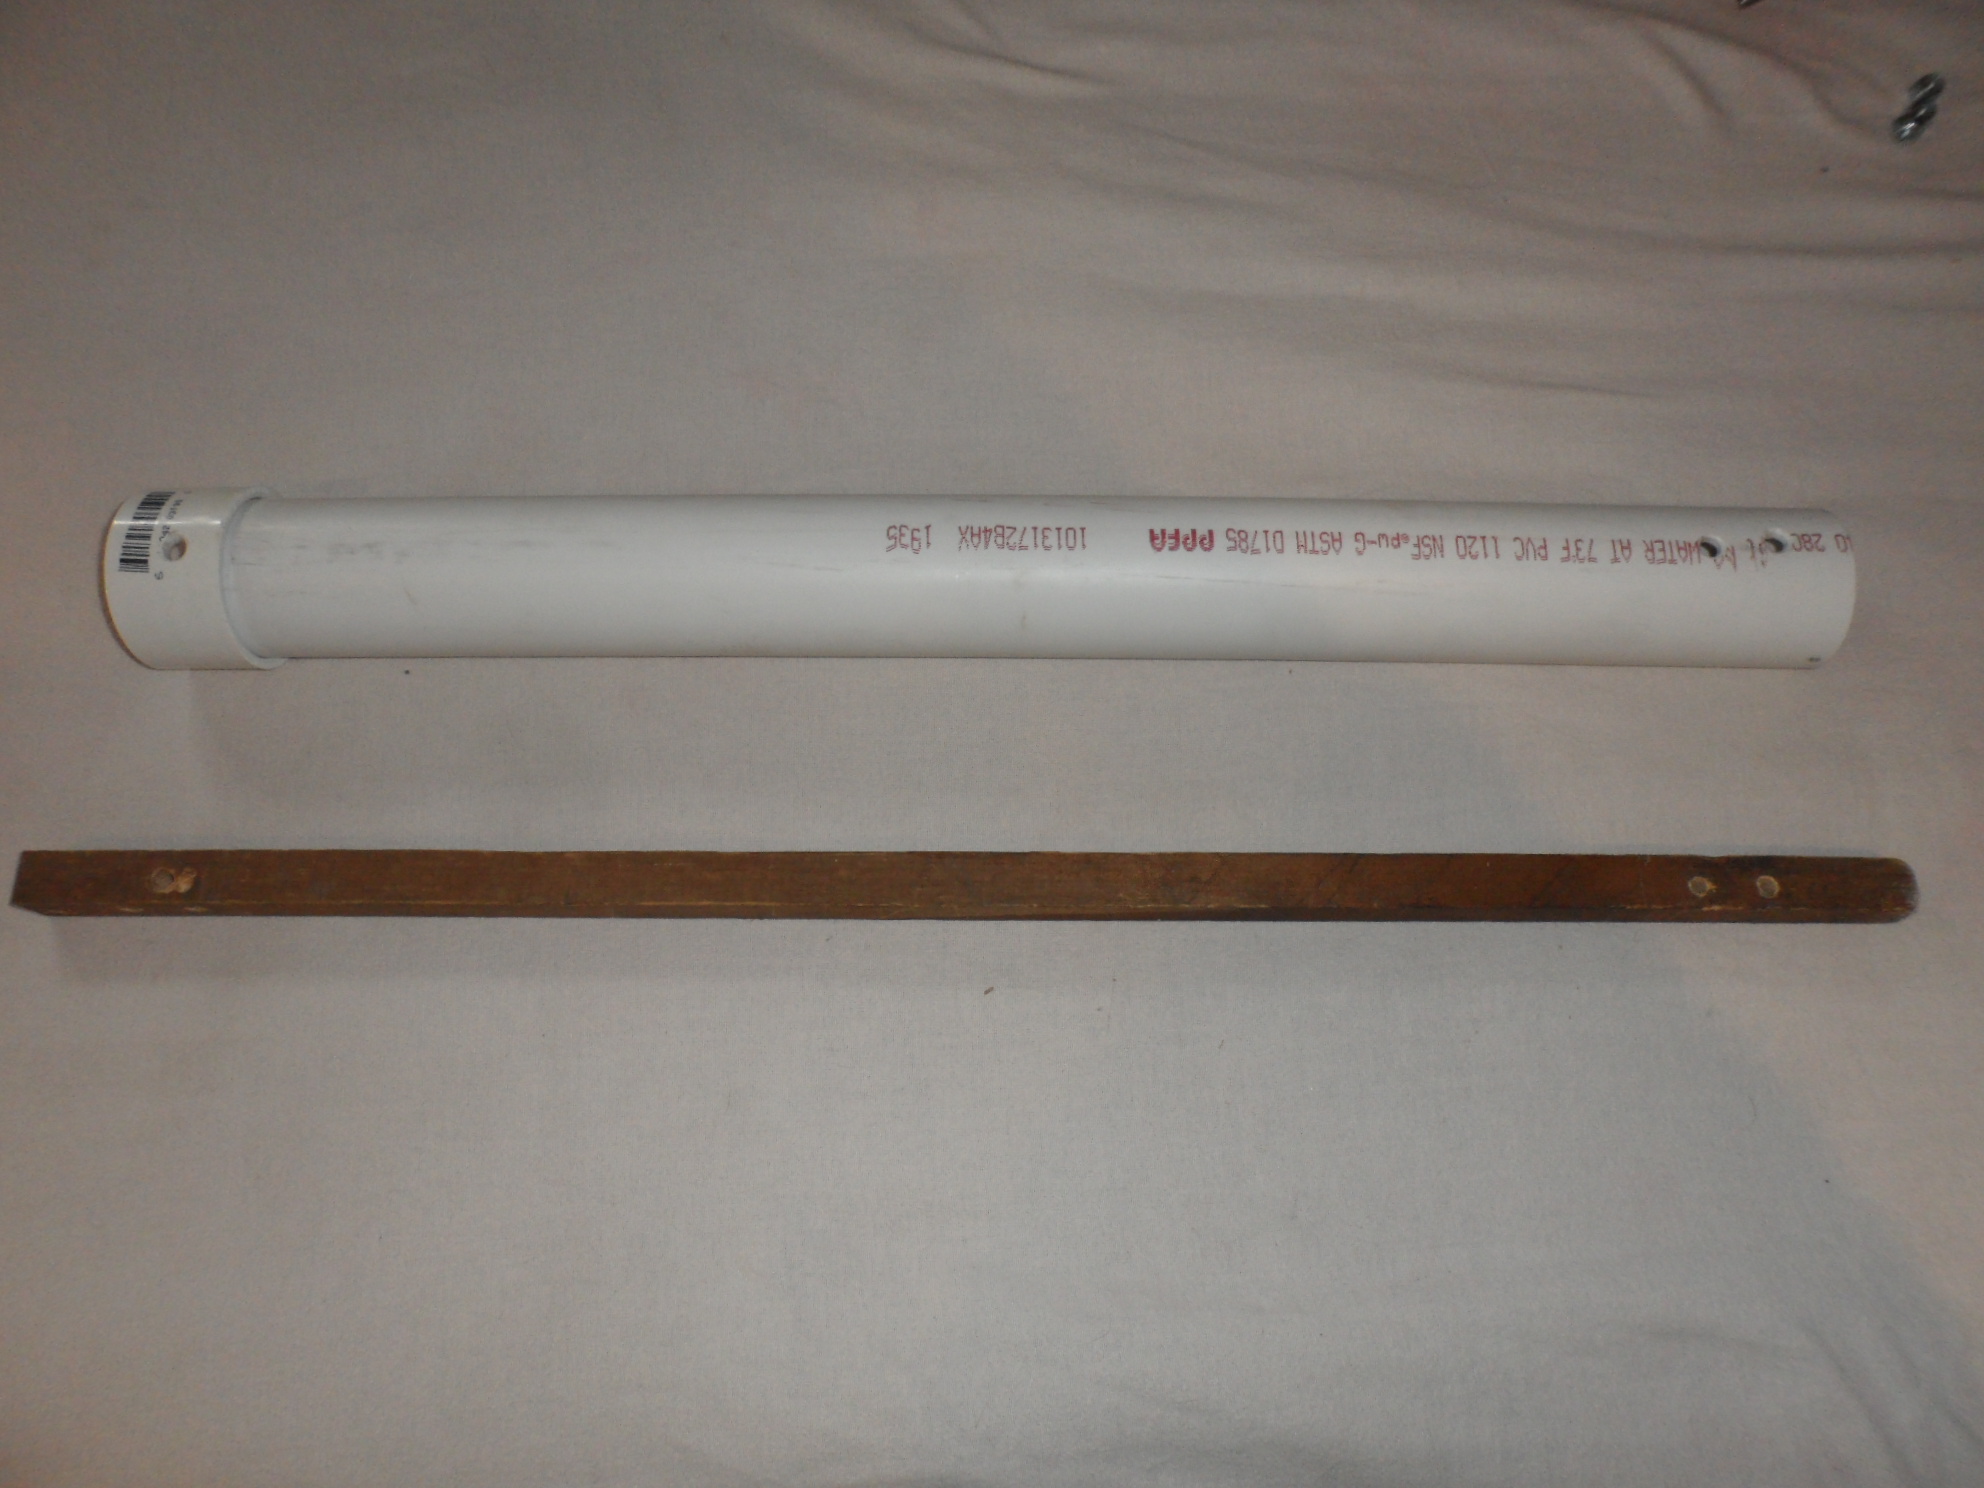
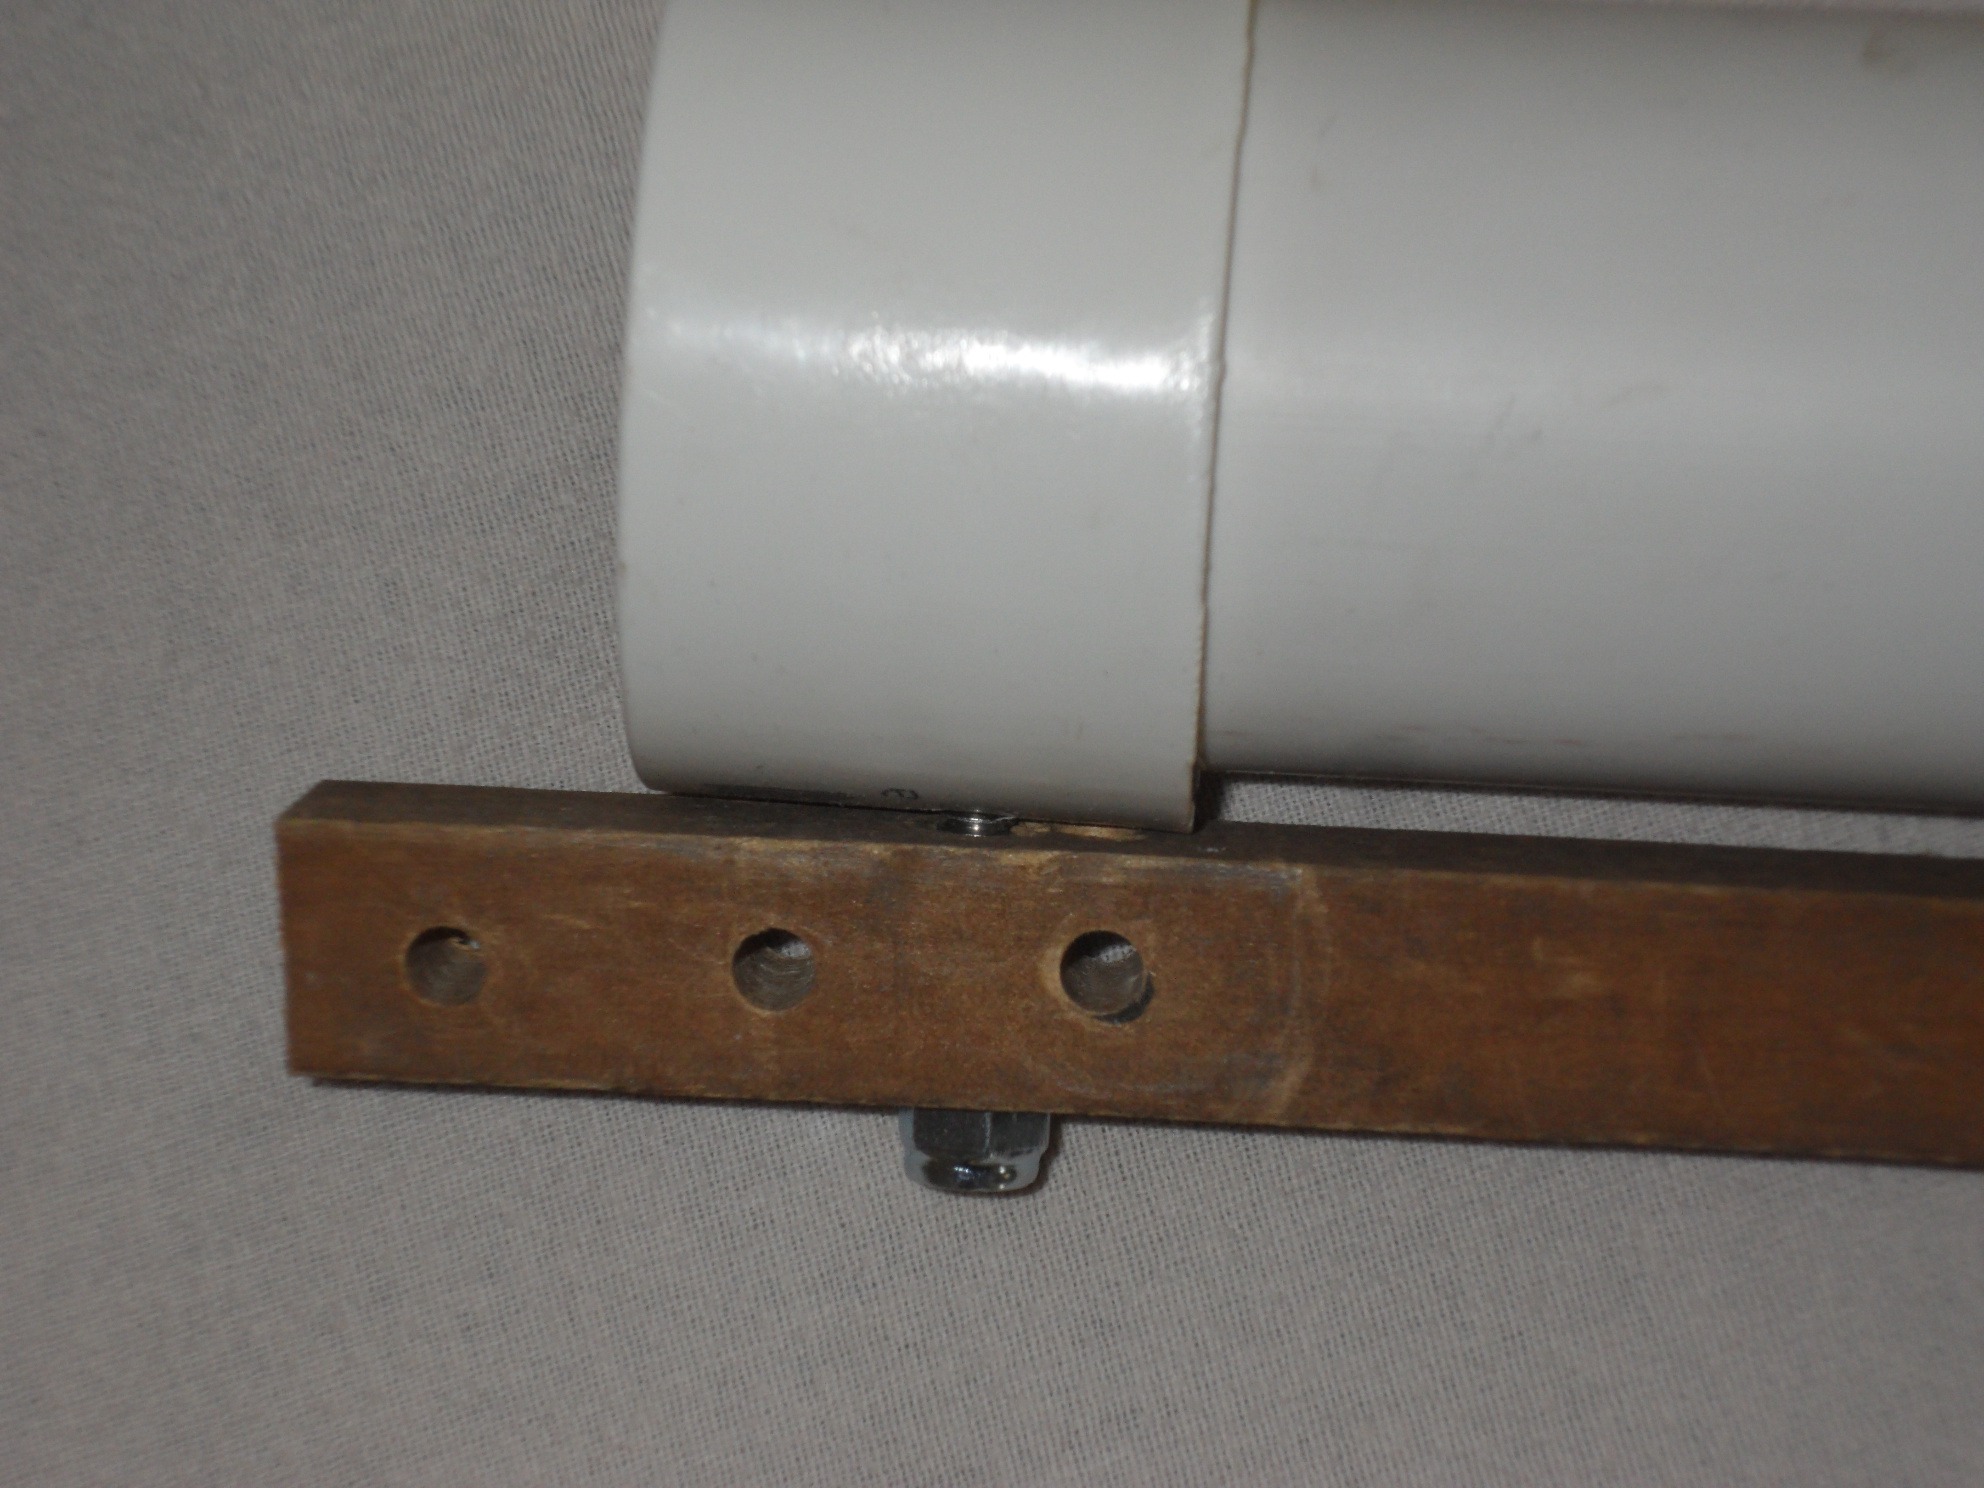
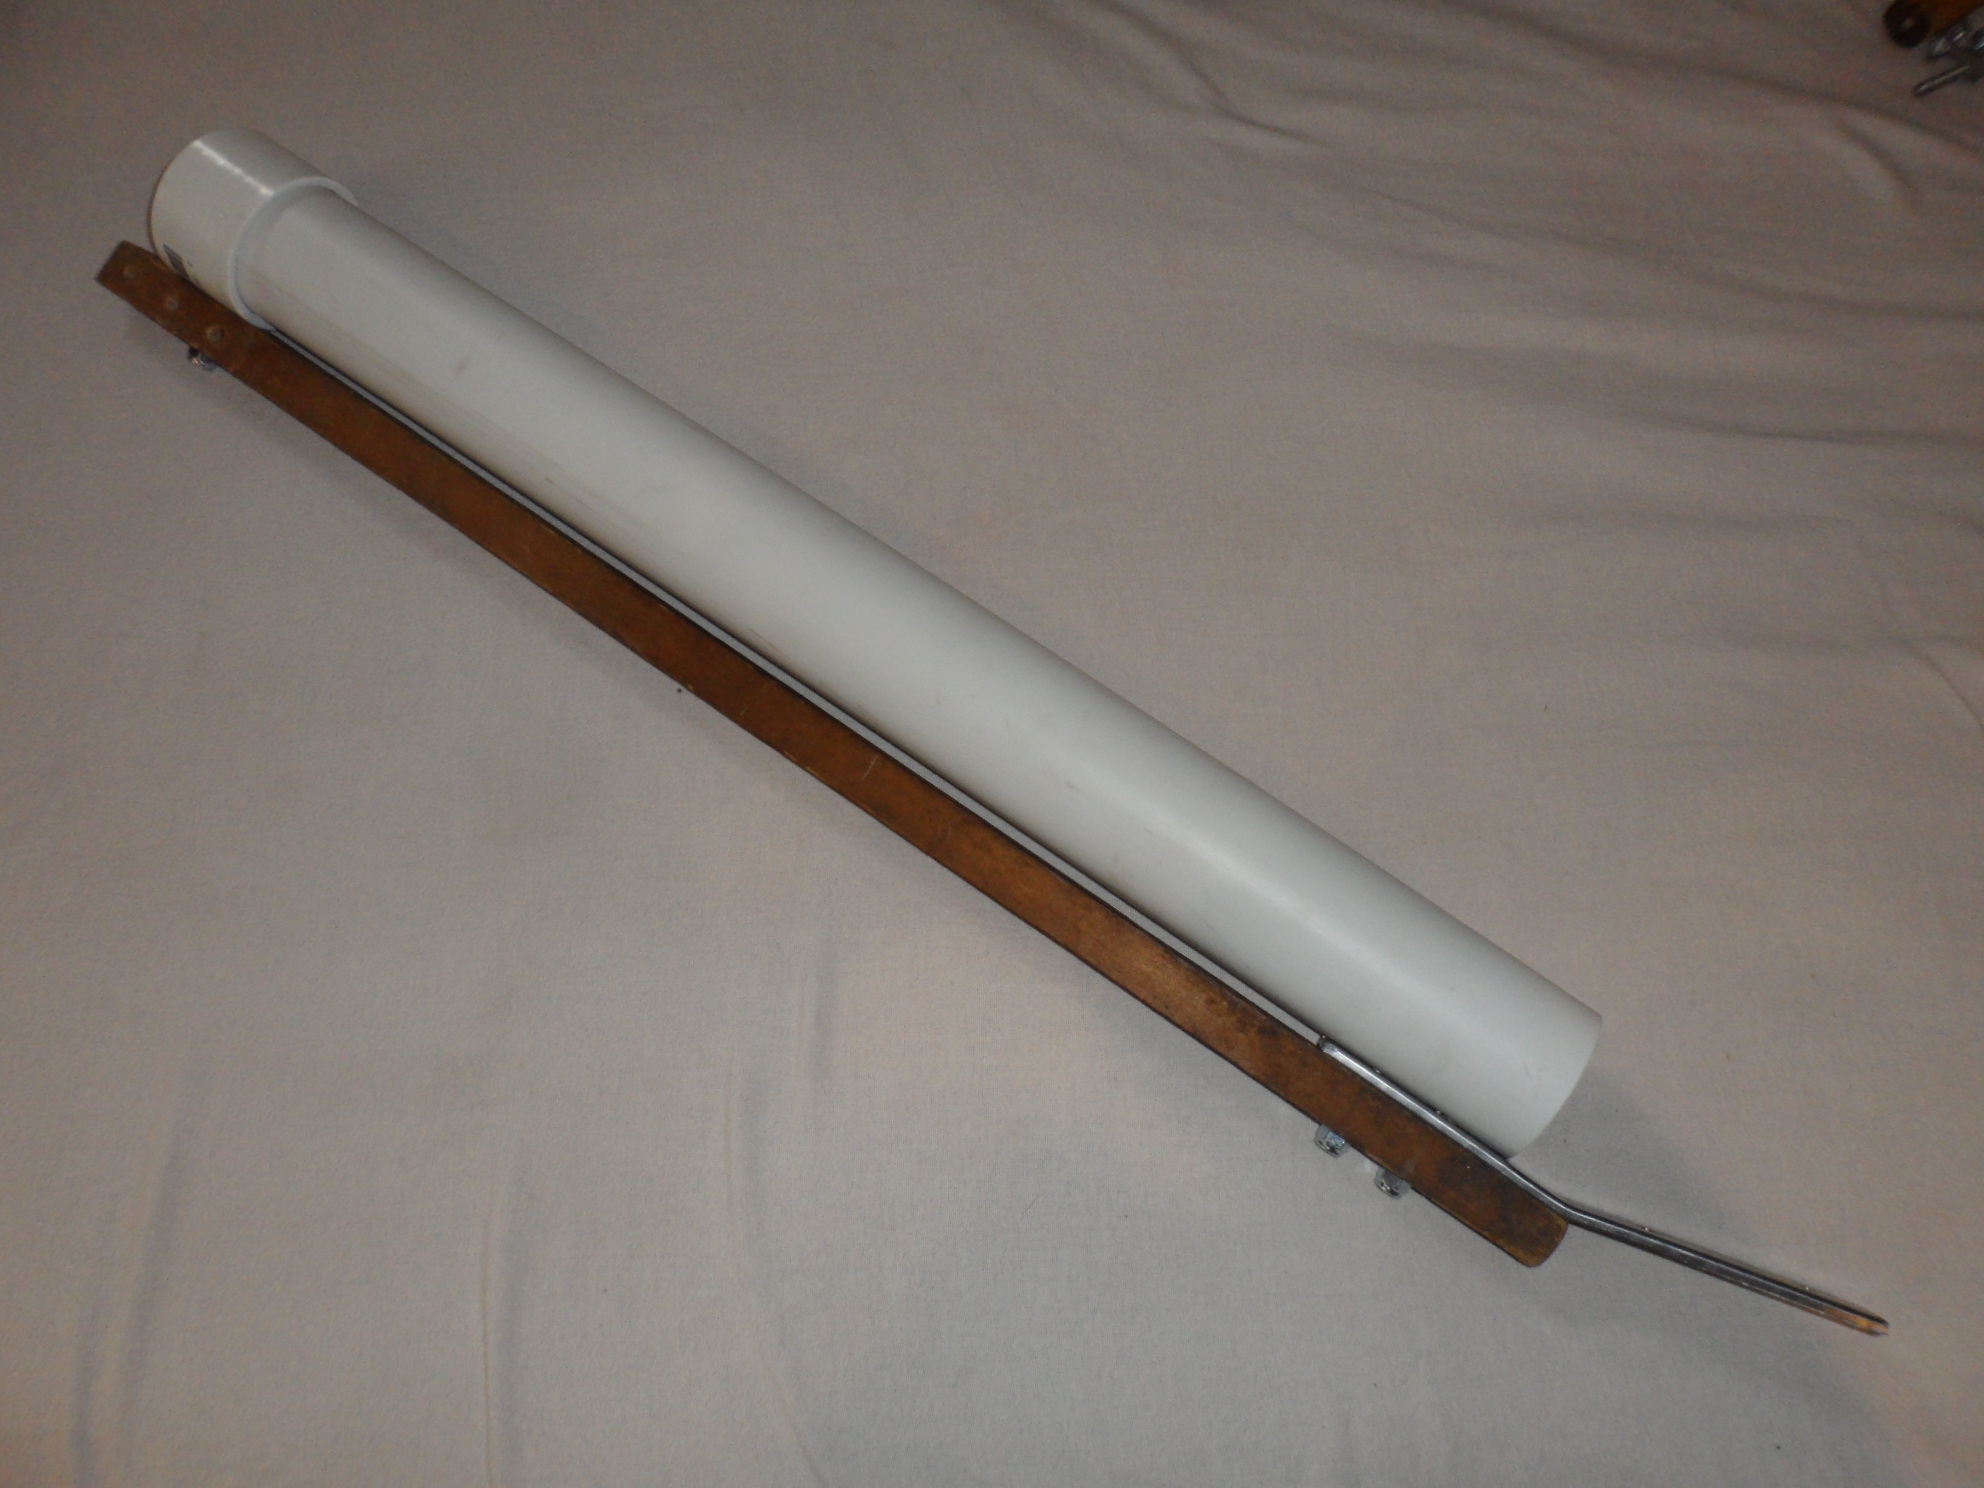
The body is composed of three pieces: a 27" piece of square wood stock. I used 7/8" since that is what I had around here. A 24" piece of 2" PVC pipe and third A 2" PVC pipe coupling.
|
 |
|
|
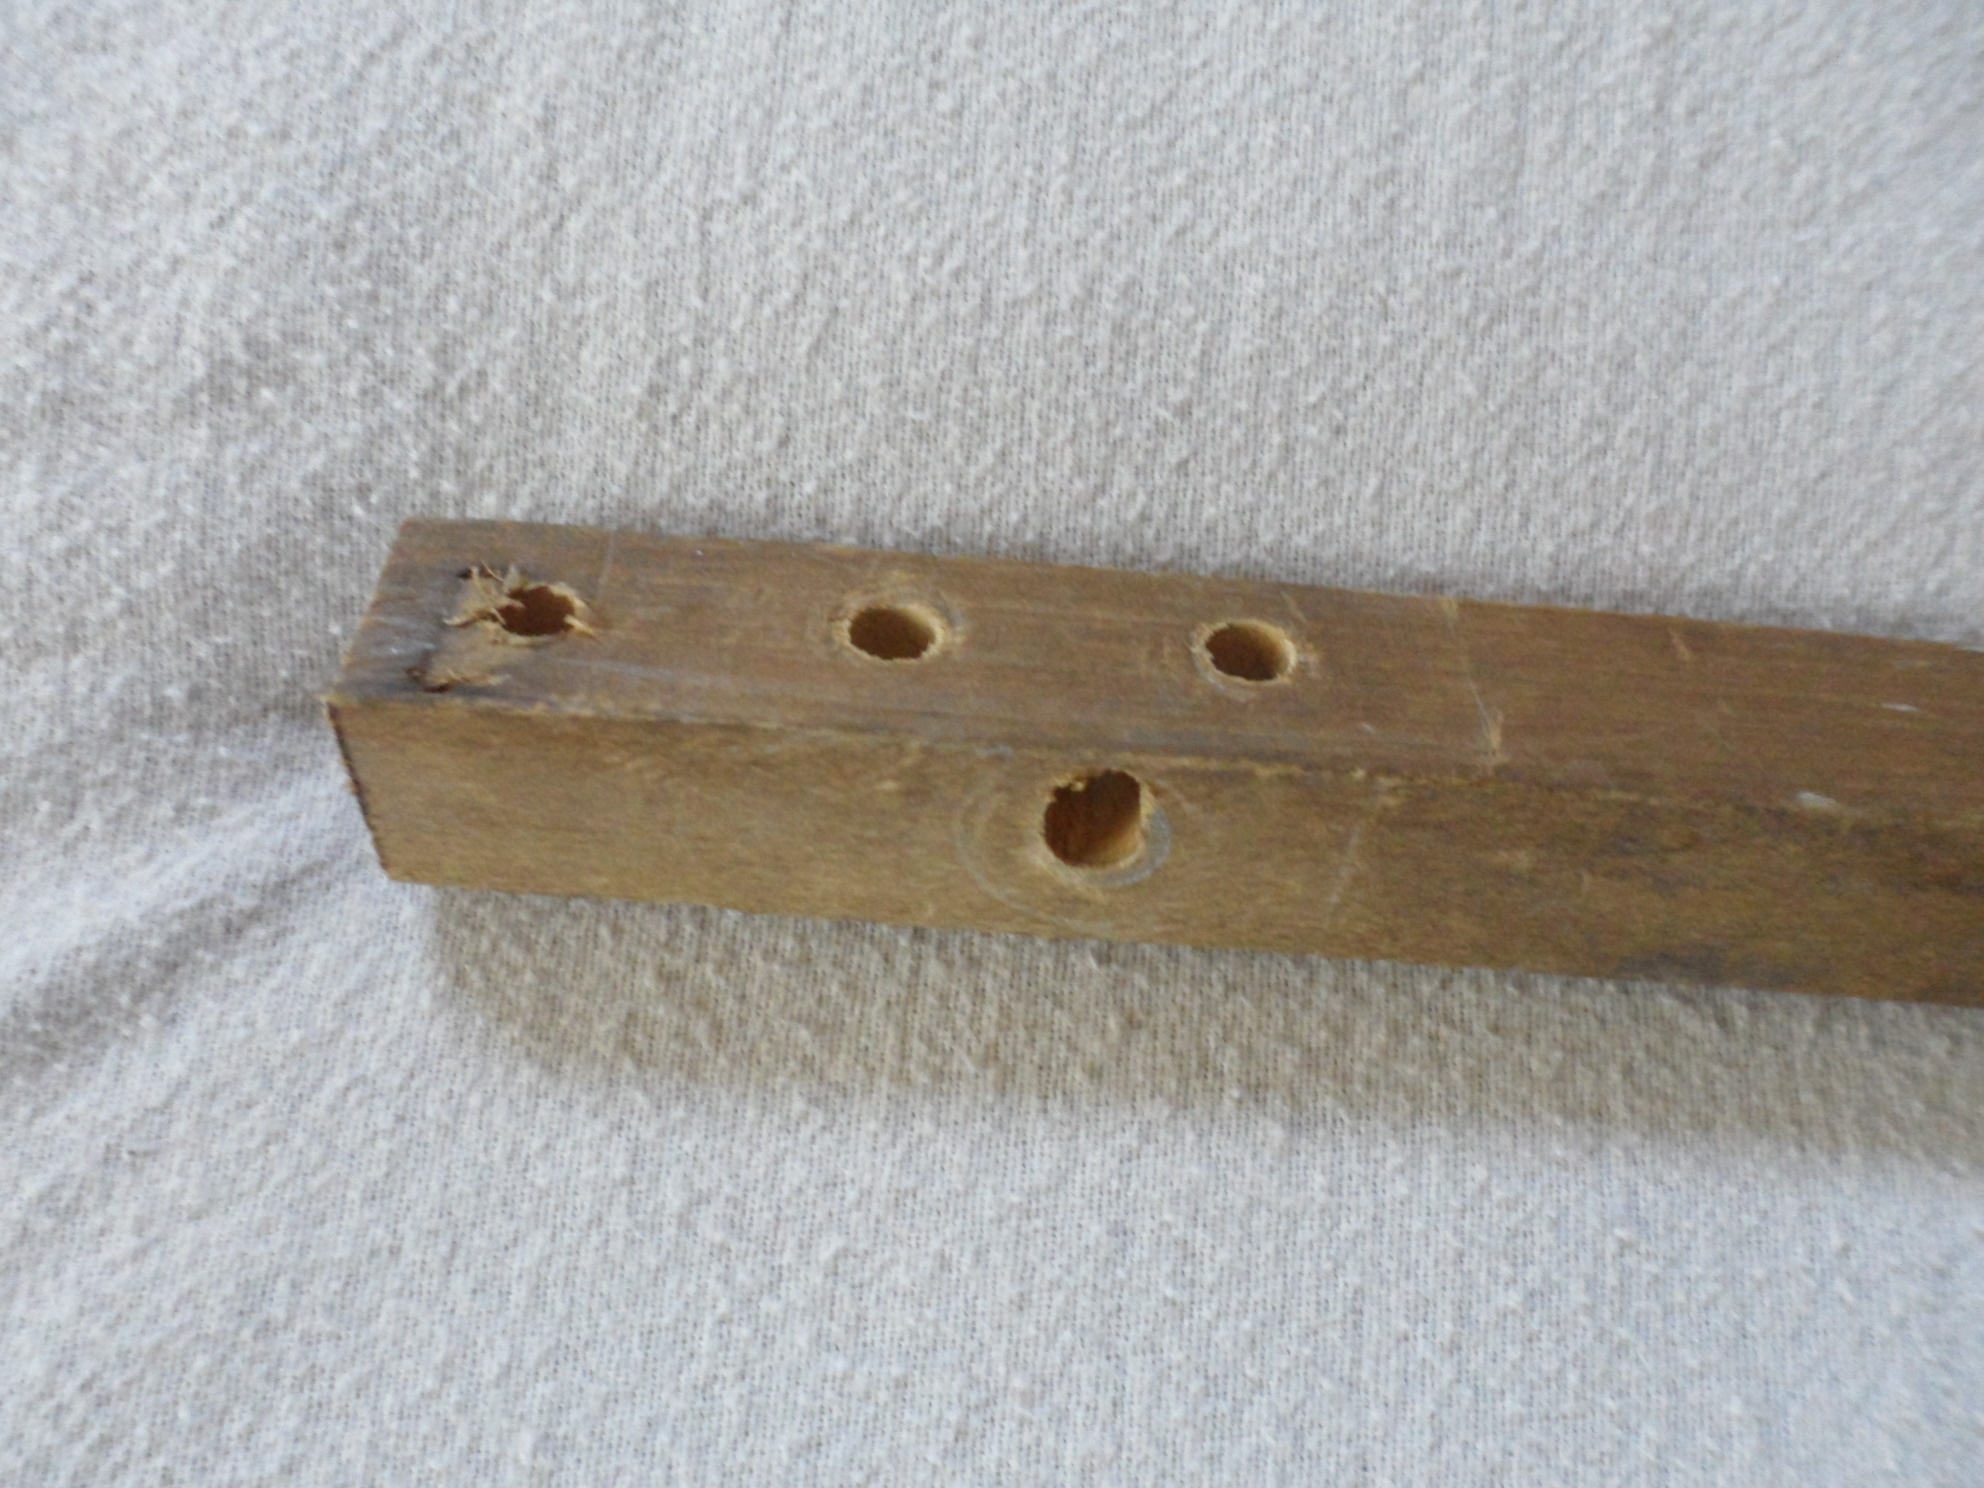
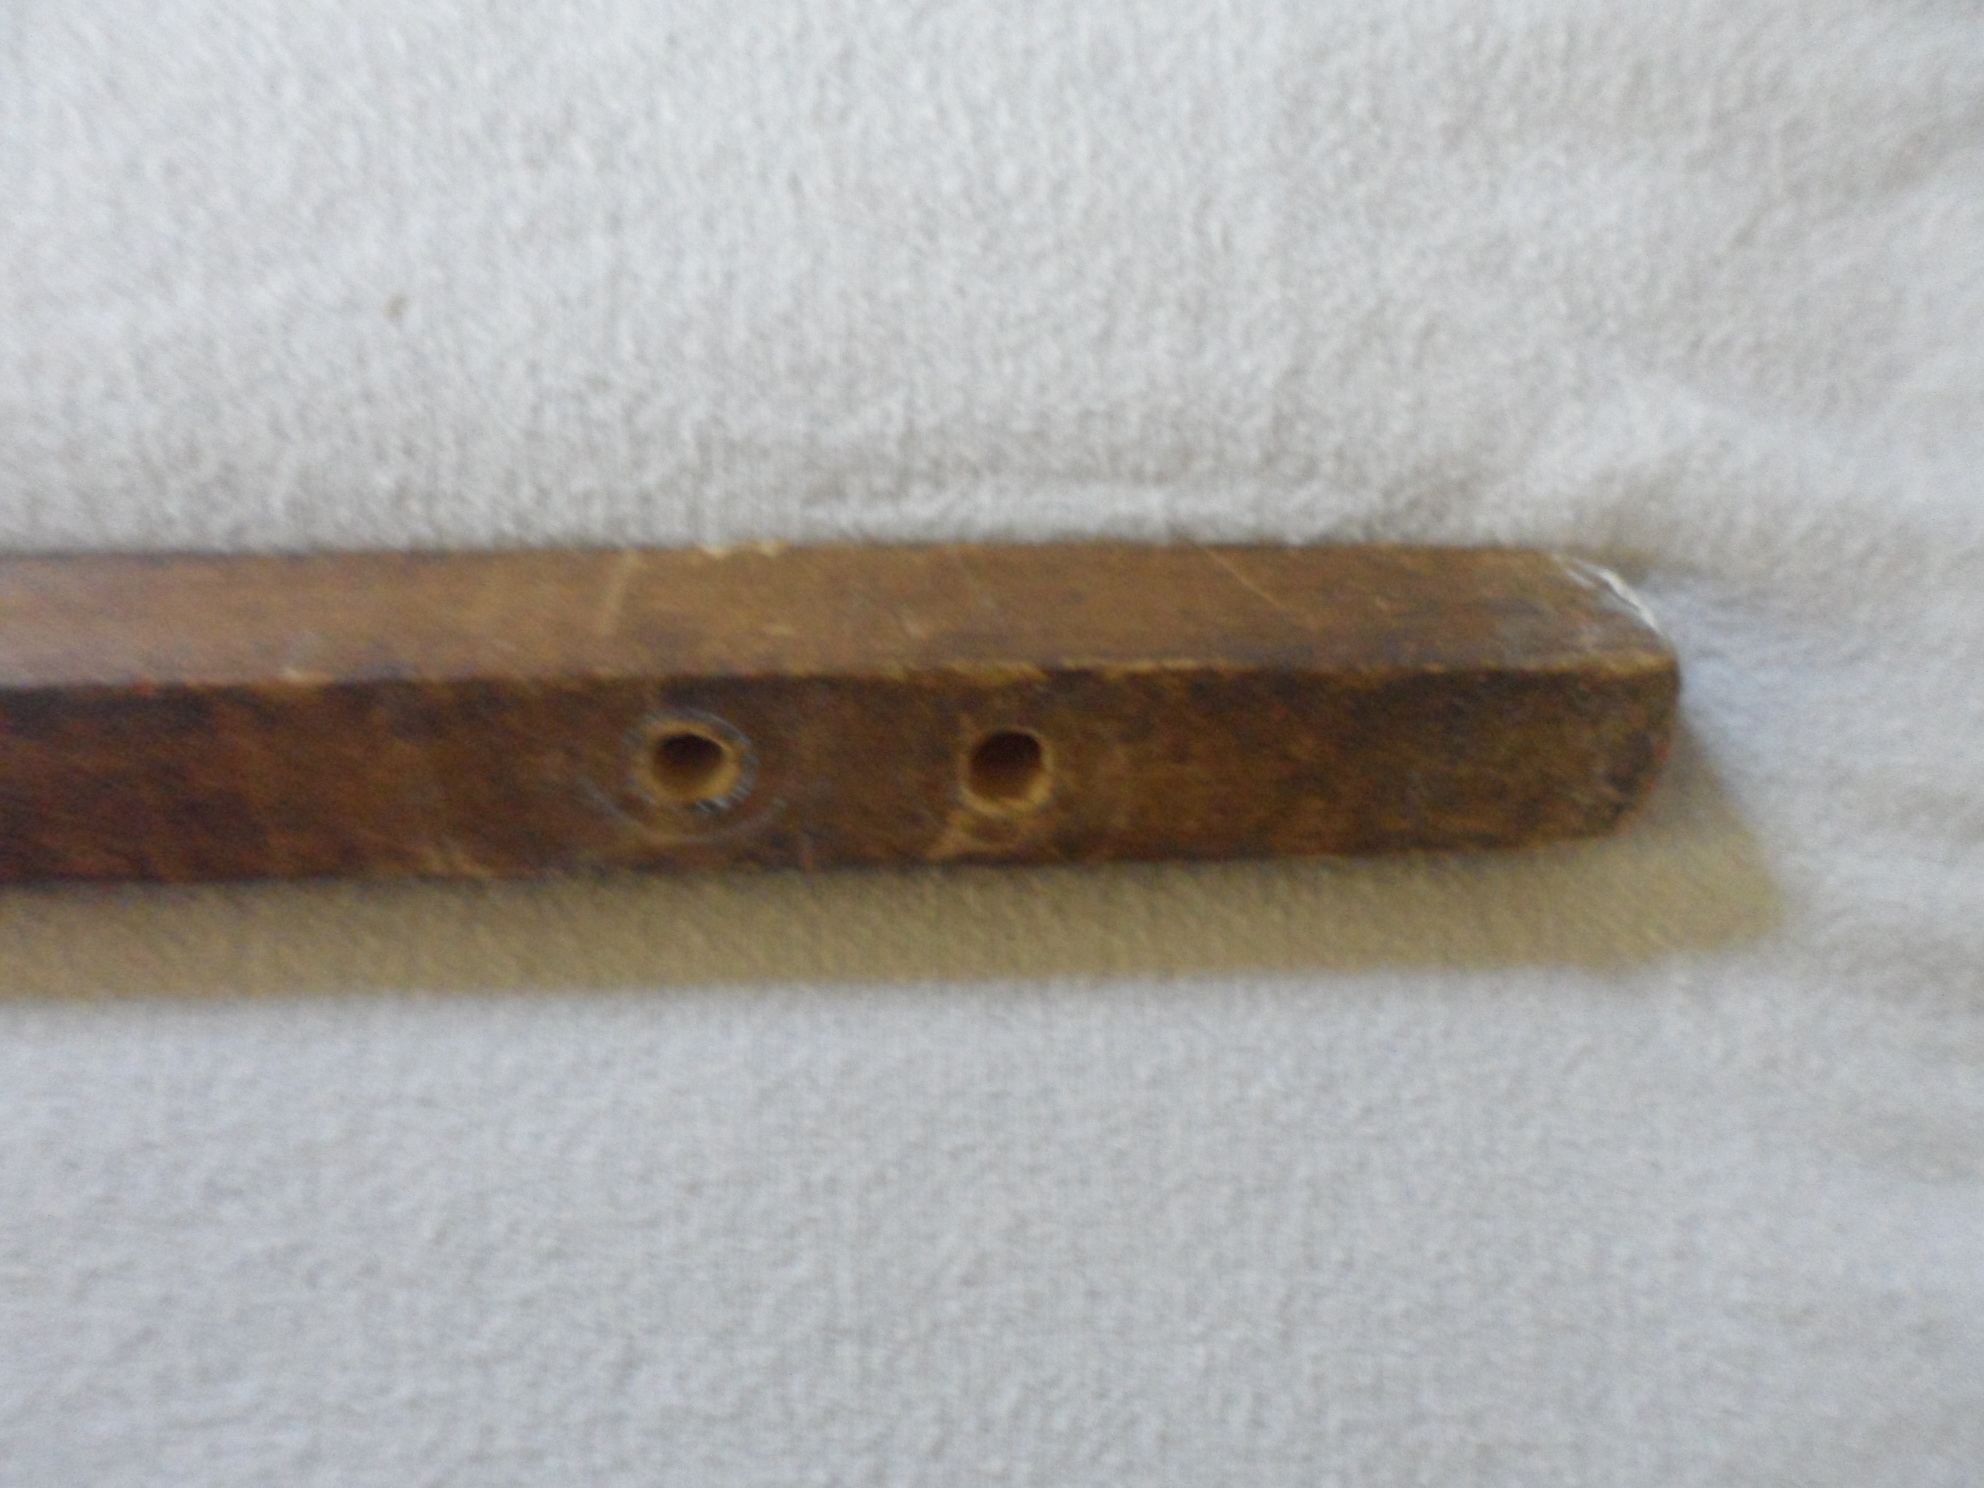
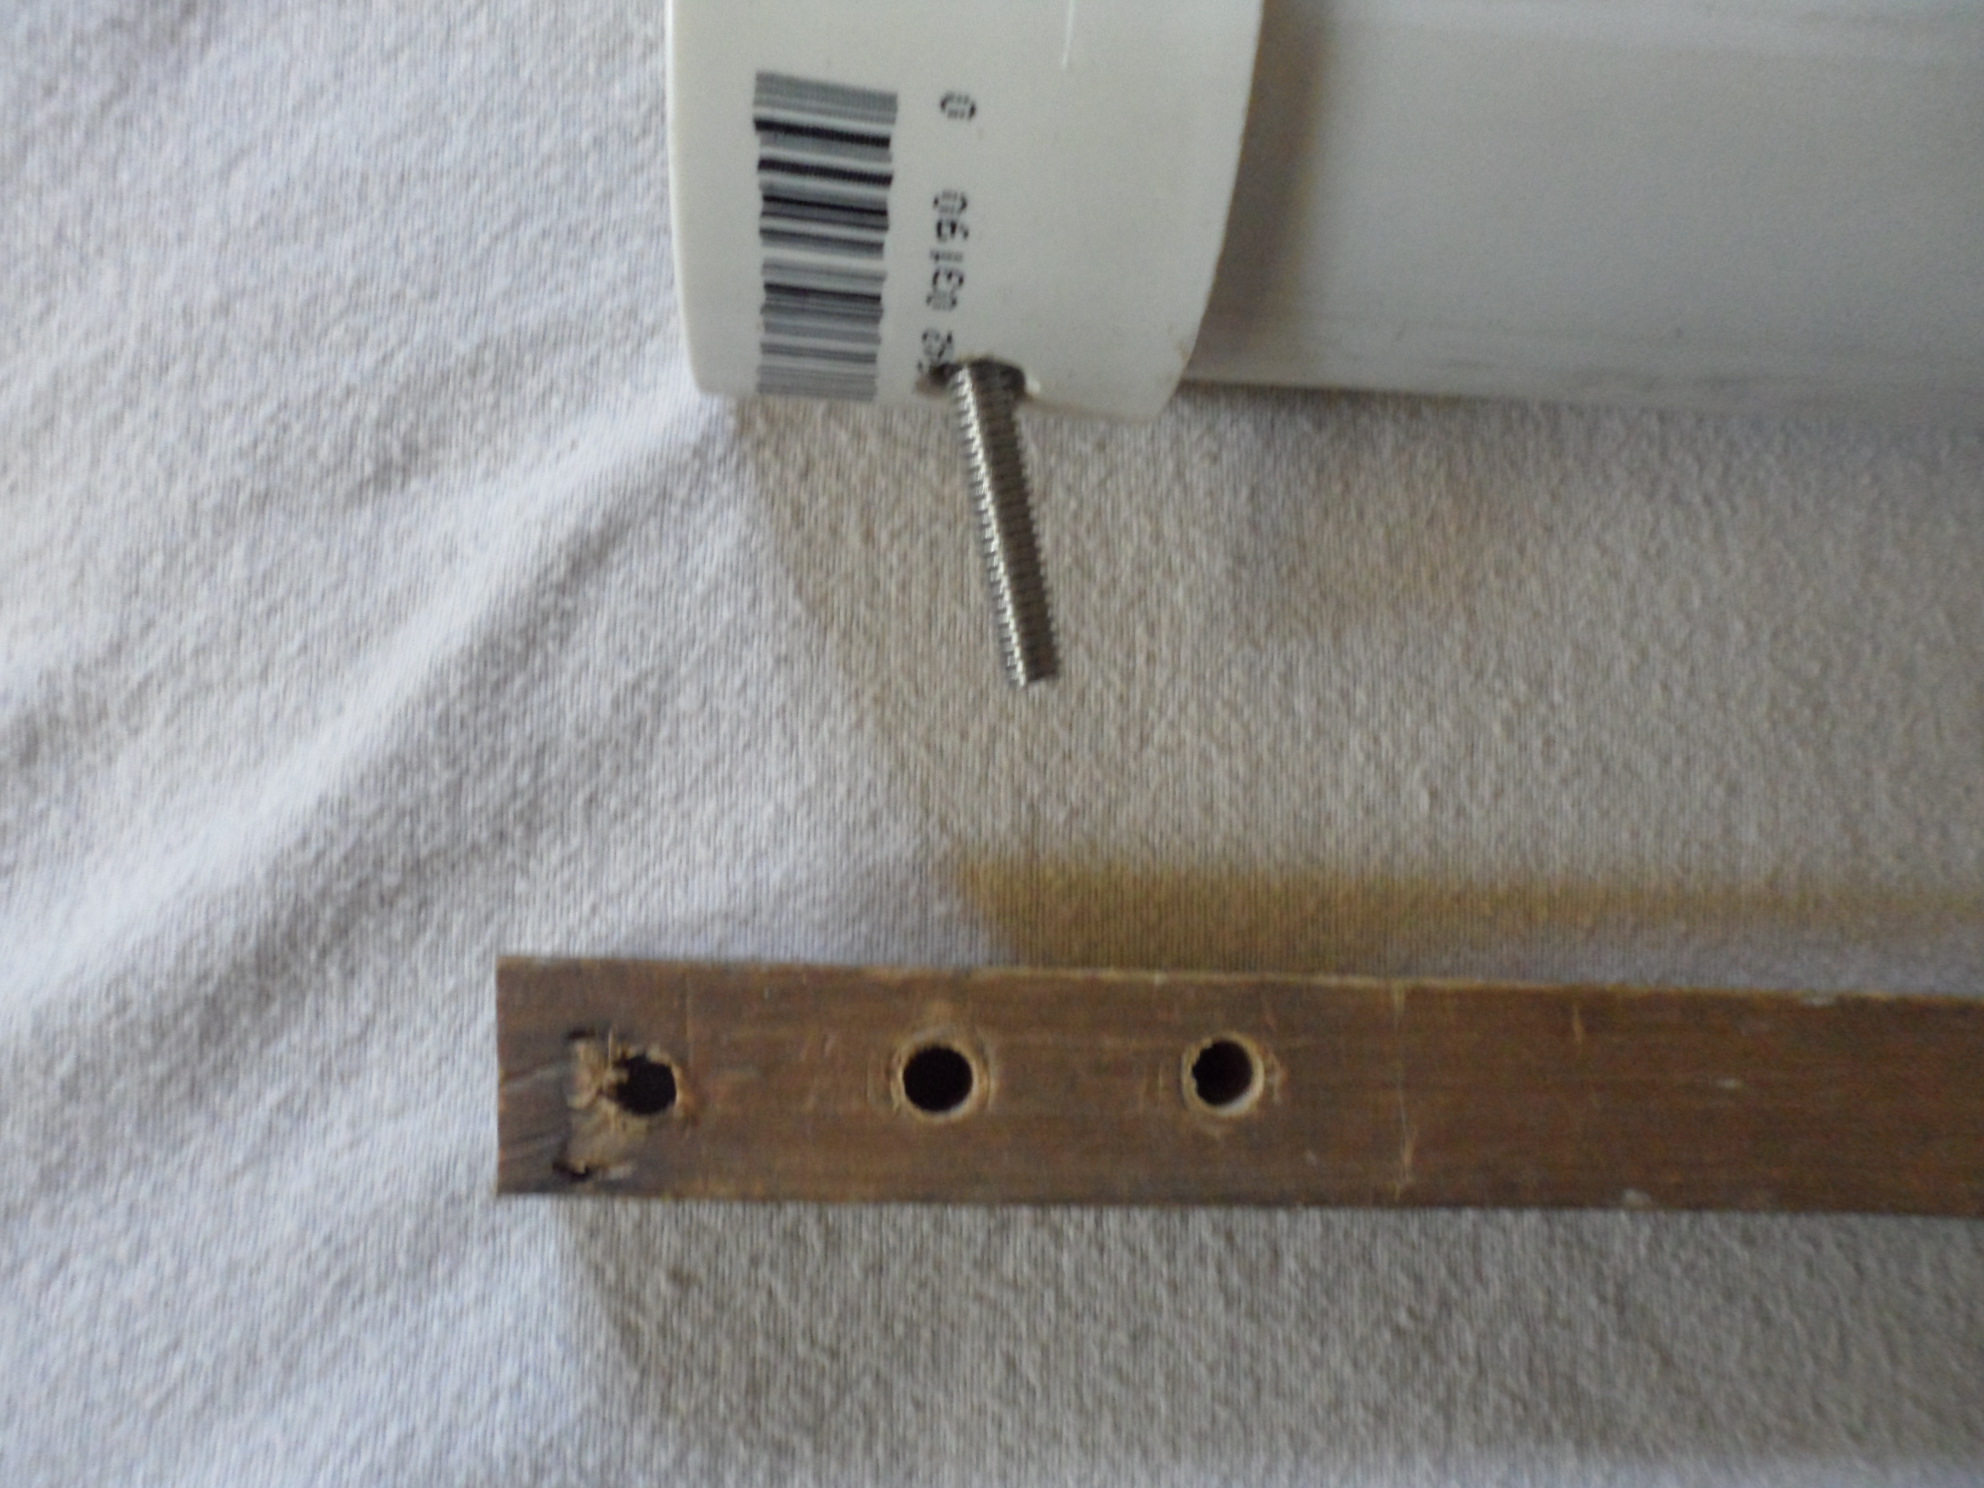
The 3 holes in the left picture are where the Handle mounts (1" spacing, 1/4" dia.) On the right is the lower end you see a pair of 1/4" holes. They are 2 " and 3" from the end. The single hole on the left is 2" from that end. The PVC pipe will be needing three holes drilled. They are at 1", 2"s and 23 3/4"s from the bottom. the single hole will go thru your coupling and hold it in place.
|
 |
 |
|
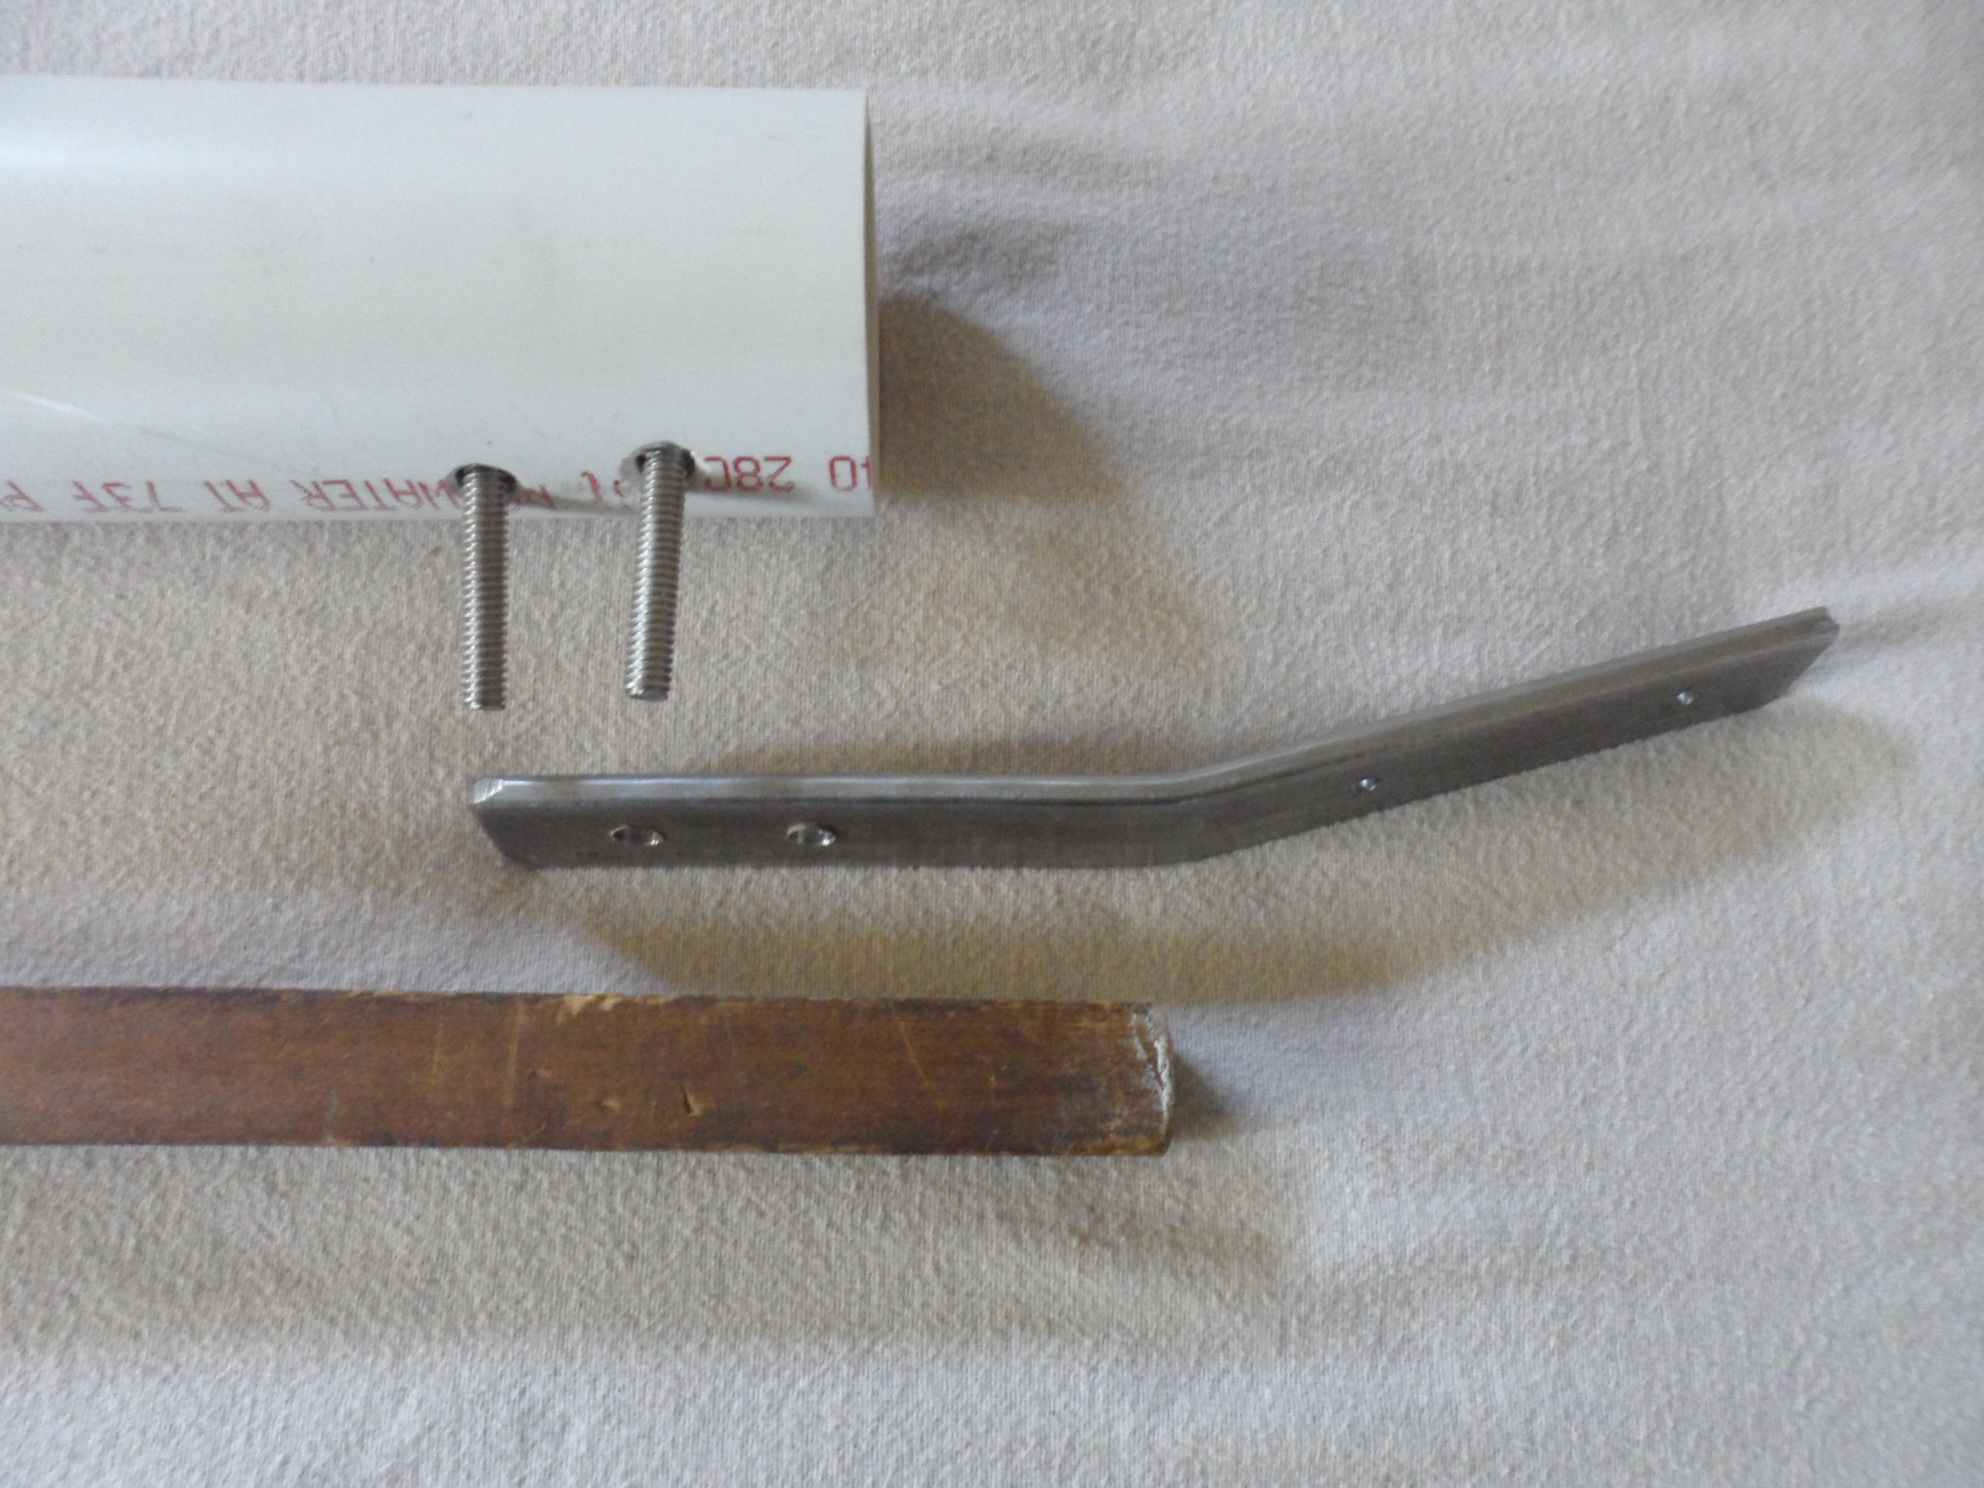
At this point you will need the 1" x 1/4" x 8" piece of metal. The holes are at 1" spacing here as well. On the right they are at 1" and 2" from the end.. On the left they start at 3/4" from the end, the second is 1" over from there. The bend is at the 4" point and is about 20*.
|
 |
|
|
The top end needs be assembled at the same time like shown in these two shots.
|
 |
 |
|
The Body is now assembled. |
 |
|
| Making the Clam-shell Assembly | ||
|
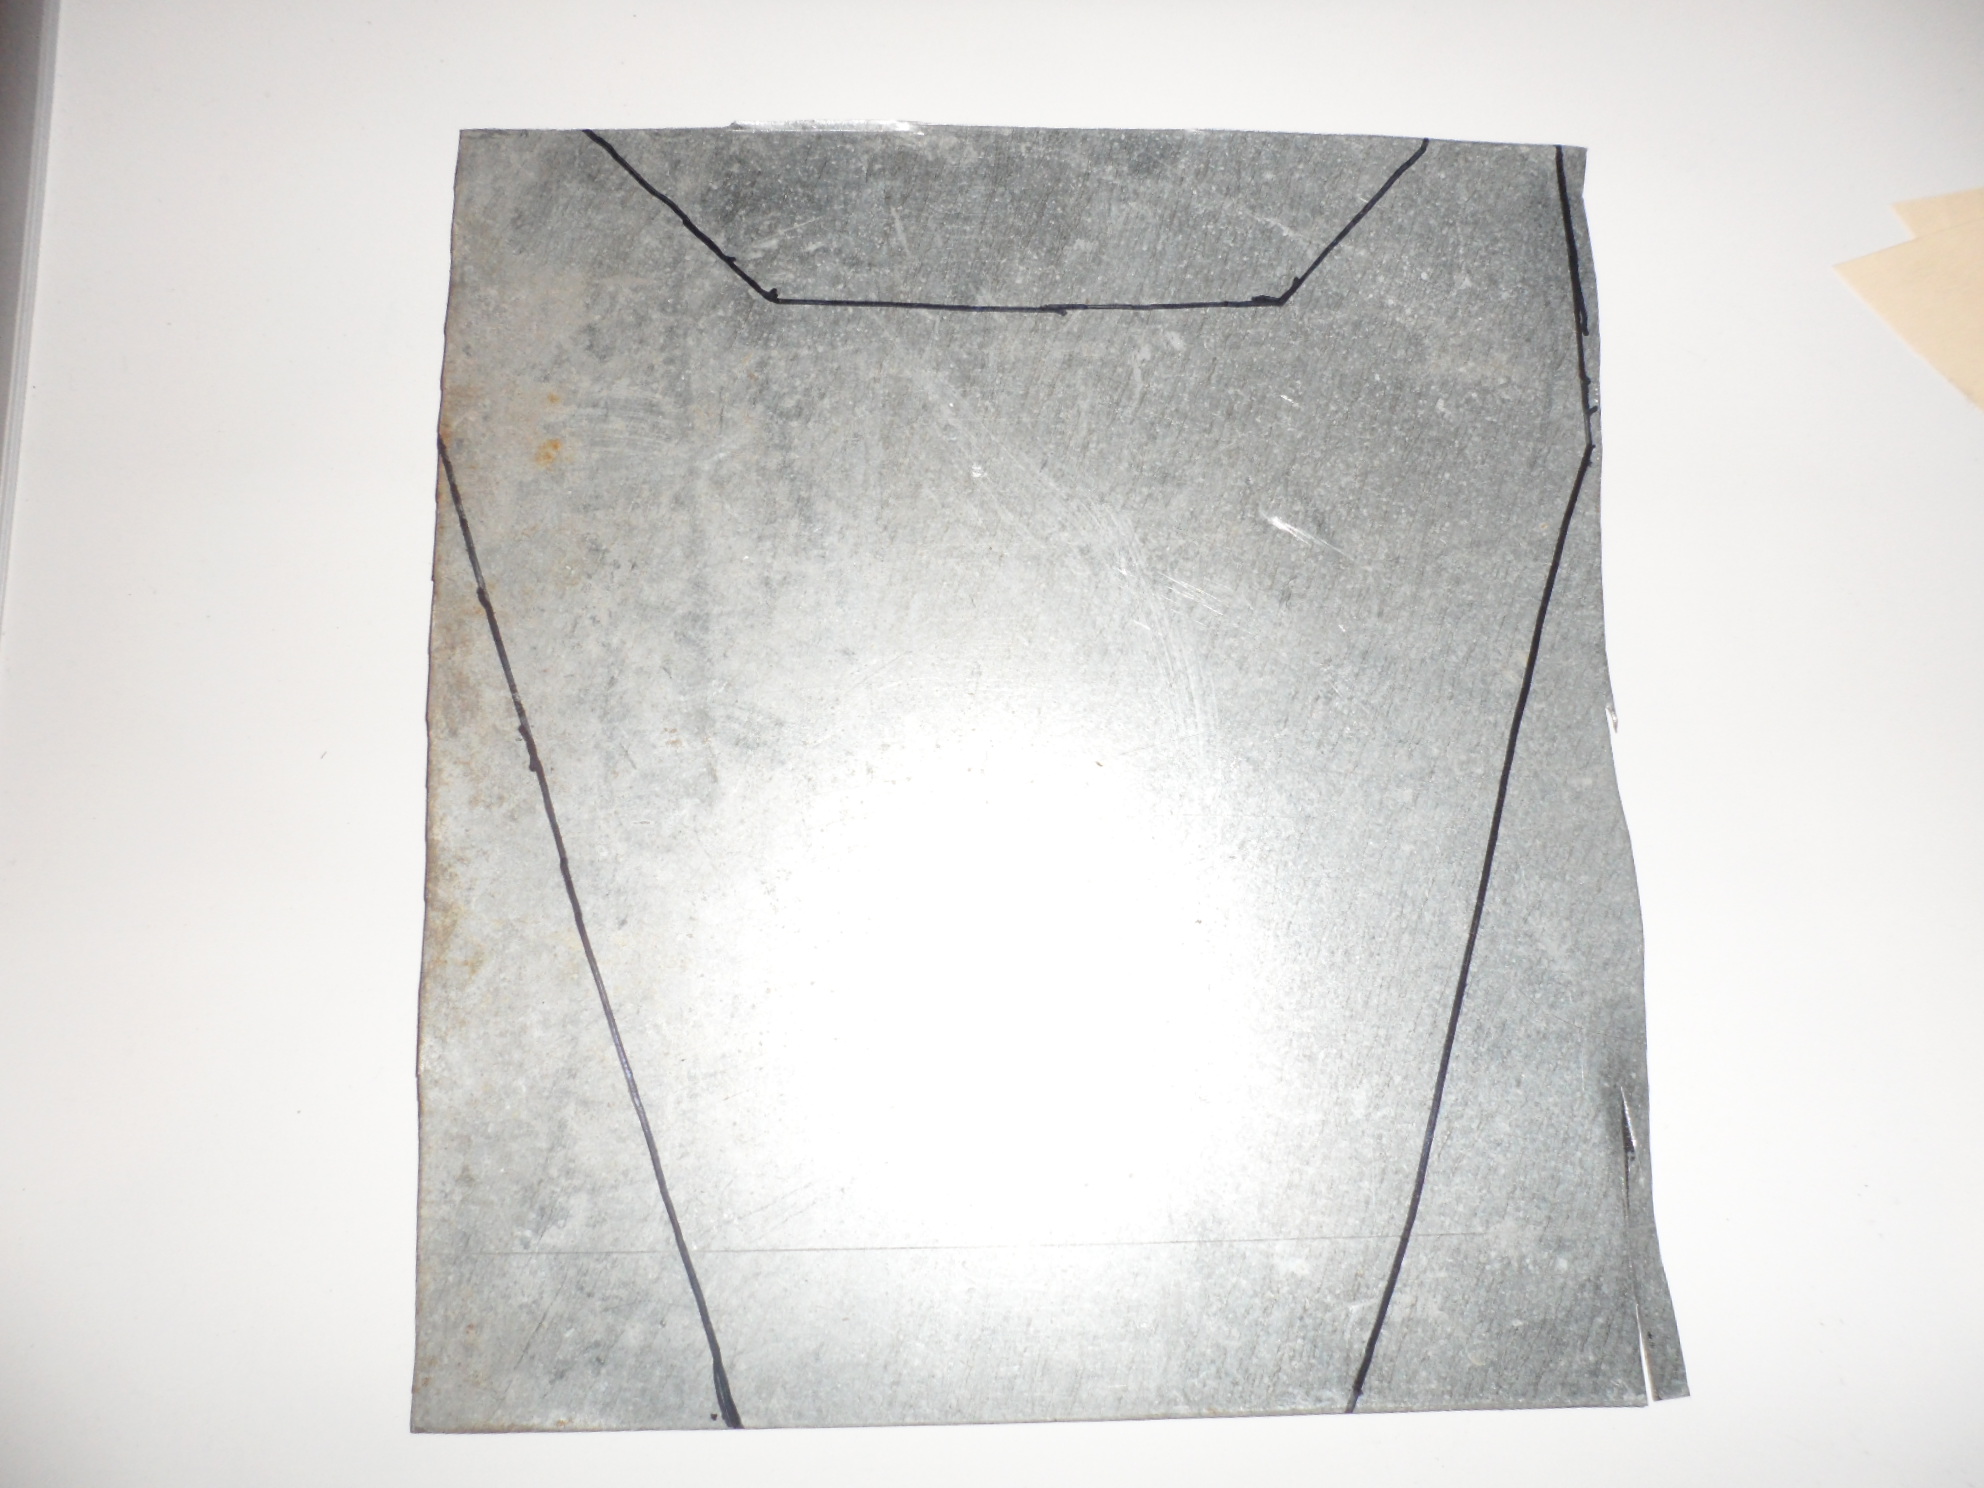
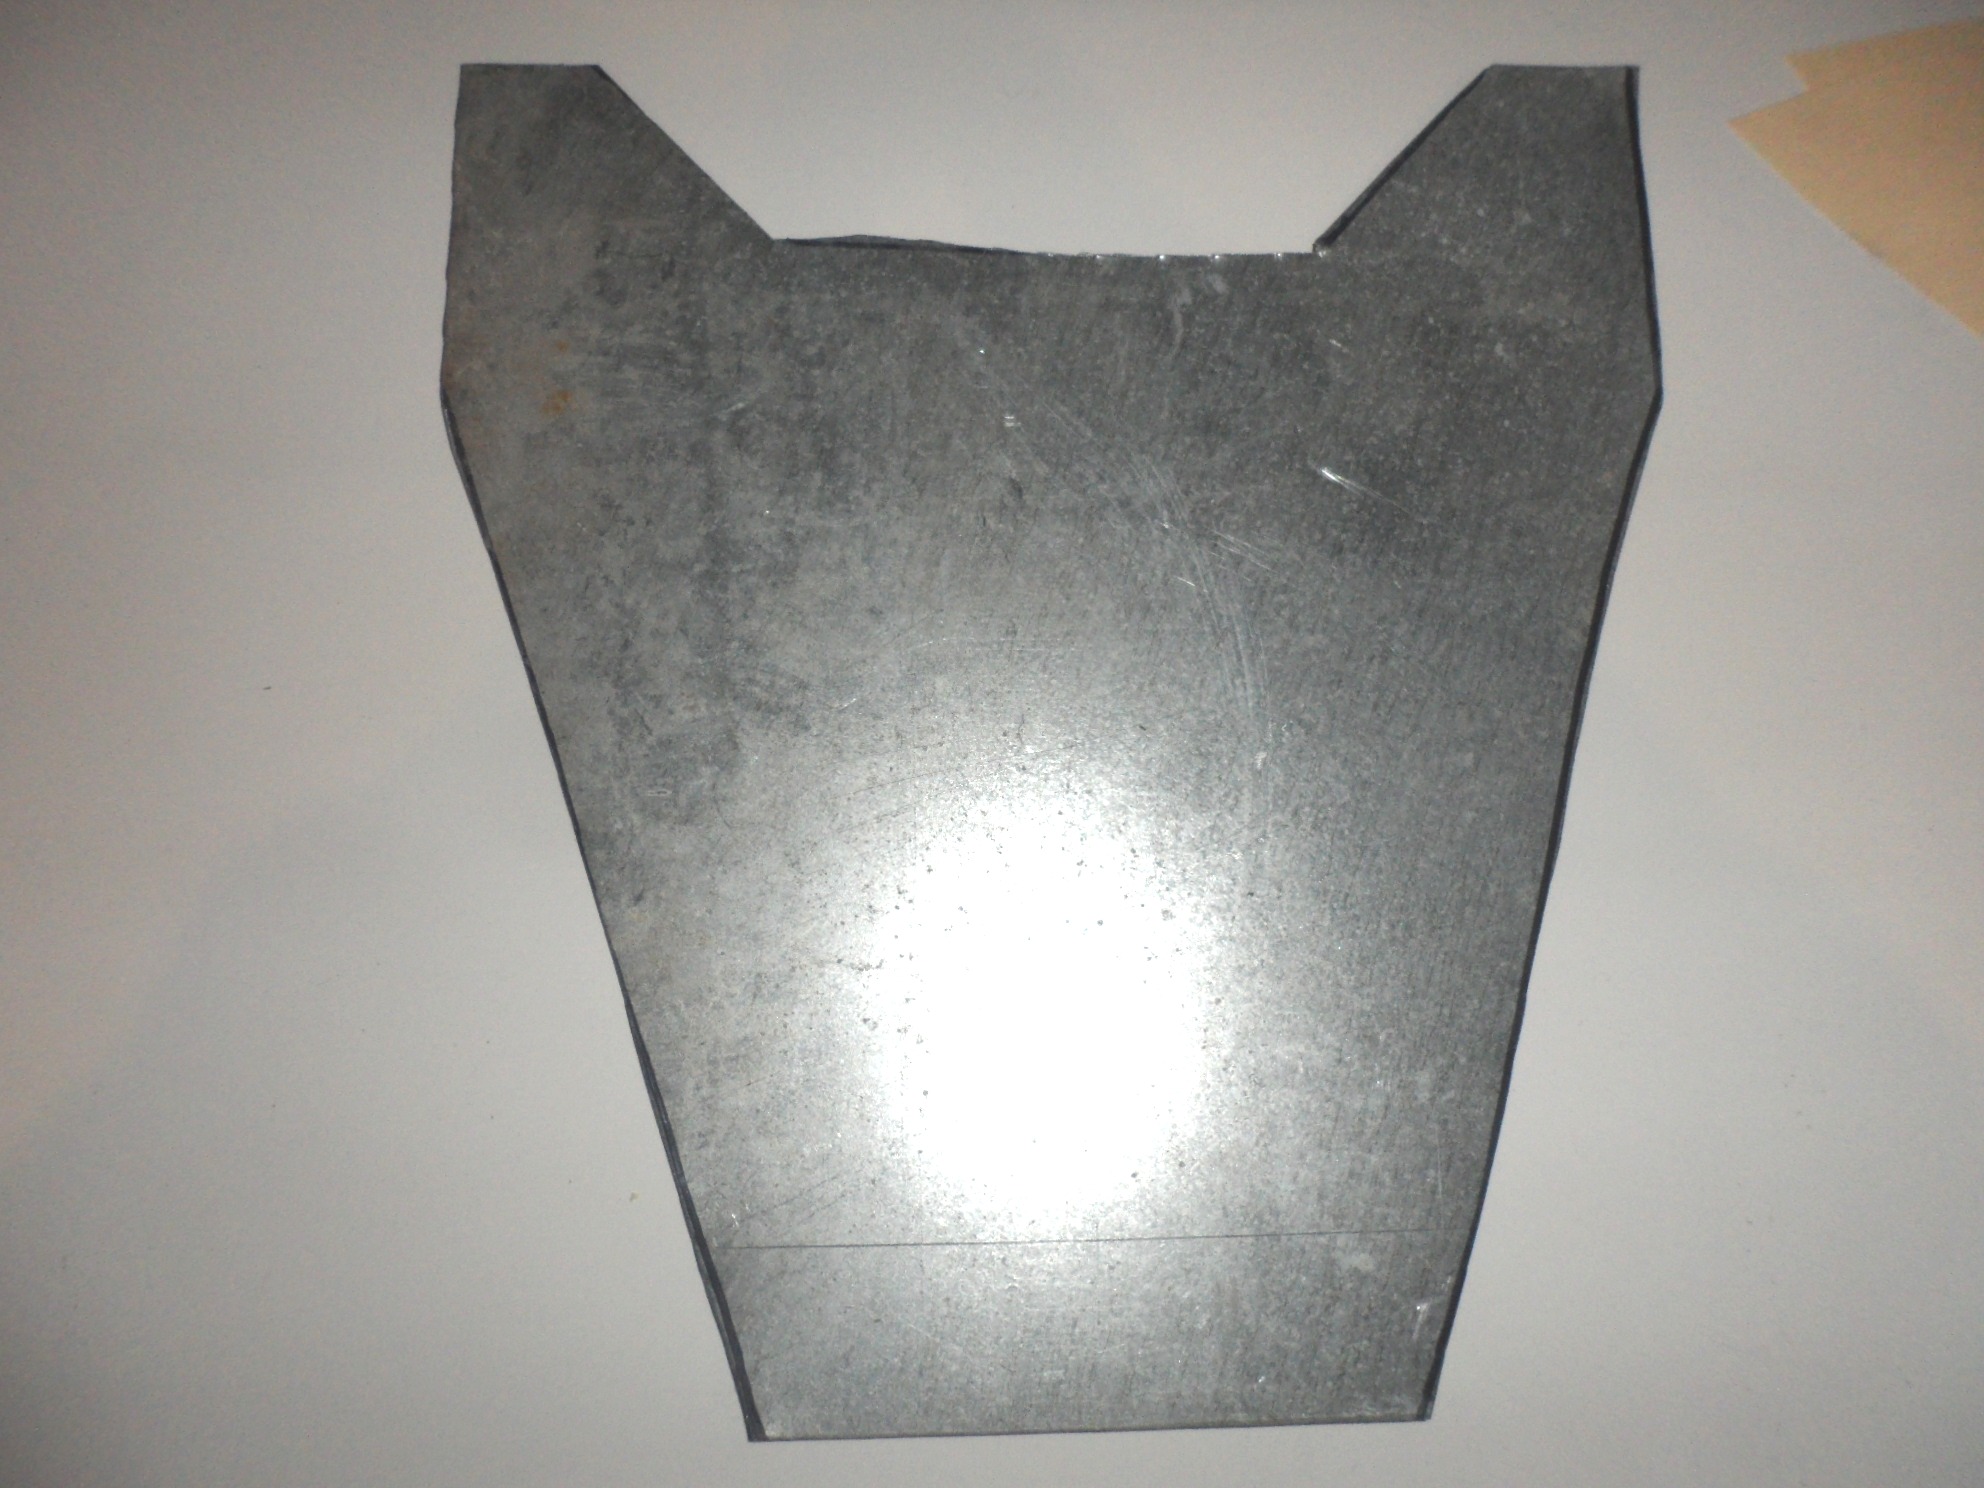
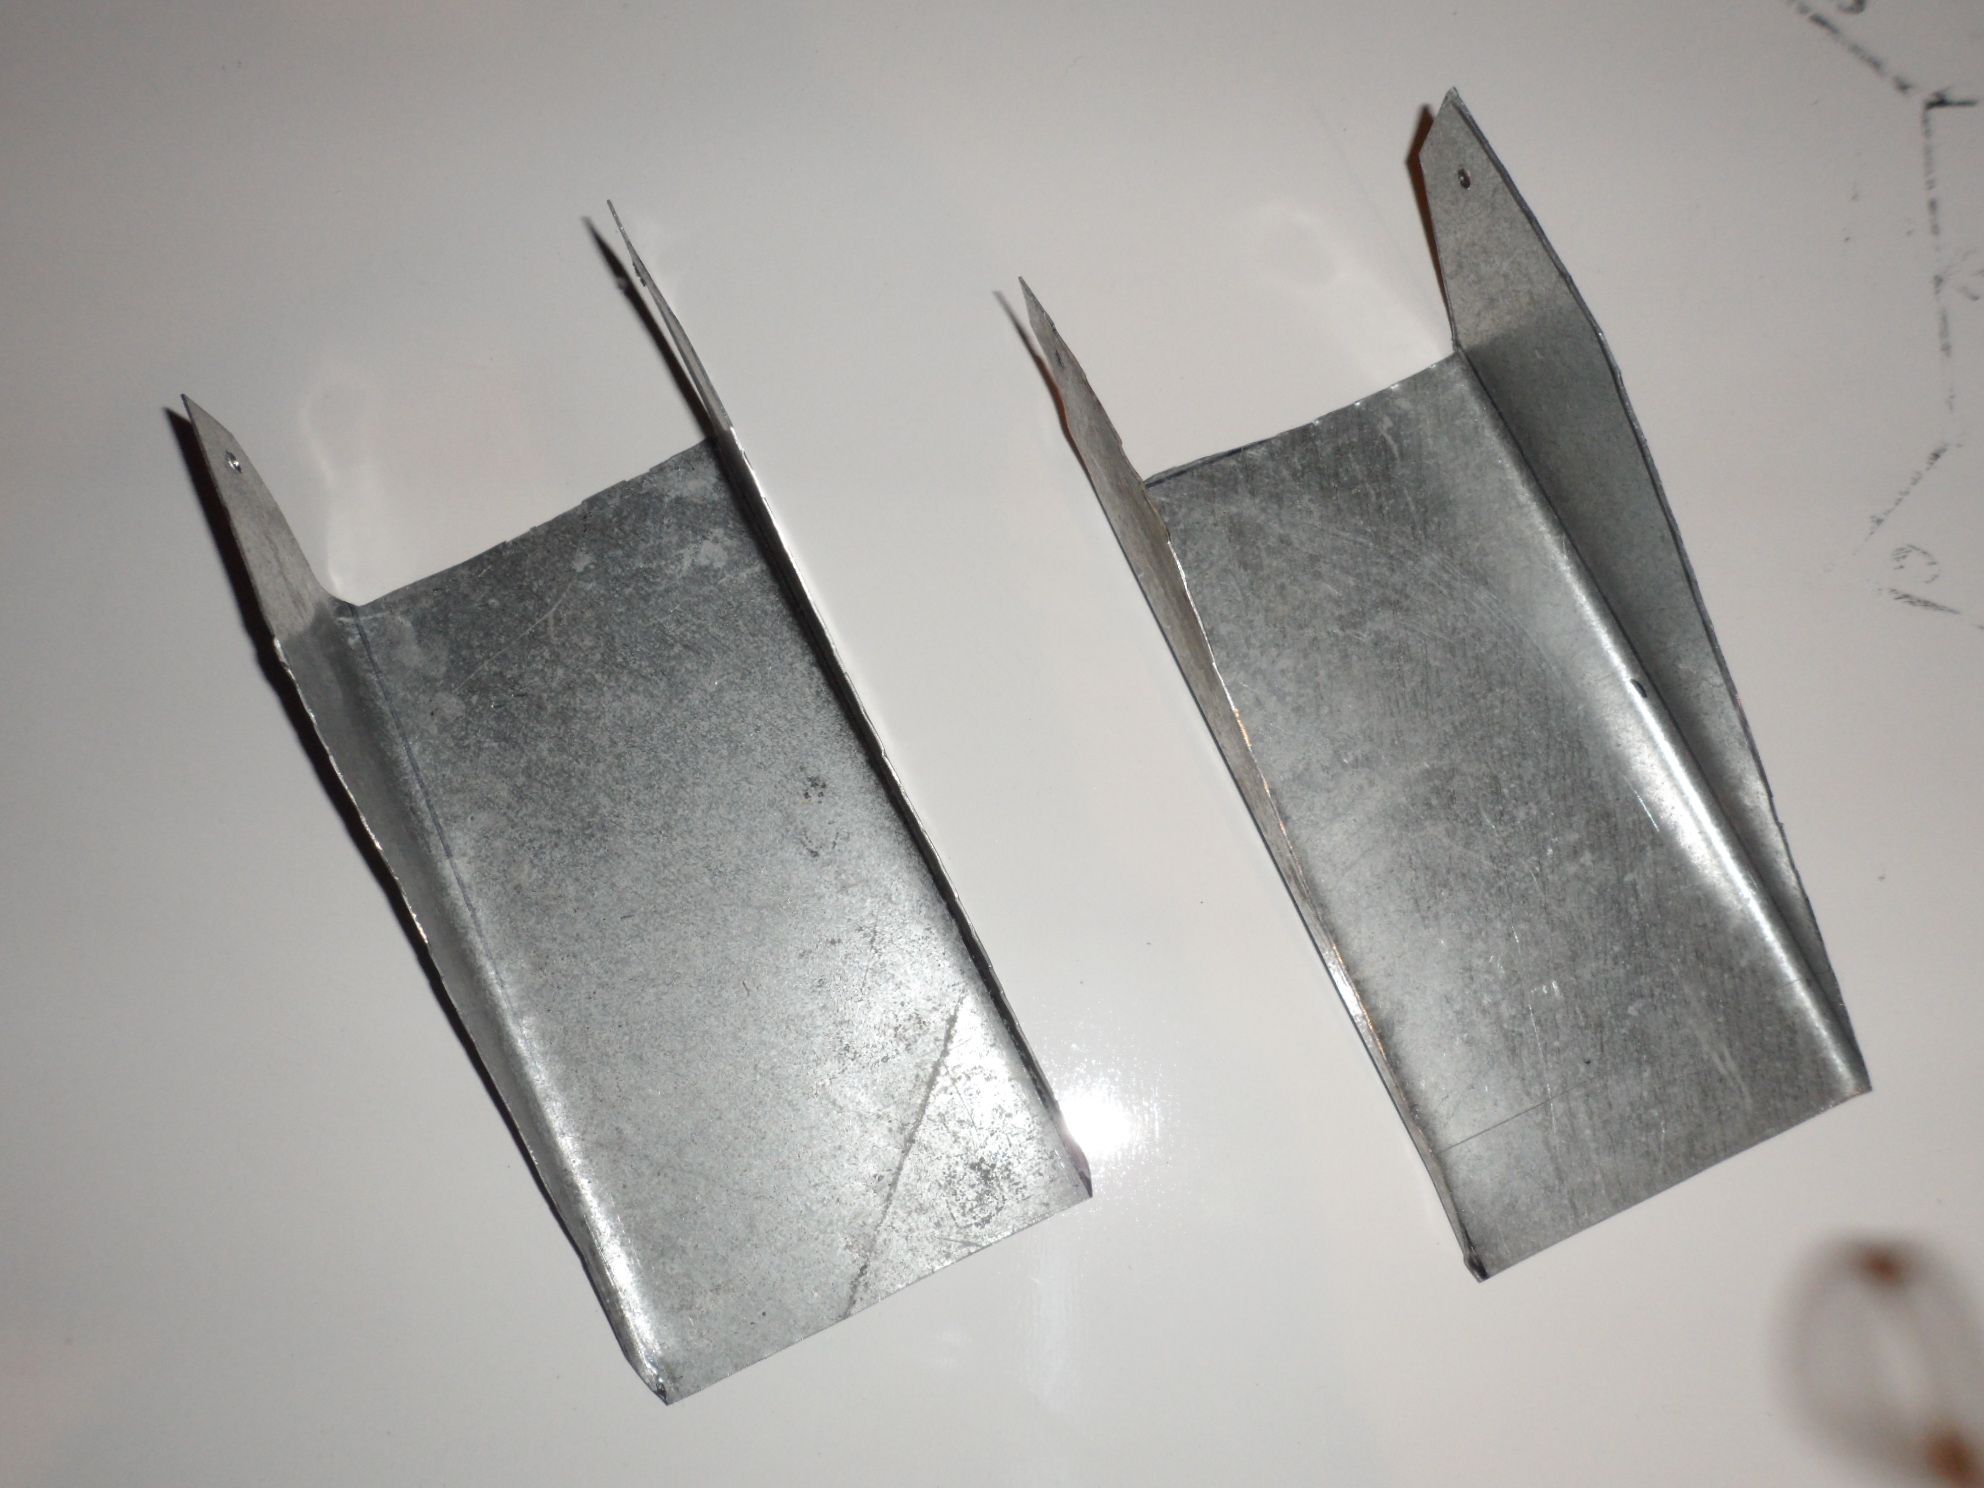
The Tin after the Template is traced and after the metal is cut. This needs to be done twice to give us two 'shoe blanks.'
|
 |
 |
|
This is after the two shoes are bent. The shoes need to fit together snugly but not tight!
|
 |
 |
|
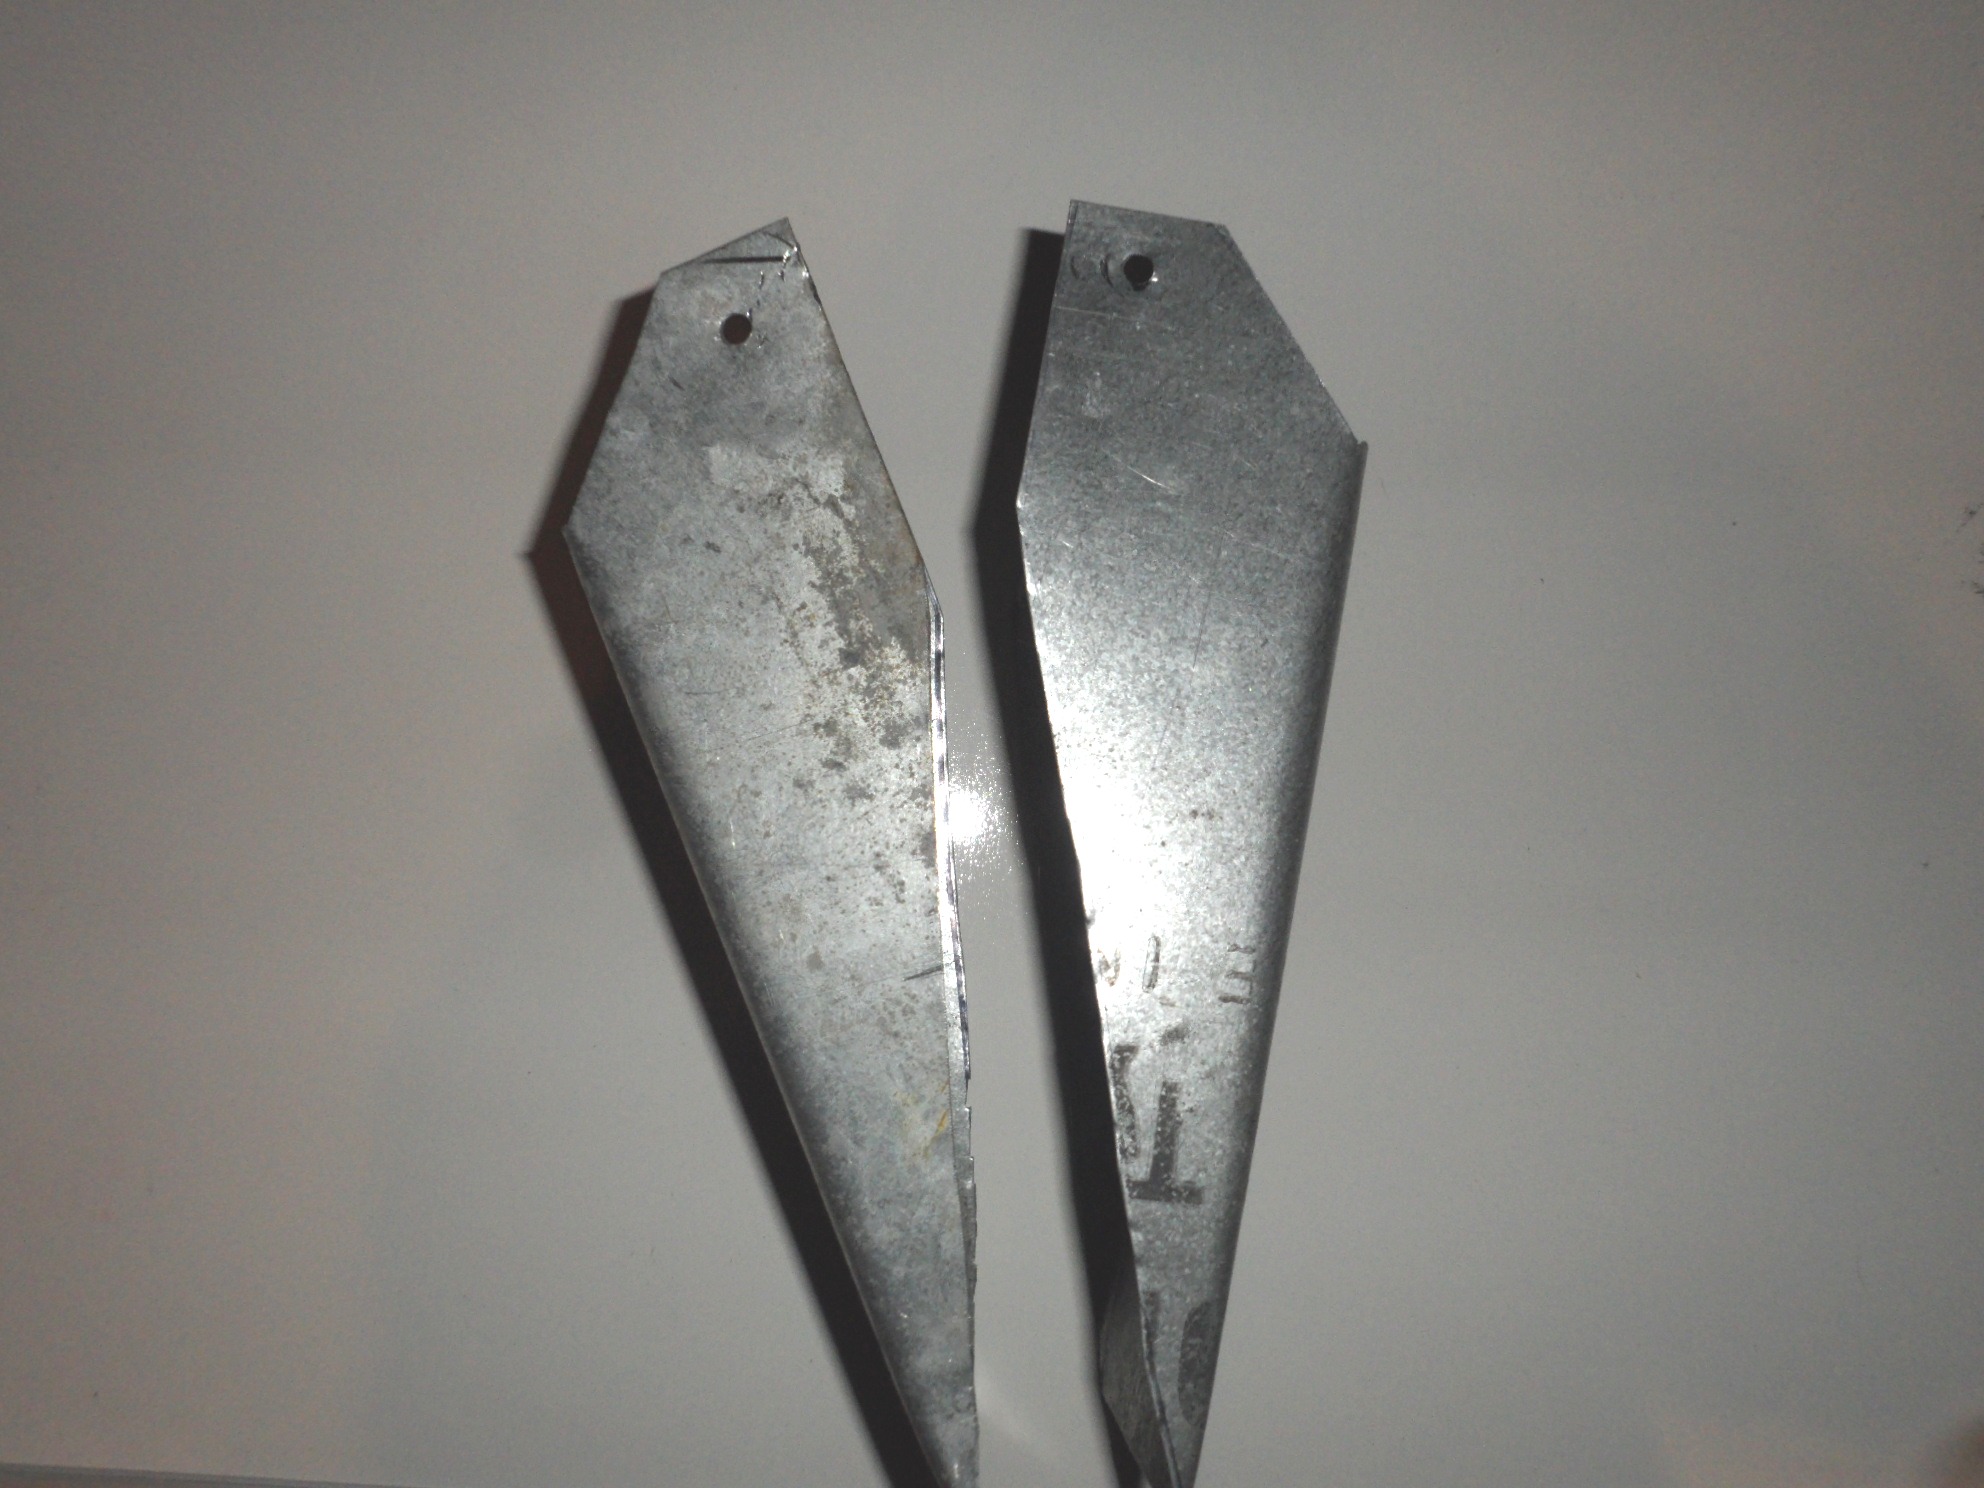
Next the pivot holes need to be drilled. These are 3/16" and set 3/4" from the top and 'inside edge.
|
 |
 |
|
The face of each shoe will also need to be drilled with two holes on the centerline. One is 1" down from the top, the second 3 inches
|
 |
|
|
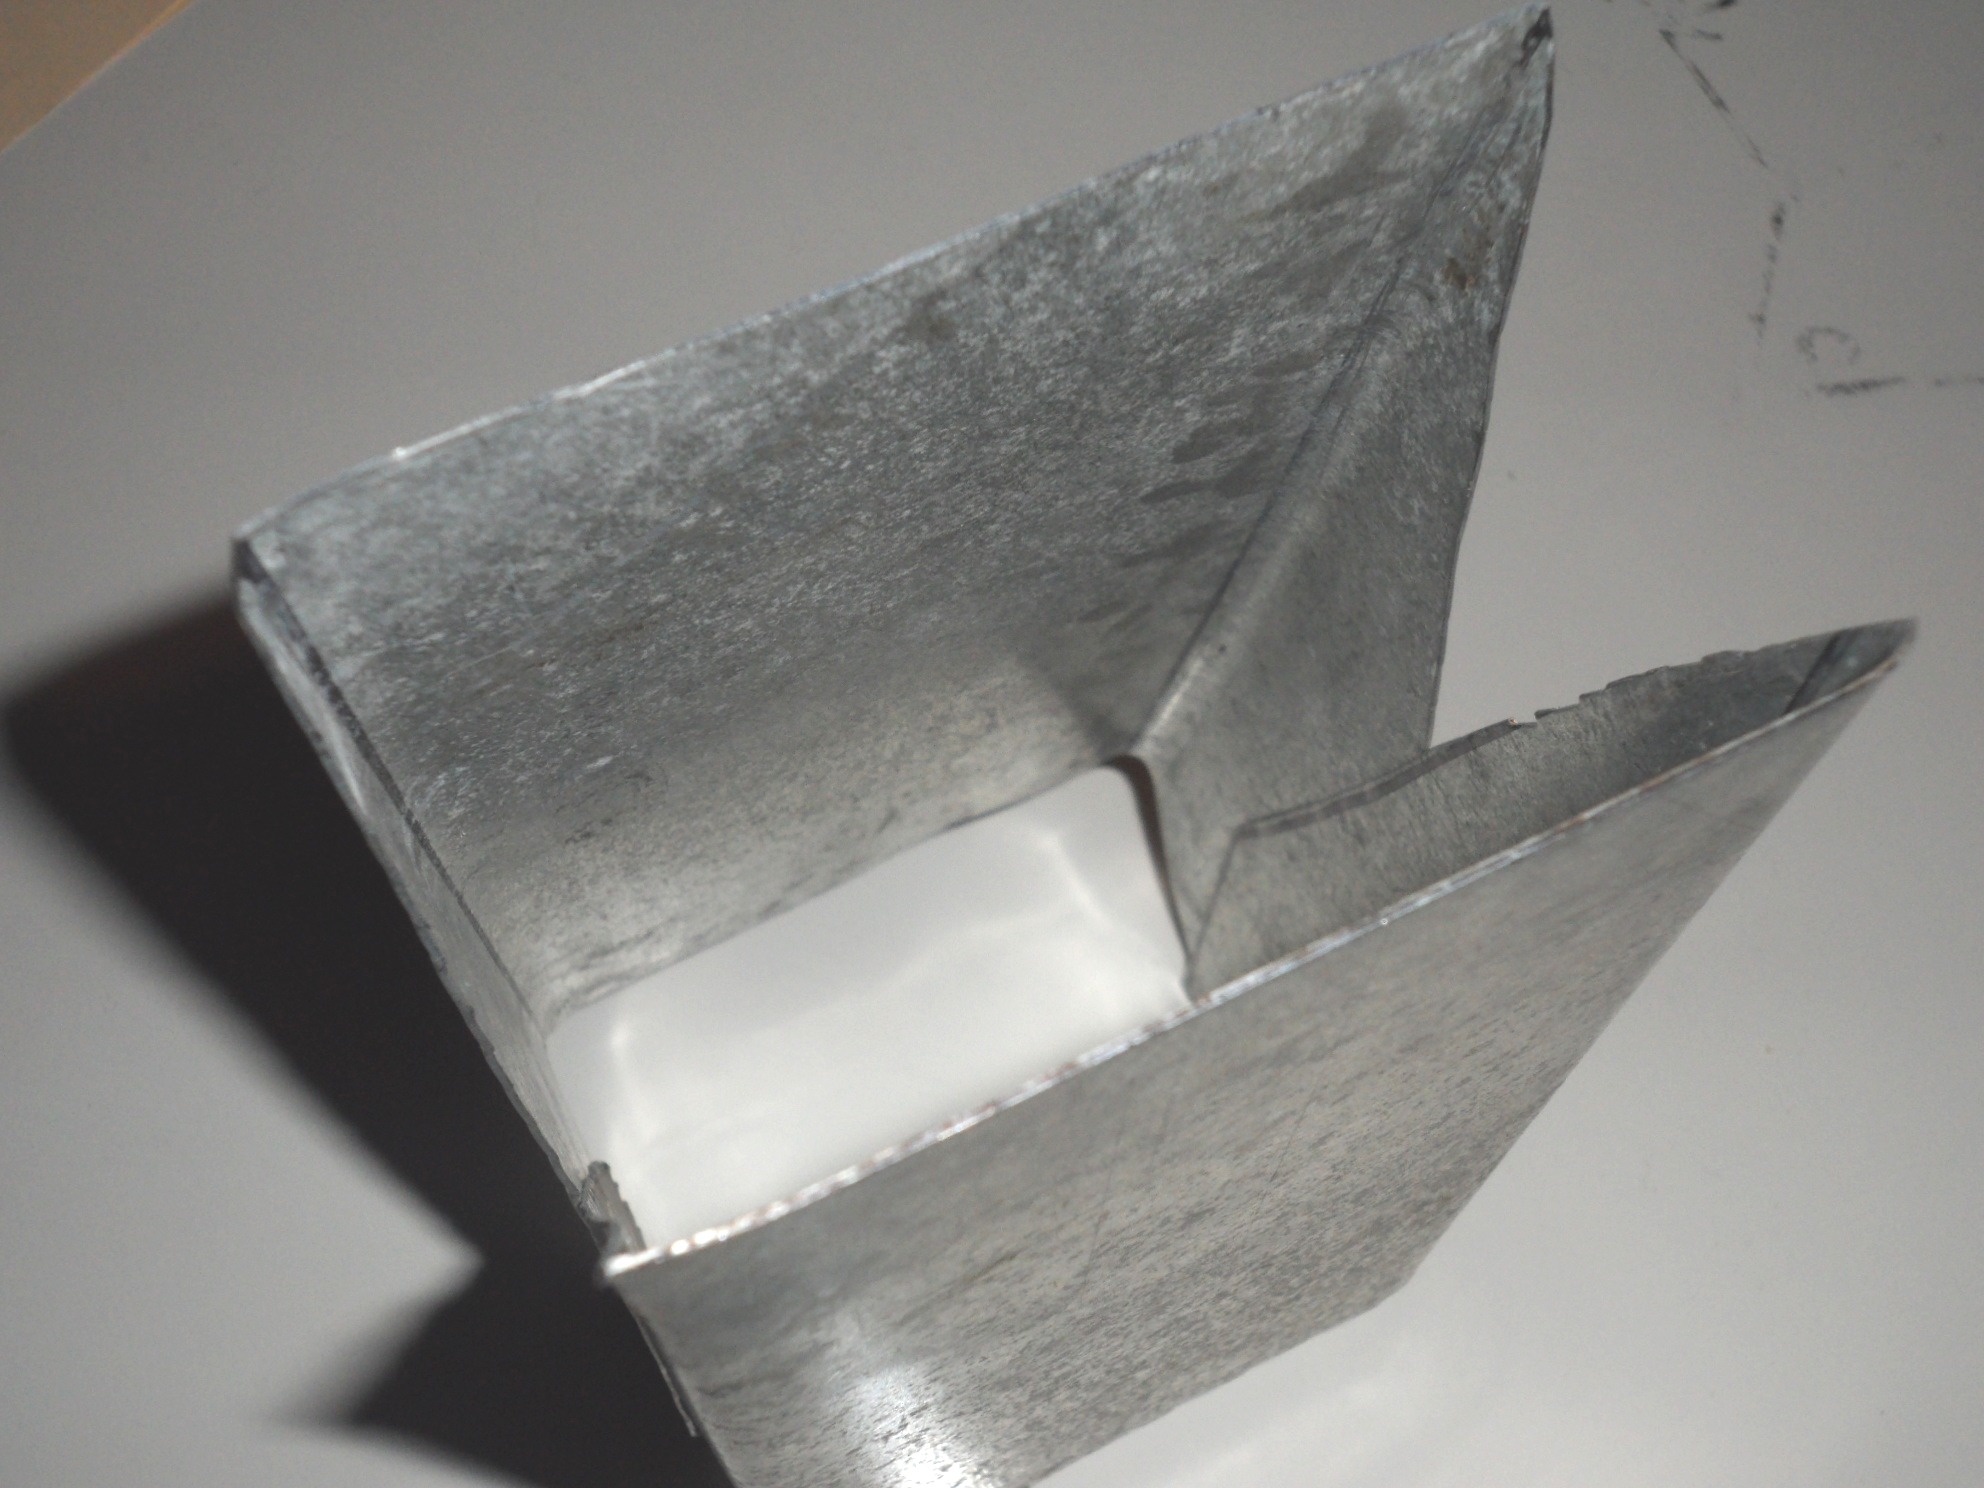
The Shoes assembled as a unit - Closed position. .... and Open position. They should move cleanly at this point! The sharp points can be trimmed at this time if wished. |
 |
 |
|
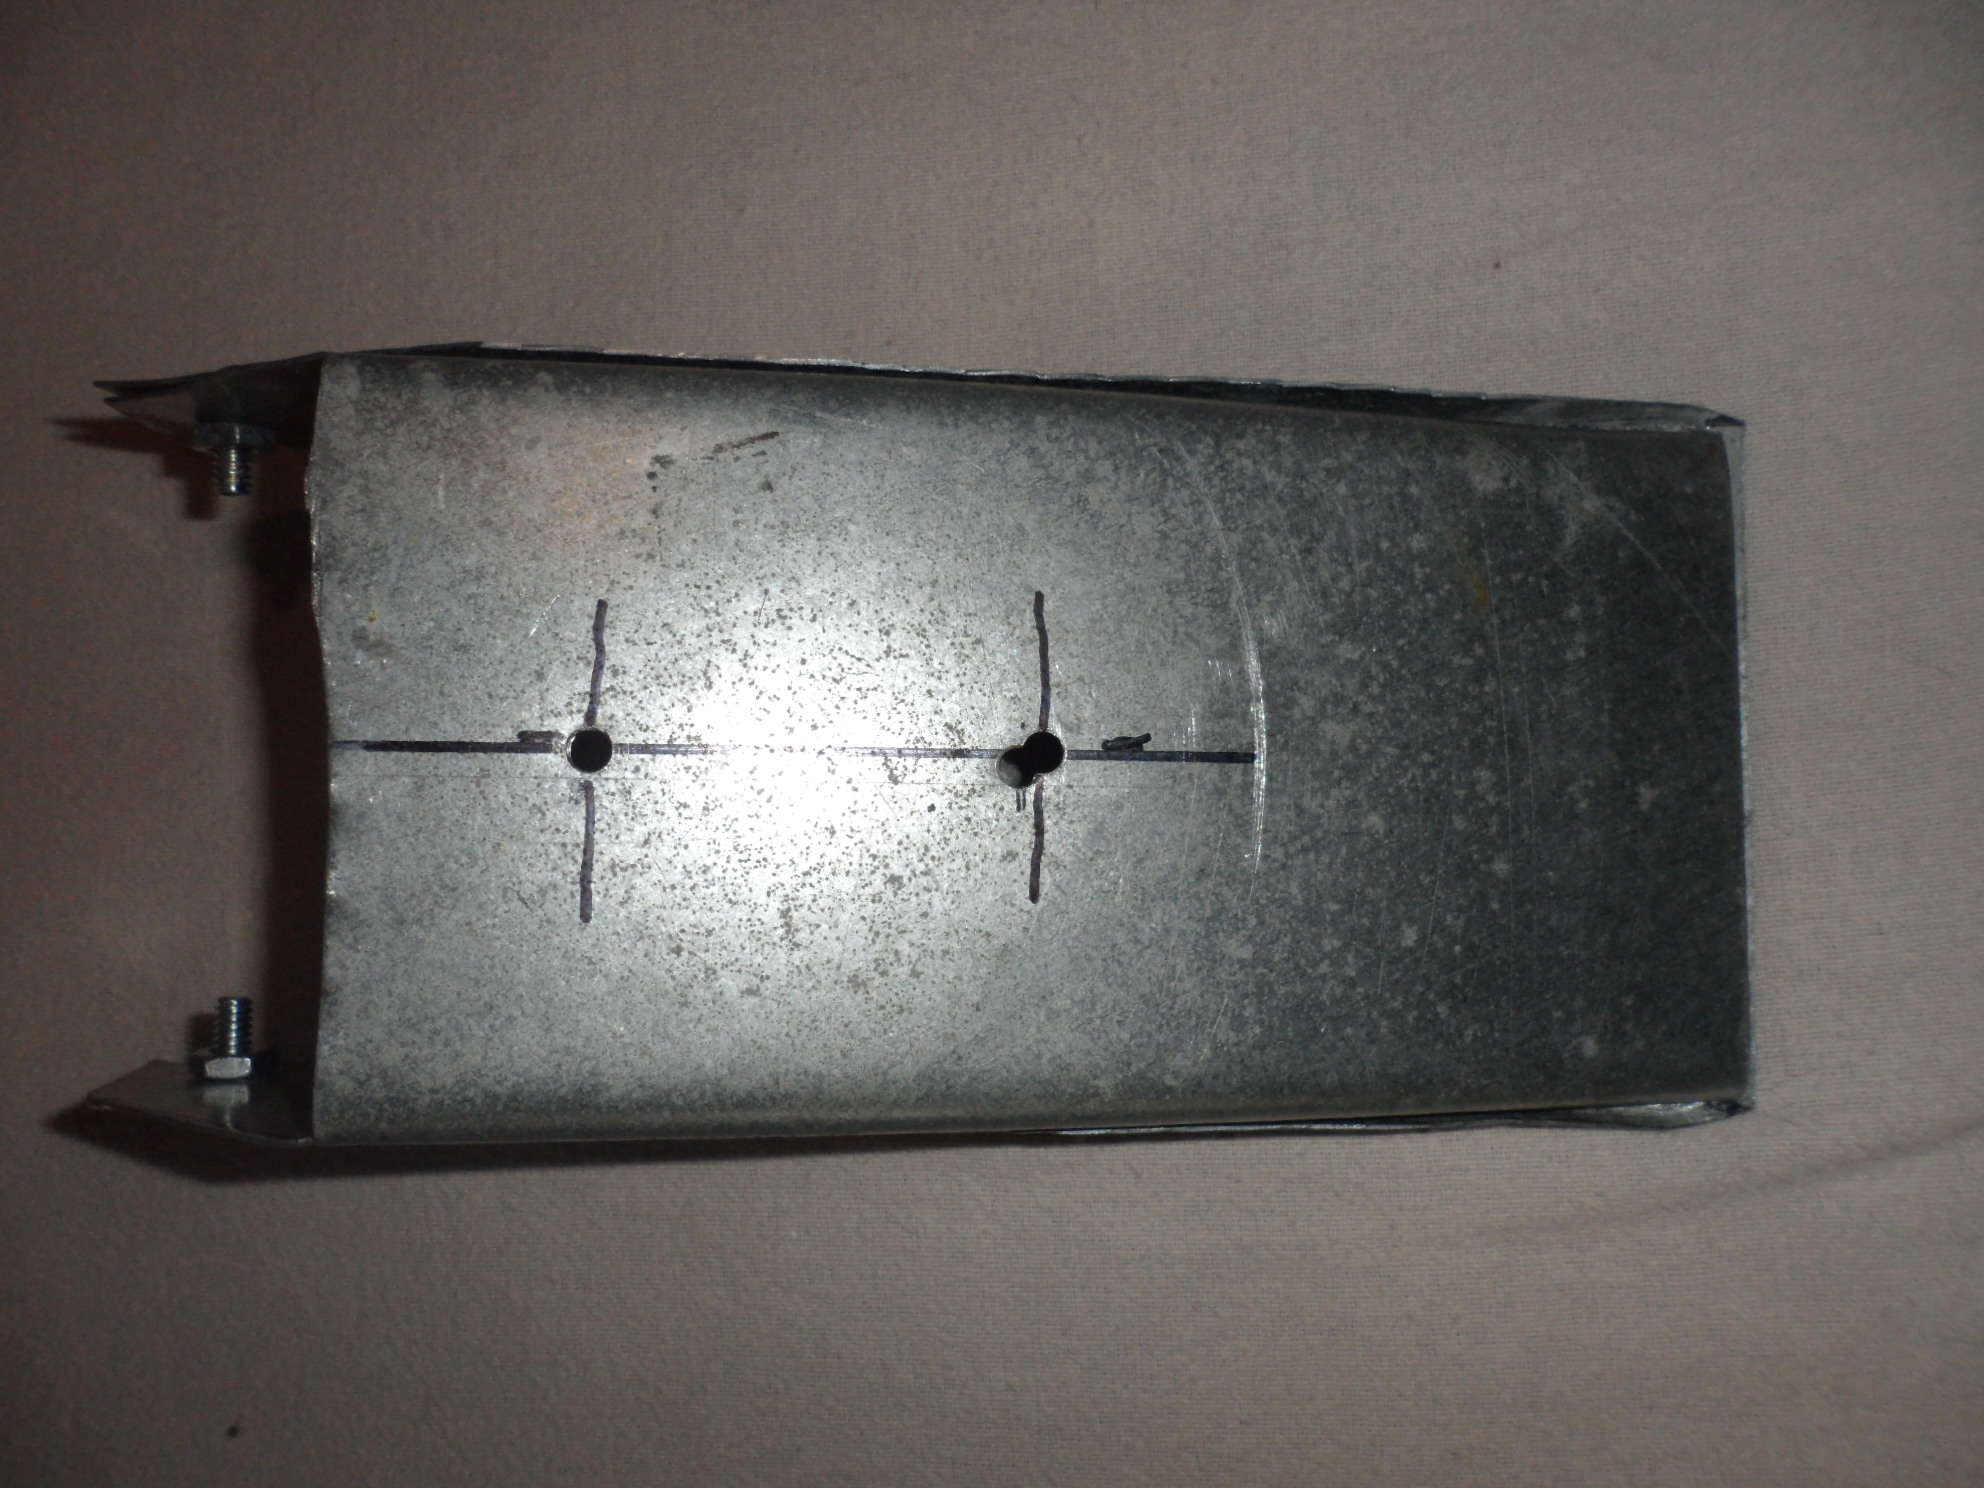
The Clam-shell assembled with the 'Big foot' attached. This is the 16" x 1" x 1/4" piece mentioned earlier. Three holes in it - One 1/4" hole one inch from one end. Two holes are drilled 1" and 3"s from the other end. The sharp bend is 4 1/2" from the two hole end.
|
 |
|
|
Next slide the body assembly into the completed Clam-shell. The bent bar goes into the inside.
|
 |
|
|
Feed the 3/16" round head screws out from the inside and put the nuts on.
|
 |
|
|
Completed Clam-shell should open and close easily!
|
 |
|
|
Install your Handle.
|
|
|
|
Completed New and Improved Potato Planter! (Front View) |
|
|
|
Back View. |
 |